Tag: vegetable gardening ideas

  • Start your vegetable garden in only three weeks time.

    Start your vegetable garden in only three weeks time.

    What could you do to become more self sustainable? Well, start your own vegetable garden.

    These are not easy times, things are not as they used to be and nobody knows what we can expect in the coming year.

    What keeps us going is that we can become a bit more self sustainable on our homestead. And so can you, I will show you in a bit.

    This year we were not going to do so much in our vegetable garden. We have our goat cheese project going and we needed to upgrade our tourist accommodations. Since we thought that would be a lot of work already we decided not to grow a lot of vegetables this year.

    But it all changed. There will be no tourists coming this year, the ones that booked cancelled their bookings.  Apart from that we fear that prices for food will go up in the unavoidable economic crisis that will follow.

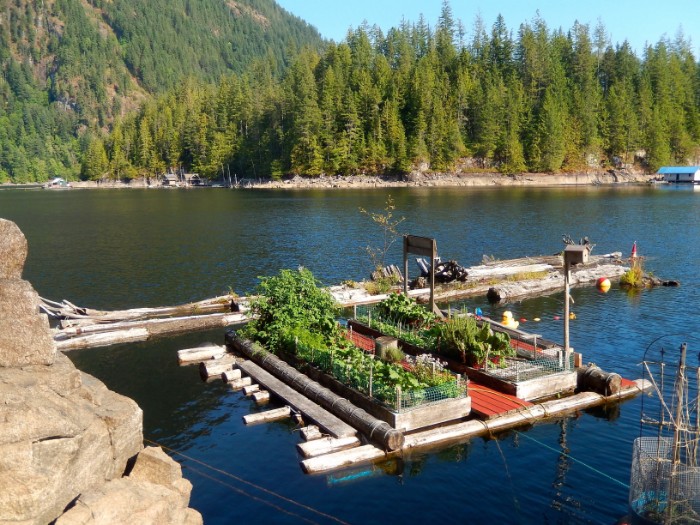
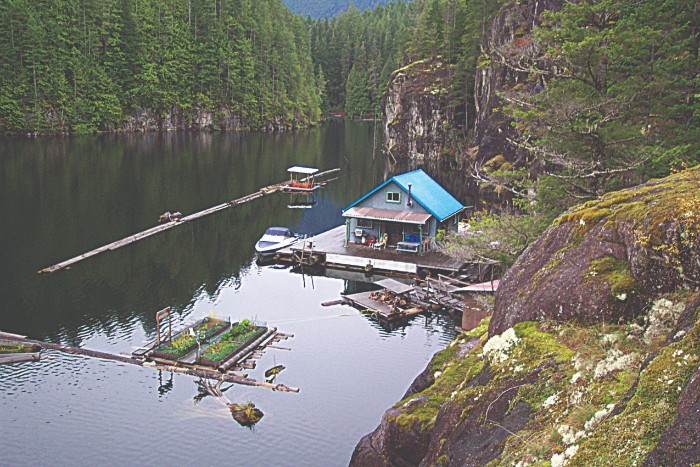
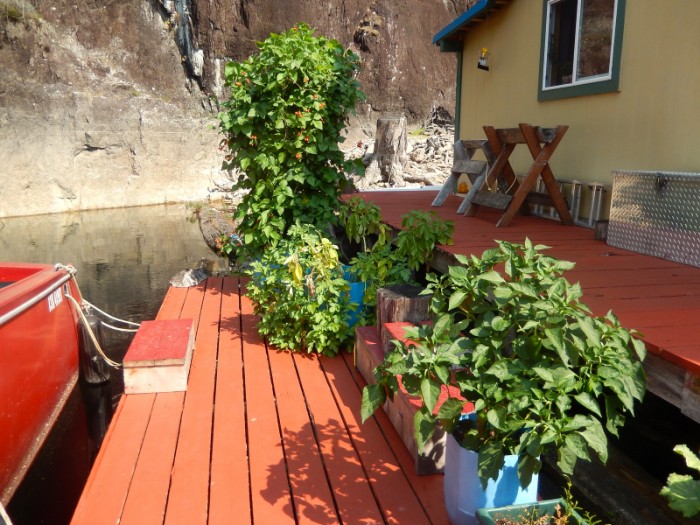
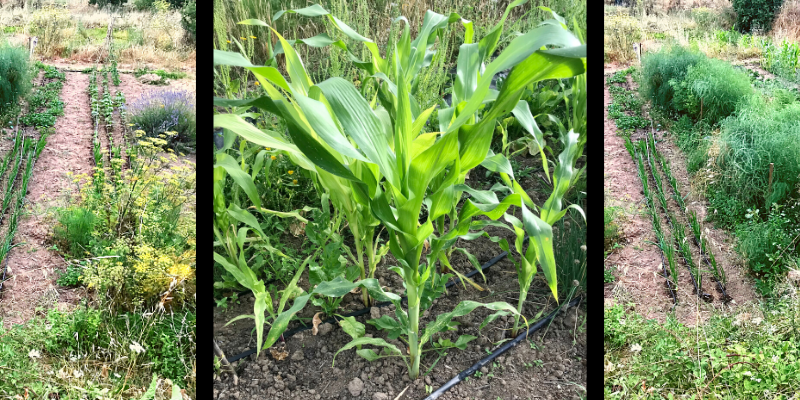
    So there we were. We had to go a step back, or maybe it is a step forward in a way. We dug out the garden tools, filled a lot of bags with the compost we had made from the goat manure and off we went to the vegetable garden. Now our garden down on the river terrace on our land is planted with a lot of small vegetable plants. Hopefully they will grow and we will have plenty.

    For us this is just a little move back to self sustainability, we’ve been there done that and now this comes in handy.

    But what if you’ve never done anything like that? Where and how could you start?

    Here is a simple guideline how you can start your own vegetable garden!

    Well, its a bit of an effort, but imagine you’ll be growing your own food!

    To make it doable I broke it down into weekly tasks.

    Week 1

    Pick a place for growing your vegetable:

    in your garden in the soil or on raised beds. Or if you have no space around your home, you could rent an allotment at the edge of the town where you are living. Go to the allotments and ask the people that are working there on a Sunday morning. They will be able to tell you where and how to rent one of the allotments.

    Get yourself some tools,

    like a haw and a spade and some handtool to clean up the place and get rid of the weeds.

    Look for some compost or manure.

    Ask the people from the allotment where to buy it. There might be a farmer in the neighbourhood that wants to get rid of some manure. People that are keeping horses are often a good source of compost or manure. If you can not get hold of it buy a bag of sheep manure pellets or something similar. A garden center will have it. And when that’s closed try the places where they sell animal food for sheep or cattle, these places often have a department that sells gardening stuff as well.

    Week 2

    Divide your vegetable garden into plots

    in 1.20 m wide beds with 60 cm path in between.

    Enrich & prepare the soil

    of your cleaned plot with the compost, manure or pellets. Don’t overdo it. Two or three buckets of horse or cow compost per m² will do. When you bought pellets, a hand or 5 per m² will do fine. Work the compost or the pellets well into the soil.

    The end result should be nice loose manured soil.

    When the soil is sandy and soft, mixing the compost or pallets into the soil well will be sufficient.

    With compacted soil: till the compost or pallets into the soil. This is how you do it:

    • push a spade or a fork into the soil vertically (with your foot or even by standing on the edge of the spade),
    • push the handle down to push up the soil on your spade or fork,
    • then simply flip the soil back into the hole upside down,
    • if the soil stays in one block: break up the block.

    This way you turn the first layer of the soil. You are doing 2 things at a time: working the manure into the soil and loosening up the soil.

    Tom my husband is showing a haw and a spade.
    Tom is showing you a haw (left) and a fork (right).

    Week 3

    Buy plants for your vegetable garden.

    Really, that is the easiest way to get good vegetables fast.

    You’ll save time growing them from seeds. And growing plants from seeds is more complicated.

    Why?

    Because you have to know how they look when they sprout and you will have to take the weeds from in between the tiny plants. It’s a risky business and something you will have to practice over time. For a starter who wants quick results it’s much easier to start with plants that you buy.

    When buying plants is not possible try your friends and neighbours that already have a vegetable garden, they often have too many plants seeded and are likely to give you some since they find it hard to throw away plants that they have grown from seeds.

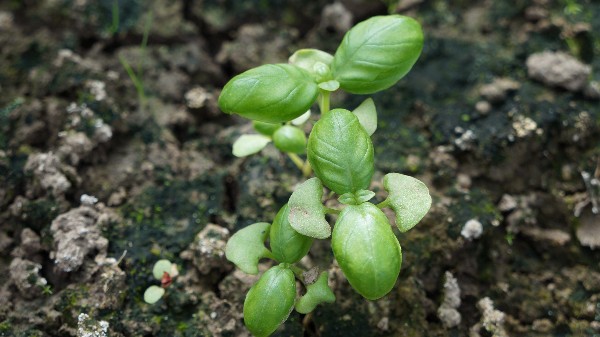
    Plant your plants in the beds.

    Look up the distancing of the plants on the internet. Tomatoes need a different distance from each other then beetroots.

    At the beginning the plants look tiny in their big space, but no worries the space will fill up. Properly distanced plants will grow better.

    Don’t go into fancy gardening methods.

    Plant e.g. all tomatoes together in nice rows. Do the same with the other vegetables. Over the years you can start experimenting, but give yourself a chance to get started.

    Fancy gardening methods can be complicated for a starter and instead of making gardening fun it can become a nightmare with no results. So: start simple!

    After that: Keep your garden clear from weeds.

    Believe me: there are no gardening methods that save you from clearing weeds.

    No escape, you will have to do it.

    What we find the easiest is using a haw. You can use the tool standing upright. Important thing with a haw is that you weed very frequent, like ones a week. The trick is that you weed the weeds when they are still tiny, do not let them grow big. This way weeding will be easy and quick and no big effort.

    Tip: to avoid weeding your vegetable plants by accident do not use the how around the plants but use your fingers to clear away the weeds around the plants.

    Water the plants when needed.

    This is what I do to know whether the plants need water: I stick my finger in the soil right next to a plant. When the top 2 cm are dry and i feel just a little moisture at the tip of my finger I water the plants.

    [success icon=”fa-picture-o” ]If you have doubts about starting to grow your own vegetables or need any help or advise: send me an email and ask! Really I do not mind at all to get your email. I am looking forward to get it. I really hope you will start to grow your own food and enjoy its results.[/success]

    Do you want to know more about vegetable gardening?

    Here are some of our other blog posts:

    Where To Start Your Vegetable Garden, Some Things To Consider.

    How To Analysing The Soil From Your Vegetable Garden.

    Two Ways of Making Compost

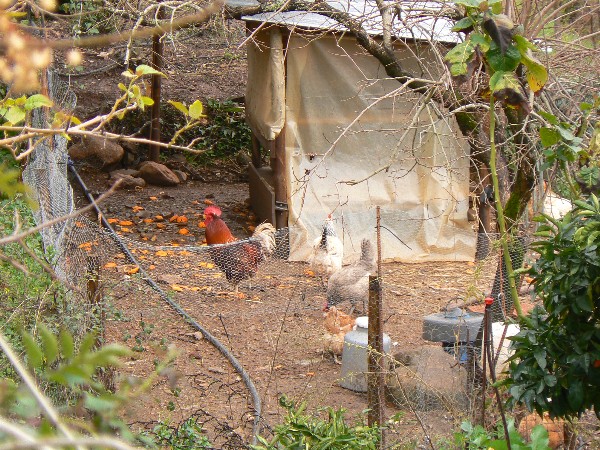
    Prepare your Vegetable Garden with Chickens

    Our Vegetable Garden in Monchique


  • Float Gardening in British Columbia

    Float Gardening in British Columbia

    A guest post written by Margy Lutz. Margy describes her life on a float Cabin Home on Powell Lake in Coastal British Colombia. She has a very special float garden. Her husband writes interesting books about their off-grid life.

    I want to thank Monique for inviting me to write a guest post. She’s an amazing homesteader with lots of experience and knowledge to share with her readers and visitors.

    A Float Cabin Home on Powell Lake

    First, I’d like to share about where I live. My husband and I have an all-season off-the-grid water-access float cabin on Powell Lake in Coastal British Columbia. We’ve lived here full time since our retirement and Canadian residency approval in 2008. British Columbia has a long history of using float cabins and workshops for forestry and fishing along our remote and steep coastline. Historically on Powell lake, float cabins were inexpensive retreats for paper mill workers.

    Our cabin is just above sea level. We get a dusting of snow in winter, but the weather is relatively mild for our location. Fortunately, the lake is unusually deep and doesn’t freeze. And long summer days are perfect for gardening.

    Float Cabin BC

    A Raised Bed Floating Garden

    I’ve always liked gardening. Maybe I got it from my grandparents who were farmers.  I wanted to grow some food of my own. Our good friend John, who built our cabin, came up with the solution, a special float that holds four 4X10-foot raised beds.

    The float garden is separate from our cabin. A rope pulley brings it in for me to garden, then it goes back out to the front log boom where it’s protected from nibbling critters.

    Nutrients are leached from the shallow soil by rain and frequent watering. In spring I augment it with compost and mushroom manure. Several times throughout the growing season I add plant food. Even here I get traditional garden pests, but I don’t use insecticide. We don’t want poisons in the lake water we drink.

    My garden has spring daffodils, then summer marigolds and alyssum for color and pest control. My crops include herbs, garlic, onions, radishes, beets, carrots, kale, broccoli, bush peas, spinach and a variety of lettuce. Over the years I’ve grown strawberries, asparagus, Brussels sprouts and potatoes in my beds. Crop rotation helps to reduce pests and provides variety.

    For watering I use a solar powered boat bilge pump with a hose.  It’s much easier than a watering can and gentler on the plants. When I had a small plot on shore I used a tarp and rain barrel system. That was a good solution for a spot without a water source.

    Container Gardening on the Cabin’s Decks

    In addition to my float garden I have numerous pots and large containers on the cabin’s many decks for additional plants, especially ones that take up a lot of space. Here you will find potatoes, tomatoes, beans, peas, cucumbers, peppers, squash, rhubarb, blueberries, red currants, more flowers and herbs for easy access.

    Gardening takes a lot of time from May through September, but the rewards make it worth it. The garden isn’t large enough to be self-sustaining, but each dinner has something I’ve grown myself. I’ve also learned how to preserve excess produce for use during the off season.

    Deck garden

    Winter Gardening

    Fall is the time I put most of my garden to bed. With a little effort, the growing season can be extended for some plants. I leave my kale, beets, carrots and broccoli in the ground with extra mulch around them. Clear plastic bags protect plants in containers. They ward off heavy rain, focus warmth from the waning sun and reduce damage from freezing.

    Composting

    Composting is an important part of my gardening. I do it all onboard. During the growing season I use the chop and drop method. Garden and kitchen vegetable waste is chopped into small bits and used as mulch. In fall I use my empty potato growing barrels to compost the large amount of plant cuttings. Monique has an excellent post about chop and drop. It’s how I discovered her website and blog.

    More Gardening Information

    You can read more about my gardening exploits and other aspects of float cabin living in my husband’s books Up the Lake and Off the Grid: Getting Started available in print and Kindle formats from Amazon. Also, here is a quick link to the Gardening Category on my blog.

    My story shows you can garden just about anywhere: containers on an apartment balcony, sprouts in your kitchen, a plot in the back yard or edibles interspersed with ornamentals. The options are endless. Start small and learn as you go. If it can work for me, I know it will for you. Thanks for reading my post. If you have any questions leave a comment, visit my blog or email me through the link in my blog profile.

    Happy gardening! Margy Lutz

  • Sweet Basil, all you need to know to grow it.

    Sweet Basil, all you need to know to grow it.

    Sweet Basil is an easy, straight forward plant to grow. In this blog you will find all the things you need to know for planning, companion planting, use and storage of Sweet Basil. It also provides you with information about the type of soil it needs and the pH it will grow in. One place to find it all.

    Sweet Basil is just a choice of many types of Basils that are available for growing. I like the Genovese. It has big tender leaves to harvest and I love the taste and structure for making pesto.

    From all the anual Basil I tried to grow, this one came out the best. It grows relatively easy. The other thing is that I think, most smaller leaved anual basil have a hard leave for harvesting. I don’t like hard leaves in salad and for making pesto. For me salad contains tender things. For pesto making the small leave variaties don’t quit make a smooth paste.

    Plant characteristics

    English name: Basil, Great Basil, Saint-Joseph’s-wort

    Latin name: Ocimum basilicum

    Family of: Lamiaceae (mint)

    Maximum size plant: height, 20-60 cm width 15-20 cm

    Root structure and depth: 20-30 cm, round structure

    Spacing (plantafstand): 20-25 cm

    Companions: tomatoes, apricot, asparagus, cucumber, fennel, zucchini, stinging nettle. Sweet Basil needs sunlight to grow. When growing them next to high plants like tomatoes and asparagus, make sure they are on the sunny side of the high plants.

    Not companion with: Rue Herb, Chard/Silverbeet, Wormwood

    Remedies for: Aphids, Fruit Fly

    Water needs: medium in loamy soils. In sandy soils water properly otherwise they will go into flowering very quick.

    Food needs: no fresh manure, compost, tolerates fresh compost.

    Light: lots of sun

    What type of soil: Sandy soils of any kind, loam/clay soils when they are rich in organic matter. Loves it fluffy. For more information about soil types click here. For finding out more about analysing your vegetable garden soil click here.

    pH: 5.1-8.5

    Weed tolerance: does tolerate some weeds as long as it is bigger than the weeds.

    This is how it looks:
    Basil Genovese
    Picture 1: Full grown Sweet Basil, time to harvest.
    Young Sweet Basil plants
    Picture 2: Young Sweet Basil plants. The first two leaflets are still visible.
    Flowering sweet basil
    Picture 3: Flowering Basil. Leaves will be less tender. When you take the flowers out it will continue growing. You can use the flowers as well.

    How to seed

    Pre seeding: When the season, where you are, is short you can pre seed in pots.

    Make sure you buy the right soil. Soil for growing pot plants is to rich for seedlings. The special soil for seeding is the one that works.

    Handy and time saving is to seed them in trays. Peet seeding trays can be used integral. You do not need to take the plants out but plant the plant together with the pot. This way you do not disturb the roots, which gives the plant a growth advantage. This might be handy if you only have a short growing season.

    You can also use the cheaper reusable seeding trays, when your season is longer. I would put some flat trays under the seeding trays to catch the surplus water when watering the trays. Here you find some affiliate options. When you use these links you will support our farm. Please feel free to click on the picture.

    Seeding directly: In long season areas you can seed directly. I usually seed a small row next to where I want to grow them so I can easily plant them out. To recognise the small seedlings: make sure the seedbed is well weeded and raked.

    Seed distance: 5 cm

    Depth of seeding: 0,3 cm

    Tip for saving time:  buy a pot with basil in the supermarket and plant them in your garden. The growers usually squeeze a lot of plants in the pots. Turm the pot you bought up side down and carefully take the earth and plants out. After that carefully separata the plants. Now you have lots of plants to plant out. They will still grow a fair amount.

    This can be done until later in the season. When you just want to grow a few plants this might be a good option.

    Growth

    Germination temperature: 21-29°C. This is essential for growing Sweet Basil. It will not germinate when the temperature is not high enough. Best is when the soil has warmed up till 21°C. Give the soil a week or so to warm up a bit. Note: in clay soils the temperature of the soil stays cool longer, this might stop your Basil from germinating.

    Germination time 5-10 days

    Duration from seed to Harvest: 60 days max

    Seedlings: Seedlings start to grow with two heart shaped leaflets. In picture two these small leaflets are still visible.

    Harvest

    Harvest when full grown and leaves are lush (see: picture 1). You can stil harvest when it is flowering, leaves will not be as tender. The flowers (picture 3) have a strong taste and are good to harvest too.


    How many plants will you need?

    It depends on what you want to make from it. With the two of us we, ideally, grow between 30 and 50 plants. We grow them only once a year. We make a lot of pesto for the rest of the year. When we have no time to cook a big meal we use the pesto with some pasta and dried tomatoes. Easy and quick. So a lot of basil fits in our household.

    When you just like it every now and then in the salad you might be all right with just 10-12 plants. When you have a long growing season you can plant a few plants early and some later in the season.

    Storage

    When you dry Sweet Basil it will lose most of it’s charming taste. So, I think that is not really an option. I think eating it fresh or making it into pesto are the best two option for Sweet Basil.

    To preserve I freeze the pesto (see: recipe). You can also use jars to keep the pesto, but do not add the cheese. I do not know why it works with the jars of pesto that you buy in the supermarket. It always goes of when I add the cheese, no matter what I do.

    When you preserve pesto in jars be aware that there is, however small a change of getting botulism into your jar. For this add some lemon juice to the mixture. It will keep the color nice and prevent the bacteria that cause botulism to produce the poisonous botox by lowering the pH.

    Recipes

    Pesto

    Fill up an blender jar for 2/3 with Sweet basil leaves. Add three or four hand full of nuts. Just any nuts will do.

    The official recipe is with pine nuts, but these are very expensive where I live. Almonds and wall nuts are much cheaper here so I use those.

    Add the juice of halve a lemon and two or three cloves of garlic.

    Blender it & freeze it in portions. It is not easy to cut it when frozen, so it is better to freeze it in desired portions.

    Add some grind cheese when used.

    Tomatoes, Basil and Mozzarella

    This is so easy to make and it is delicious.

    Slice some tomatoes in 1-2 cm thick slices.

    Lay them on a large plate.

    Slice the mozzarella in 1-2 thick slices.

    Put the slices on top of the tomatoes.

    Sprancle on a fair amount of Balsamico.

    Cover the whole with Basil leaves (one leave per tomato slice).


  • Growing Asparagus

    Growing Asparagus

    When wanting to grow a vegetable cash crop why not choose a sexy one? Figs are supposedly the most erotic fruit, but its vegetable compeer is without doubt the asparagus.


    Nowadays asparagus is a speciality in North-West Europe, but it has a history that goes back to Roman and originally even Egypt times. That history gave us the idea to start growing them in the Algarve. If the oldest terraces in the Algarve are built by Romans – as they say – , why not grow ancient Roman asparagus on these terraces today?

    Two varieties are known by the consumer: white and green ones. These two are actually not different species, but differently grown. The white ones are white, just because they don’t see daylight before picking: they grow in sandy mounds, you have to dig them out. The green ones simply grow above the soil, as you would expect from vegetables.

    This is how you grow the plants.

    To start growing asparagus, you have to be patient. Especially when you seed them, like we did.

    First, in springtime, you seed them in a tray, under plastic. A month after seeding, when the young and fragile plants are already up to 20 cm, you have to transplant them into separate pots. Forget about the rule “transplanting when the first real leaves appear, after the two germ-leaves, because asparagus is a Lily-variety, a monocotyledon, so it doesn’t have germ-leaves. You just transplant them, when they’re big enough.

    Then it takes a year for the fragile little plant to become firm enough to be planted on the spot where you want to keep them for their lifetime. Make sure you put them in sandy but very fertile soil. Once they are planted on their spot, it takes another 2 years before you can start harvesting them. The picture below shows the plants in the second year on their spot. But once they are strong enough to do so, oh my dear, what a yield you have.

    The harvest.

    To avoid exhausting the plant, you shouldn’t harvest them longer than 21/2 months per year though. In north-west Europe that period is from april up to mid June, but in our Algarve we have them already at the end of February and the harvesting goes on till mid may.

    After the harvesting months, the asparagus sprouts grow rich and high (up to 2 metres!) until late autumn. Asparagus takes a lot of space, in width and height.

    When you give the asparagus compost every year, they will stay alive for about 15 years. They also appreciate a bit of chalk now and then. After all those years, when the plant starts to grow weaker, and eventually dies, you can not plant new asparagus on the same spot, it simply refuses to grow there. So, make sure that you migrate to another piece of soil when you want to continue growing asparagus after 15 years.

    Asparagus is a nice cash crop for us, and we enjoy the aphrodisiac asparagus frequently ourselves.

    Pin it for later:

    growing asparagus

  • Prepare your vegetable garden with chickens.

    Prepare your vegetable garden with chickens.

    Did you know you can prepare your vegetable garden with chickens? Chickens can help you in your garden and orchard in many ways. We use them as our little helpers. One of the things we use chickens for is to prepare the vegetable garden.


    A month before we start  the garden, we fence in the area where we want to make the vegetable garden. We use an electric chicken fence with a portable fence charger with a battery feed. It has to be powerful enough to charge the whole grid of the fence. It not only keeps the chickens in but also keeps the animals that want to eat the chickens out.

    The chickens will eat all the weeds and weed seeds that are on the plot. Which will make weed control in the garden very easy at the beginning.

    For 100 m² you will need about 5 chickens for a month to do the job. They will need a small shelter where they can roost and a place where they can lay their eggs, fresh water and some extra food. We made an A-frame chicken house with handles so we could carry it around on our steep land. For the future I will make one from lighter material that can be moved easily.

    On the plots where we have vegetables every year I want to make permanent chicken houses, so we only need to move the chickens. We move the chickens during the night in the dark when they are not so active. We put three chickens in a jute bag, the once that can carry 30 kg of grain. They stay very quiet in the bag and three chickens are easy to carry. If you think that is still to heavy you just put in two chickens. Sometimes we had a group of chickens that would just follow the chicken house wherever it went, but unfortunately this did not work with all the chickens that we had.

    At the end of the month I start bringing some extra compost to the plot. I just make small piles here and there, the chickens will spread it and clear it from weed seeds that survived the compost making process. After that we simply take the fence away and use a rotavator to soften up the earth because the little chicken’s feet make a dense crust at the service of the soil we have here. This might be different with the type of soil you have. Then you can go ahead and start organizing your vegetable garden and start seeding and planting.

    Pin for later:

    Prepare your vegetable garden with chickens