Tag: Vegetable Garden

  • Start your vegetable garden in only three weeks time.

    Start your vegetable garden in only three weeks time.

    What could you do to become more self sustainable? Well, start your own vegetable garden.

    These are not easy times, things are not as they used to be and nobody knows what we can expect in the coming year.

    What keeps us going is that we can become a bit more self sustainable on our homestead. And so can you, I will show you in a bit.

    This year we were not going to do so much in our vegetable garden. We have our goat cheese project going and we needed to upgrade our tourist accommodations. Since we thought that would be a lot of work already we decided not to grow a lot of vegetables this year.

    But it all changed. There will be no tourists coming this year, the ones that booked cancelled their bookings.  Apart from that we fear that prices for food will go up in the unavoidable economic crisis that will follow.

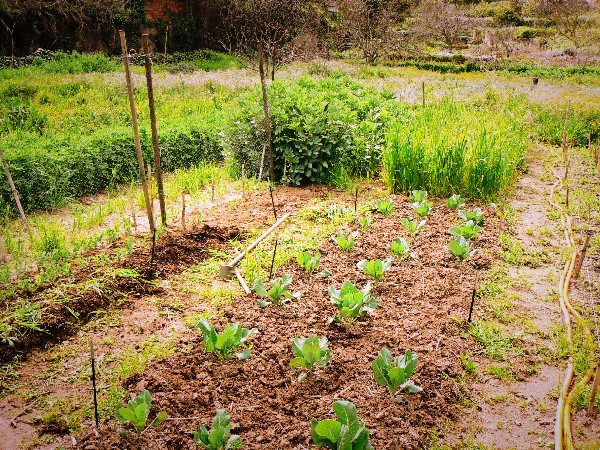
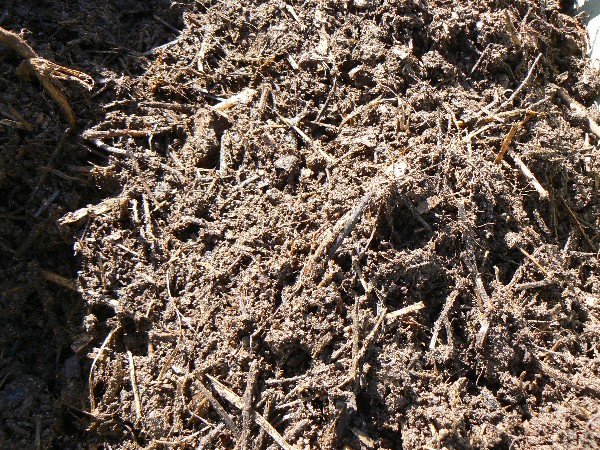
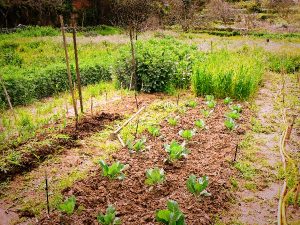
    So there we were. We had to go a step back, or maybe it is a step forward in a way. We dug out the garden tools, filled a lot of bags with the compost we had made from the goat manure and off we went to the vegetable garden. Now our garden down on the river terrace on our land is planted with a lot of small vegetable plants. Hopefully they will grow and we will have plenty.

    For us this is just a little move back to self sustainability, we’ve been there done that and now this comes in handy.

    But what if you’ve never done anything like that? Where and how could you start?

    Here is a simple guideline how you can start your own vegetable garden!

    Well, its a bit of an effort, but imagine you’ll be growing your own food!

    To make it doable I broke it down into weekly tasks.

    Week 1

    Pick a place for growing your vegetable:

    in your garden in the soil or on raised beds. Or if you have no space around your home, you could rent an allotment at the edge of the town where you are living. Go to the allotments and ask the people that are working there on a Sunday morning. They will be able to tell you where and how to rent one of the allotments.

    Get yourself some tools,

    like a haw and a spade and some handtool to clean up the place and get rid of the weeds.

    Look for some compost or manure.

    Ask the people from the allotment where to buy it. There might be a farmer in the neighbourhood that wants to get rid of some manure. People that are keeping horses are often a good source of compost or manure. If you can not get hold of it buy a bag of sheep manure pellets or something similar. A garden center will have it. And when that’s closed try the places where they sell animal food for sheep or cattle, these places often have a department that sells gardening stuff as well.

    Week 2

    Divide your vegetable garden into plots

    in 1.20 m wide beds with 60 cm path in between.

    Enrich & prepare the soil

    of your cleaned plot with the compost, manure or pellets. Don’t overdo it. Two or three buckets of horse or cow compost per m² will do. When you bought pellets, a hand or 5 per m² will do fine. Work the compost or the pellets well into the soil.

    The end result should be nice loose manured soil.

    When the soil is sandy and soft, mixing the compost or pallets into the soil well will be sufficient.

    With compacted soil: till the compost or pallets into the soil. This is how you do it:

    • push a spade or a fork into the soil vertically (with your foot or even by standing on the edge of the spade),
    • push the handle down to push up the soil on your spade or fork,
    • then simply flip the soil back into the hole upside down,
    • if the soil stays in one block: break up the block.

    This way you turn the first layer of the soil. You are doing 2 things at a time: working the manure into the soil and loosening up the soil.
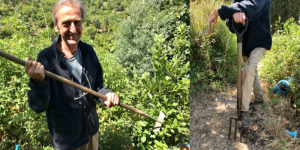
    Tom my husband is showing a haw and a spade.
    Tom is showing you a haw (left) and a fork (right).

    Week 3

    Buy plants for your vegetable garden.

    Really, that is the easiest way to get good vegetables fast.

    You’ll save time growing them from seeds. And growing plants from seeds is more complicated.

    Why?

    Because you have to know how they look when they sprout and you will have to take the weeds from in between the tiny plants. It’s a risky business and something you will have to practice over time. For a starter who wants quick results it’s much easier to start with plants that you buy.

    When buying plants is not possible try your friends and neighbours that already have a vegetable garden, they often have too many plants seeded and are likely to give you some since they find it hard to throw away plants that they have grown from seeds.

    Plant your plants in the beds.

    Look up the distancing of the plants on the internet. Tomatoes need a different distance from each other then beetroots.

    At the beginning the plants look tiny in their big space, but no worries the space will fill up. Properly distanced plants will grow better.

    Don’t go into fancy gardening methods.

    Plant e.g. all tomatoes together in nice rows. Do the same with the other vegetables. Over the years you can start experimenting, but give yourself a chance to get started.

    Fancy gardening methods can be complicated for a starter and instead of making gardening fun it can become a nightmare with no results. So: start simple!

    After that: Keep your garden clear from weeds.

    Believe me: there are no gardening methods that save you from clearing weeds.

    No escape, you will have to do it.

    What we find the easiest is using a haw. You can use the tool standing upright. Important thing with a haw is that you weed very frequent, like ones a week. The trick is that you weed the weeds when they are still tiny, do not let them grow big. This way weeding will be easy and quick and no big effort.

    Tip: to avoid weeding your vegetable plants by accident do not use the how around the plants but use your fingers to clear away the weeds around the plants.

    Water the plants when needed.

    This is what I do to know whether the plants need water: I stick my finger in the soil right next to a plant. When the top 2 cm are dry and i feel just a little moisture at the tip of my finger I water the plants.

    [success icon=”fa-picture-o” ]If you have doubts about starting to grow your own vegetables or need any help or advise: send me an email and ask! Really I do not mind at all to get your email. I am looking forward to get it. I really hope you will start to grow your own food and enjoy its results.[/success]

    Do you want to know more about vegetable gardening?

    Here are some of our other blog posts:

    Where To Start Your Vegetable Garden, Some Things To Consider.

    How To Analysing The Soil From Your Vegetable Garden.

    Two Ways of Making Compost

    Prepare your Vegetable Garden with Chickens

    Our Vegetable Garden in Monchique
     

  • Cooking Cheese and Spinach Quiche with Fresh Farm Ingredients.

    Cooking Cheese and Spinach Quiche with Fresh Farm Ingredients.

    This blog is written by Anna Tonk. She volunteered at Terra do Milho for two month.

    What happens in the kitchen during winter on a Homestead?

    Living on a Homestead and having to cook for the hardworking people there seemed like a daunting task, because usually as a city dweller I am used to having everything on hand around the corner. Everything is pre-cut, ready-to-eat, or prepared using all sorts of baking mixes

    Hence my cooking started with a slight anxious feeling trying to think of a suitable recipe for the available ingredients.

    [button_simple link=”https://terradomilho.eu/2019/01/learning-easy-homesteading-skills-seasonal-cooking/” target=”_orange” background_color=”#ffffff” border_color=”#000″ text_color=”#000″ ]Click here for more about Seasonal Cooking[/button_simple]

    How to cook with fresh farm ingredients ?

    When you start really thinking about your meal, the farm suddenly becomes your playground, like a giant pantry full of surprises, new flavours, odd fruits and vegetables, and you discover you have everything on hand already. Or you could just go and search on the internet (or browse Monique’s cabinet full of cookbooks) for a recipe with some of the main ingredients found on the farm.

    Beets, carrots, apple, potatoes and a freshly picked laurel leaf became beetroot soup. Potato, onion and picked leaf-cabbage became Korean pancakes accompanied by found-in-pantry soy-sauce with garlic from the land and homemade sambal. But the loveliest recipe of the first week was probably the goat cheese and spinach quiche.

    There are chickens on the land so for this recipe we only had to use flour, butter and cream that weren’t from Terra do Milho.

    Cheese and Spinach Quiche


    For the crust:

    – 1 ½ cup all-purpose flour
    – 2 tablespoons full grain flour added when the dough seems too wet (and to add a little fiber)
    – 140 gr cold diced butter (10 tablespoons)
    – one large egg  mixed with 2 tablespoons of icy cold water
    – pinch of salt

    Whisk the egg and water together in a separate cup or little bowl. Then in a larger mixing bowl mix the flour with the salt and mash in the butter with a fork, or use the blender until everything looks like crumbs. Add the whisked egg and water. If the dough is too sticky add the whole grain flour, if it’s too crumbly still, add some water. Butter the pie dish and sprinkle some flour on top, your quiche will come out easily! Spread  the dough over the pie dish with a spoon (or with cold hands) and make holes in the bottom with a fork (no soggy bottom!). Put it in the fridge (this will ensure good baking results).

    For the filling:

    – 4-5 eggs
    – Whatever vegetables that go well with goat cheese (spinach)
    – 1 onion and 2 cloves of garlic
    – Half a homemade goat cheese
    – 200 ml cream
    – salt and pepper (and additional spices if you want to)
    – Some fresh chopped parsley

    Preheat the oven to 180 degrees Celsius. Chop your vegetables, the onion and the garlic in small pieces. Sautee the onions and garlic in some oil or butter and add the vegetables. Cook until done and drain the moisture out of the pan. Put all the vegetables in a strainer to drain. Whisk the cream and the eggs together very well. Season it and mix in the vegetables. Take the crust in the pie dish out of the fridge and fill it up with the filling. Set the oven timer to 30 minutes, or check until the quiche is a deep golden brown (see picture!). It may even take 40 minutes. Serve in the pie dish! For garnish just put some parsley on top, but it is also nice to eat fresh with the quiche.

    Good luck in the kitchen at Terra do Milho. There is always something that you will discover you can eat.

    Spinach Quiche


  • The Advantages of Dehydrating Fruit and Vegetables

    The Advantages of Dehydrating Fruit and Vegetables

    Don’t you know what to do with an overload of fruit and vegetables in summer and fall?
    Do you only have little time for preserving your dear harvest?
    Is your pantry not big enough to store all the goodies from the land?

    This blogpost contains affiliate links. By using this link to buy a product we will earn a small commission. This way we will be able to continue providing you with the best information we have about Homesteading. 

    Here is what you can do: dehydrate your fruit and vegetables.

    Check this short video to see what a dehydrator is and how it works.

    An overload of fruit and vegetables in summer and fall.

    Every year our trees carry fruit. It starts in early summer with apricots followed by plums then apples and pears a bit later in the summer. In fall we have our lemons, oranges and persimmons ripening.

    Some trees carry a lot of fruit, like our plum and persimmon trees. The persimmon trees can carry up to 100 kg. The plum trees something like 80 kg. Far too much to make jam from or to can. We would never eat all that jam or canned fruit in a years time. So I find the dehydrator a good solution to deal with these big amounts of fruit. Combined with the use of a steam juicer and with canning I manage to process a lot of it.

    Another thing that I love to dehydrate is tomatoes. Every year we have an overload of tomatoes in fall. Dehydrated tomatoes are very tasty and can be used the rest of the year when there are no fresh ones. They are lovely in pasta dishes .

    By dehydrating you will preserve vitamins.

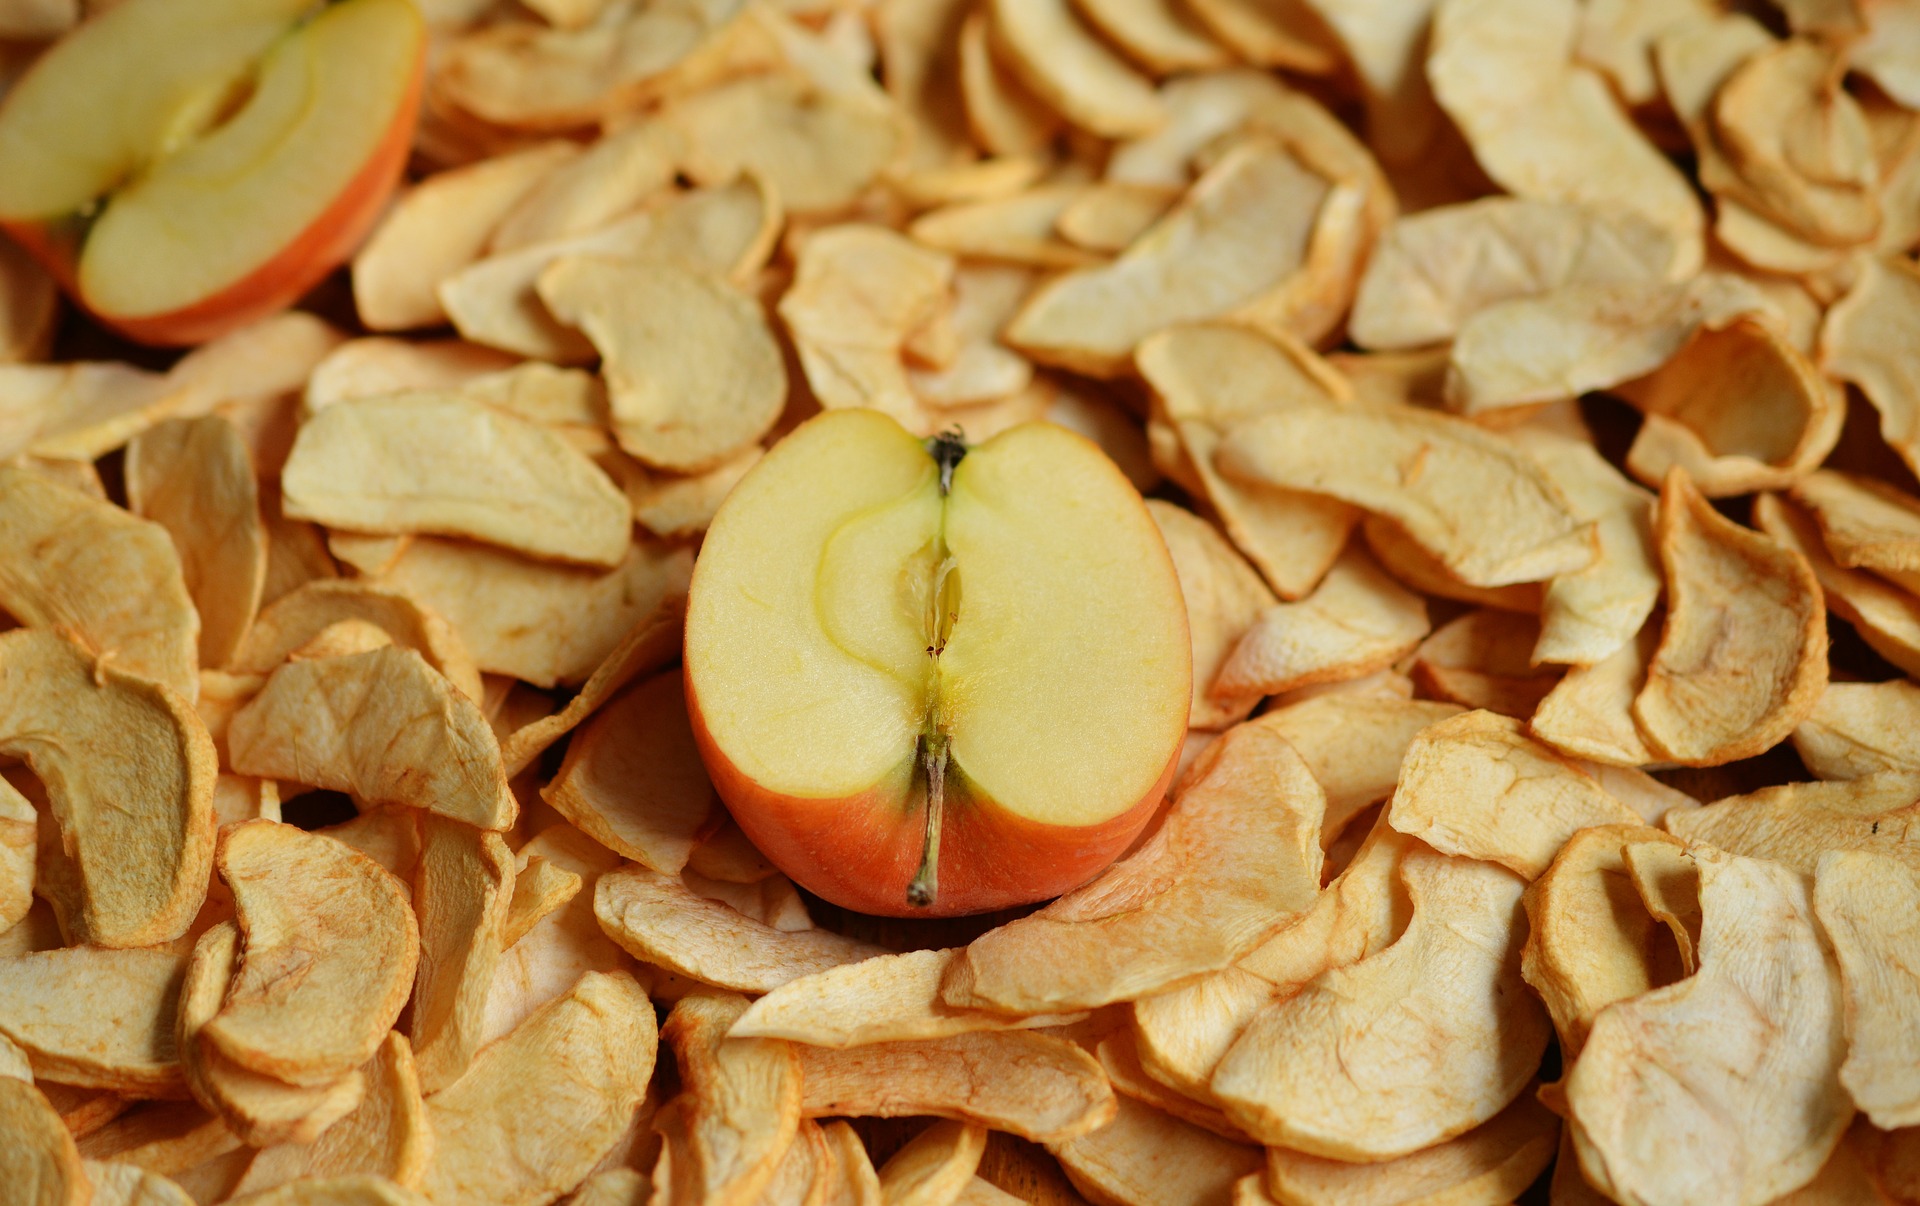
    Our apple and pear trees carry less, but I still like to use the dehydrator to preserve these fruits since dehydrating means keeping the vitamins preserved as well. Apple and pear sauce tastes very good and I do make it, but by heating the fruit vitamins get lost. This is not so much the case when you dehydrate your fruit. So dehydrating is also a healthy way to preserve fruit and vegetables.

    Dehydrating is Easy and quick

    For canning or jam making a lot of steps are required. Not so much with dehydrating. I think it is a lot quicker and easier. That is why I like it.

    You do need to clean the fruit or vegetable so there is no dirt on it before it goes into the dehydrator. After that you just dry the fruit and put it in the dehydrator.

    When you dehydrate apples or pears it takes a bit more work. You need to take the center with the seeds out. If you want it more fancy you can peel the, something I do not do. It is a matter of taste.

    When you have a lot of apples or pears you can use a special knife to cut the center out. The are also practical peeling devices to make the peeling quicker.

    Saving space by dehydrating vegetables.

    Except for the tomatoes we did not dehydrate a lot of vegetables yet, but our neighbouring friends do. They dehydrate practically all their surplus vegetables. The reason is that it saves a lot of space to store dehydrated vegetables instead of canned vegetables.

    Dehydrated fruit can be a healthy, heavenly candy.

    One of the best things of dehydrated fruit is, I think, that you can produce super nice healthy candies.

    We always like to have some snacks in between. And sure you can make a cake or some muesli bars for that purpose. But the thing is: they contain added sugar… The dried fruit or fruit leather does not. For me (being over 50…) this makes dehydrated fruit the perfect snack for in between.

    As already mentioned dehydrating fruit also keeps most of the vitamins in the fruit.

    Costs

    Yes, you do need to buy a dehydrator. When you buy the one we have it will cost you a bit over 100€. There are also some smaller dehydrators for a bit less as well.

    Other then buying the dehydrator the costs are very low. Most dehydrators are pretty efficient in electricity use. There is no significant difference in our electric bill when I have been dehydrating fruit even though the dehydrator runs a long time. I try to use the dehydrator overnight even saving more since the night price of the electricity we buy is lower than the day price.

    Once done and packed away, there are no extra costs involved.

    [button_simple link=”https://www.brouwland.com/nl/bier/?tt=25813_12_329799_Dehydrating&r=%2Fen%2Four-products%2Fkitchen-canning%2Fherb-fruit-drying” target=”_blank” background_color=”#ffffff” border_color=”#000″ text_color=”#000″ ]Click here to check out what a Dehydrator costs.[/button_simple]

    What can you dehydrate?

    You can basically dehydrate all fruit and vegetables but some things are nicer to dehydrate then others.

    On our farm we use different techniques for preserving: canning, steam juicing and dehydrating. Simply because some techniques work better for some things then other things. And sometimes we use different techniques for one thing to get a bigger variety.

    Hard fruit like apples and pears do not steam juice very well when they are not 100% ripe. Sometimes we harvest the fruit earlier because if we leave them hanging birds and fruit flies will consume them. Making the fruit to hart to steam juice. In that case we use dehydration to preserve the fruit.

    Softer fruit like plums, figgs and apricots as well as berries do very well in the steam juicer, but can also be dried in the dehydrator. We do both. The juice can be used for making syrup or jelly. The dehydrates fruit can be eaten as candies. The juice and the dried fruit can even be used in fruit sauces. Soft fruits can also be canned or made into jam. Something we also do.

    Persimmons a special fruit

    Preserving persimmons is a story on it’s own. You can make jam and wine, but none of the two have proved very satisfying for us. We have about 100 kg of persimmons every year from just three trees, which is a lot to process.

    I can sell some of the fruit on the market to people who do not have persimmon trees. But because almost everybody has them I never sell a lot. So I get stuck with the fruit.

    Steam juicing persimmons is impossible.

    Making jam from persimmons gives us an excellent jam. The only problem is that you need to make small quantities at a time. Somehow the jam does not set well when you have a big pot full of fruit pulp to process into jam. So we do make some Persimmon jam but not a lot. The jam is not suitable for selling since it oxidizes, showing a brown coloring in the jar.

    The best solution for processing persimmons we found is dehydrating the pulp into fruit leather. It makes a wonderful candy without any additives and without sugar. The good thing is that I can process all the fruit we have. It will also sell very well because it is absolutely delicious. It can be packaged in paper wraps or jars easily.

    Check our short slideshow on making persimmon fruit leather.

    So that’s it about dehydrating fruit and vegetables.

    I think dehydrating fruit and vegetables is very easy. It saves space, costs and time. For me it is a great way to make nice healthy snacks.

    And the fruit leather…. , is sooooo good.

    [button_simple link=”https://www.brouwland.com/nl/bier/?tt=25813_12_329799_Dehydrating&r=%2Fen%2Four-products%2Fkitchen-canning%2Fherb-fruit-drying” target=”_blank” background_color=”#1e73be” border_color=”#000″ text_color=”#000″ ]Click here to buy a Dehydrator[/button_simple]

    Dehydrating food

  • Float Gardening in British Columbia

    Float Gardening in British Columbia

    A guest post written by Margy Lutz. Margy describes her life on a float Cabin Home on Powell Lake in Coastal British Colombia. She has a very special float garden. Her husband writes interesting books about their off-grid life.

    I want to thank Monique for inviting me to write a guest post. She’s an amazing homesteader with lots of experience and knowledge to share with her readers and visitors.

    A Float Cabin Home on Powell Lake

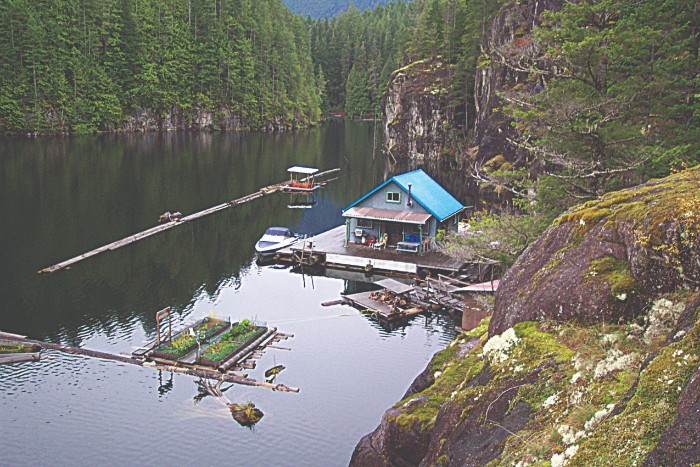
    First, I’d like to share about where I live. My husband and I have an all-season off-the-grid water-access float cabin on Powell Lake in Coastal British Columbia. We’ve lived here full time since our retirement and Canadian residency approval in 2008. British Columbia has a long history of using float cabins and workshops for forestry and fishing along our remote and steep coastline. Historically on Powell lake, float cabins were inexpensive retreats for paper mill workers.

    Our cabin is just above sea level. We get a dusting of snow in winter, but the weather is relatively mild for our location. Fortunately, the lake is unusually deep and doesn’t freeze. And long summer days are perfect for gardening.

    Float Cabin BC

    A Raised Bed Floating Garden

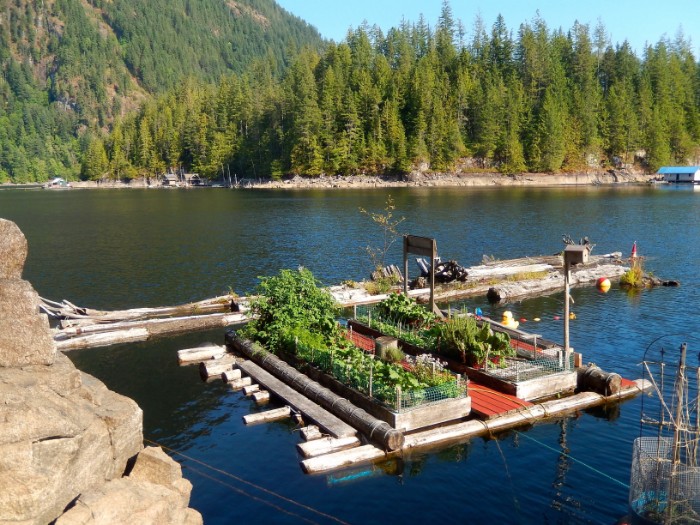
    I’ve always liked gardening. Maybe I got it from my grandparents who were farmers.  I wanted to grow some food of my own. Our good friend John, who built our cabin, came up with the solution, a special float that holds four 4X10-foot raised beds.

    The float garden is separate from our cabin. A rope pulley brings it in for me to garden, then it goes back out to the front log boom where it’s protected from nibbling critters.

    Nutrients are leached from the shallow soil by rain and frequent watering. In spring I augment it with compost and mushroom manure. Several times throughout the growing season I add plant food. Even here I get traditional garden pests, but I don’t use insecticide. We don’t want poisons in the lake water we drink.

    My garden has spring daffodils, then summer marigolds and alyssum for color and pest control. My crops include herbs, garlic, onions, radishes, beets, carrots, kale, broccoli, bush peas, spinach and a variety of lettuce. Over the years I’ve grown strawberries, asparagus, Brussels sprouts and potatoes in my beds. Crop rotation helps to reduce pests and provides variety.

    For watering I use a solar powered boat bilge pump with a hose.  It’s much easier than a watering can and gentler on the plants. When I had a small plot on shore I used a tarp and rain barrel system. That was a good solution for a spot without a water source.

    Container Gardening on the Cabin’s Decks

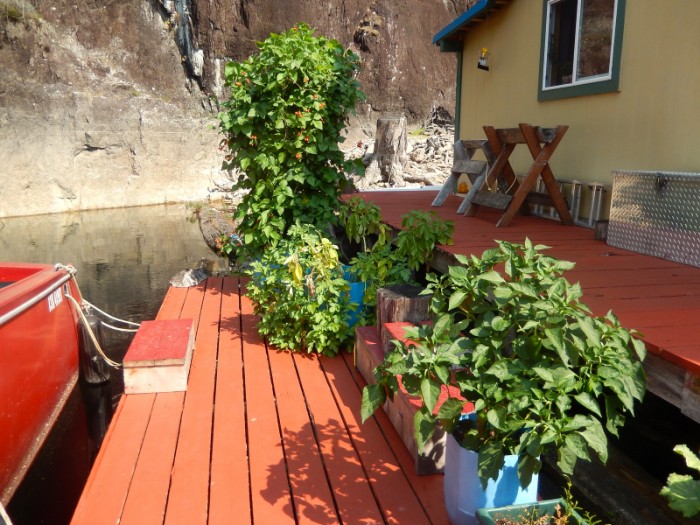
    In addition to my float garden I have numerous pots and large containers on the cabin’s many decks for additional plants, especially ones that take up a lot of space. Here you will find potatoes, tomatoes, beans, peas, cucumbers, peppers, squash, rhubarb, blueberries, red currants, more flowers and herbs for easy access.

    Gardening takes a lot of time from May through September, but the rewards make it worth it. The garden isn’t large enough to be self-sustaining, but each dinner has something I’ve grown myself. I’ve also learned how to preserve excess produce for use during the off season.

    Deck garden

    Winter Gardening

    Fall is the time I put most of my garden to bed. With a little effort, the growing season can be extended for some plants. I leave my kale, beets, carrots and broccoli in the ground with extra mulch around them. Clear plastic bags protect plants in containers. They ward off heavy rain, focus warmth from the waning sun and reduce damage from freezing.

    Composting

    Composting is an important part of my gardening. I do it all onboard. During the growing season I use the chop and drop method. Garden and kitchen vegetable waste is chopped into small bits and used as mulch. In fall I use my empty potato growing barrels to compost the large amount of plant cuttings. Monique has an excellent post about chop and drop. It’s how I discovered her website and blog.

    More Gardening Information

    You can read more about my gardening exploits and other aspects of float cabin living in my husband’s books Up the Lake and Off the Grid: Getting Started available in print and Kindle formats from Amazon. Also, here is a quick link to the Gardening Category on my blog.

    My story shows you can garden just about anywhere: containers on an apartment balcony, sprouts in your kitchen, a plot in the back yard or edibles interspersed with ornamentals. The options are endless. Start small and learn as you go. If it can work for me, I know it will for you. Thanks for reading my post. If you have any questions leave a comment, visit my blog or email me through the link in my blog profile.

    Happy gardening! Margy Lutz

  • Where to start your vegetable garden, some things to consider.

    Where to start your vegetable garden, some things to consider.

    The first step dealing with when you want to start a vegetable garden is where to start your vegetable garden. Picking the right spot requires a bit of time. In this blog you will find some things to consider while finding the right spot.

    After all you are going to put a lot of effort into your garden. It is best to pick the right spot from the beginning. It will save you a lot of frustration afterwards. Changing places for a vegetable garden usually means starting all over again. So in the end picking the right spot will save you a lot of time.


    Water, light, protection and the right soil.


    Water

    Water is, no doubt, going to be used in your garden. It is the most important thing to make plants grow. Although there are systems that work without additional water, even in the dessert. A system like that is not something you would wish to start with since these are complicated systems.

    Most practical will be a tap right next to the garden. On this tap you can later, if you wish so, connect any irrigation system. You can also fill your watering can to water your newly planted vegetables. Which, in a dry period can just give them the little extra to survive until the next irrigation round.


    Light

    What your plants will also need is a lot of light. They simply need that to grow. Some things might need some shading in the summer, but it is easier to shade those things with a shading net then to have the whole garden in the shade and to struggle with all the other plants that need sunlight.

    Gardening in a shady place or under big trees is extremely difficult. Especially trees make it even more difficult because their roots are mostly not so deep and in the way. The trees will take all the water for themselves. Some kind of trees even do not tolerate growing something under them. So check where the light is and the trees are not.

    Sure there are agricultural designs that involve trees. These designs work extremely well. The thing is that you will need a big space for these systems. Not something for a moderate vegetable garden. Some systems do not translate from big to small or vise-versa.


    Wind protection

    When you are living in an area with a lot of wind it will be wise to protect your vegetable garden against the wind. Sometimes a hedge or fence at one side of your garden will be enough. This depends of where the winds are coming from. A building can also function as a wind protector, but make sure it does not shade the garden too much.


    A little breeze in the garden is, by the way, not a problem at all. Too little air movements can also lead to an accumulation of dampness inviting fungi.


    The right soil

    Since looking into the topic of finding the right soil is a quite broader I will not discuss this here. It is worth checking out on soil though. This is where you can find more information:

    About The Soil In Your Vegetable Garden, What You Need To Find Out.


    A social place or a place where you have your own peace.

    Some people like their vegetable garden as a peaceful place where nobody disturbs them. Someone has told me once that without his vegetable garden he would never have been able to do his daily paid job. He had a lot of responsibilities in his job and a busy family at home. Other then his vegetable garden he had no place to relax. When this is you, it might be a good idea to create that peaceful place somewhere a bit hidden.

    Other people, like me, like a vegetable garden as a social place. A place where you meet other gardeners to exchange knowledge. Somewhere to sit and picnic and enjoy time with family and friends. I am not happy in a hidden away garden. So mine is part of a community garden right in town. The hidden away garden on our own land I barely use.

    Gardening in your own yard/land, on an allotment or with a group


    Gardening in your yard

    When you have a front or backyard you might choose to have your vegetable garden there. The advantage is that it is very close to home.

    When you have small kids, you might want to do some gardening when they are sleeping. Or when you are an ‘at home worker’ you can fill the little spare time gaps with some garden activity.

    Another advantage is that you do not need to travel. You can just walk to your garden. Even if you have a big piece of land you would probably put your garden close to the house.


    Some practical things when you are gardening on your yard

    How far is your vegetable garden going to be from the kitchen? Since that is the place where you are going to use most of the vegetables. It is very convenient to be able to harvest a view thing even while you are cooking.

    Another thing is the access. Can you park a car close to the garden? There will be heavy things that you will have to bring to your garden. Like manure, seed potatoes, compost, wood for raised beds, cans, containers, straw, tools, and in case there is no tap, water. It is much more practical if you can bring it there by car instead of having to carry everything a long way. When you have a homestead you might want to make your own compost from the animal manure that your goats or cows produce. It is handy that you can transport this manure, or the final compost to your garden in an easy way. Either by wheel barrel or by car or tractor.

    Something more to consider is where are your tools going to be. It is most practical that they are right at the spot. A small shelter where they can be protected from the sun and the rain extents their live time a lot. Maybe your tools are in your barn or garage. In this case you might consider to place your garden not to far from there. You might have to compromise with the distance to the kitchen and the distance to a water point though.


    Disadvantages

    Disadvantage can be that you do want to have that peaceful place for yourself. That will probably not happen when your vegetable garden is in your yard and you have a busy household.

    Your yard might be very small. You can get a long way with containers and going vertical, but you might still not have enough vegetables for the year round. Small yards can also be very shady.

    If the soil quality makes you cry, it might also not be a good idea to garden on your yard.

    When you want your peaceful spot, have a small yard or a yard with bad soil you might want to consider the next option.


    The use of an allotment

    Lot’s of towns have small allotments in or outside of the city. These you can rent for a small amount of money.

    Some allotments even allow little houses where you can picnic with the whole family or with your allotment neighbours.

    Allotments can be a very social thing. Some are organised in groups, so you will have your plot as part of a garden that belongs to a group using utilities together. Be aware of the fact that groups always have rools. It can be very nice and beneficial but you have to make sure you and the group are some kind of a match.

    Other allotments will provide you with a peaceful spot of your own.

    When you have a choice between different allotments, which one are you going to take? You might think of this: is an allotment somewhere on a route that you take anyway? For instance from the shop to your home or from your work to your home. This way you can easily pop by and save petrol.

    Again the acces by car and a tap at hand are an important thing to keep in mind.

    Also: can you store your tools there or is that not an option. Sure you can take your tools to the allotment when you are going there. But forgetting something is easy and can be annoying when the allotment is at the other side of the town.

    Disadvantages of an allotment

    Disadvantage of gardening in an allotment is that filling small time gabs with garden work is not possible. You will have to plan your garden work ahead. You also need to harvest in advance. You can not go out of the kitchen and quickly pick a lettuce.


    Gardening in a group

    When you are living in a compound there might be another option. Running a garden together with the people in the compound. Again make sure the group is a match.

    My experience is that groups gardens work best if everybody has his or her own plot. When there is a lot of space you maybe can run a potato fields or corn field together.

    I did garden in groups sharing one plot and all the tools and it was a good experience, I liked it a lot. The thing was that we were already a cohesive social group and started the garden together. So it was more like a family having a garden. At other times it would have been a nightmare to share a plot and I was very happy that I had my own.


    Fun for kids

    When you have small kids, that are interested in plants, it is very nice to give them a square meter in the garden all for themselves. This way they will learn something gardening. And they will sure be very proud to produce their first carrots.

    This is the way I got hooked to gardening. I had my small corner in my grandmothers garden where I would grow some lettuce, carrots and radish. I was very proud of my first harvest. When ever I was at my grandmothers house I would go into the garden and check my small corner. I loved it!

    Go ahead!

    I hope this information will help you pick the best spot for your garden. If there is anything you want to ask, please do. Leave a comment and I will answer.

    If you want to know more about what we are doing on Terra do Milho, check out our Facebook!

  • How to Analysing the soil from your vegetable garden.

    How to Analysing the soil from your vegetable garden.

    In this blog we will look into how you can find out what type of soil you have and what pH and nutritional value your garden soil has. We will do this by analysing the soil.

    We have already looked into what you need to know about your soil in your vegetable garden to be able to manage your vegetable garden. When you have missed the blog check it out here.


    Type of soil test with a jar.

    First of all we are going to look into the type of soil. For this there is a very simple method. It’s done with a jar and water.

    The ‘Type of Soil’ test is based on a very simple principle. You add soil and water to a jar and shake it. Sand particles are course and heavy so they will sink to the bottom of the jar first. Silt particles are less course and heavy, they will sink less fast and settle down on top of the sand. Clay particles are tiny and light, they will float around in the water quite a while. Finally after hours they will settle down on top of the silt.

    Depending on the composition of the soil in your garden the separate layers that settle down in your jar will be thicker or thinner. On of the layers can even be absent. You can measure the layers and see what the percentage of the layer is compared to the whole. With the help of a diagram you then will be able to find out what type of soil you have.

    You can do this test as a stand alone, but I prefer to do the ‘type of soil’ test and a pH/NPK test at the same time. This way I only need to take the sample from the garden one time. I just make sure you have enough soil for both tests.

    A practical session: type of soil and pH/NPK

    For this session you will need 2 jars of more or less 12 cm high and a with diameter of 6 cm. It does not need to be exactly this size. Usually the ordinary jam jar has about this size.

    You will also need: a bucket, a garden trowel or small spade, a waterproof garden marker.

    Now take a bucket and go to your plot. Pick a spot, scrape of the first 6-10 cm (2 or 3 inches) organic material. Then with the garden trowel or a small spade, dig some soil and put it in the bucket. Do this at about 6 spots. Mix the soil in your bucket well.

    After that take out soil that would be enough to fill about 2 jars. Some of it you will need for the type of soil test and some will be used for the pH and NPK test. Let the soil you have taken out dry.

    When the soil is dry take it through a sieve.

    Fill one jar for ¾ with the sieved sand. Mark the level of the soil in the jar. Then add some water leaving enough space to shake the soil and water.

    Fill another jar with 2 levelled tablespoons for the test and set aside for later when you are doing the pH/NPK test.

    Add some clean water into the jar that is filled for ¾, leaving some space at the top to be able to shake the liquid in the jar.

    Close the jar well and shake the mixture. When the soil you put in was very dry, it is good to wait 20 or 30 minutes and shake it again. You might have to add a bit more water. Now the whole mixture looks quite messy.

    So now, after you have shaken the jar. When there is sand in the soil, the sand will settle down in 5 minutes. Use the marker to mark the top of the sand. The rest will take longer to settle down. You can leave the jar for some hours, up to 24 hours or more. When the next layer has settled down, mark the top of this layer. This second layer will be silt. What settles on top of the silt will be clay. You can either wait for it to settle down or use the drawing to find out. I will explain this a little bit further down.

    Type of soil on your plot

    Measure the height from the bottom of the jar to the top line of the soil that you had made before adding the water. This is your 100%. Now Measure the the thickness of each layer and calculate the percentages.

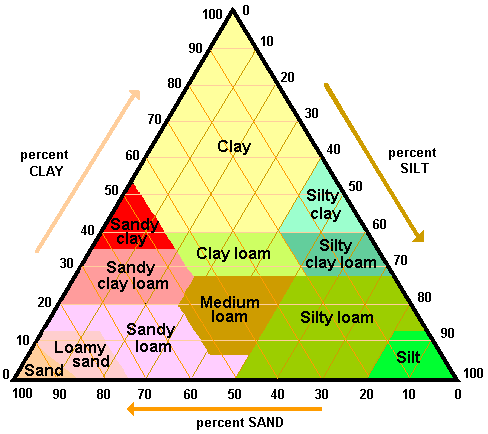
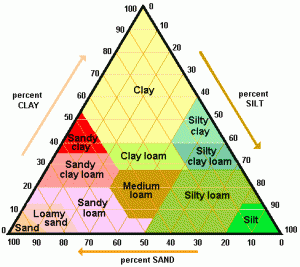
    Now we will need the diagram below to find out the type of soil you have. On this triangle you can see that each side represents a scale. You can read out the percentage of sand and silt and see where the lines cross.

    Write down your data in your garden book. Or make a file for your garden where you will keep the data from your tests. The type of soil you have will not change, but the nutrition values will. It is practical to have all the data together in a file or a notebook.

    This is how you use the diagram below

    You have a soil of 60% sand and 30% Silt. You can then assume that 10% of your soil is clay. When you look into the drawing you follow the 60% line of the sand and look where it crosses the 30% line of the silt. Note that there are two lines starting from each position. One of the two will cross one of the other two.

    In this case your soil is a Sandy loam soil.

    Soil triangle

    Our own soil as an example

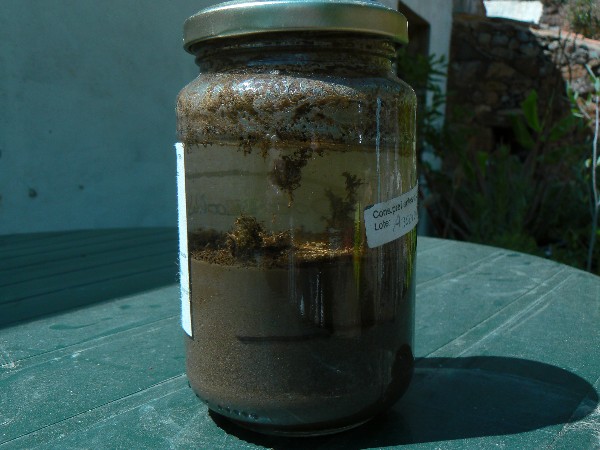
    This is what the sample of our vegetable garden look like after everything has settled down.

    soil test with jar

    It has about 55% Sand and 45% silt and if at all very little clay. So our soil is a Sandy loam soil.

    The stuff that is floating around is organic material, by the way.

    Testing the pH and NPK levels.

    For testing the pH and NPK levels of the soil I use this simple testing kit:

    It is not so expensive and it will give you all the information that you will need to get your garden going.

    The kit comes with a clear description. It is wise to read this description carefully before you start, so you will not spill any of the tests.

    I did the test for our soil. The results were easy to read from the test. The pH of our soil is 6.0. The tels us that a pH of 6.0 is an acid soil. As you can see in the previous blog. It is still very much in the growing range of most plants. The test kit gives you an extended list with the pH preference of a lot of garden plants. This is very practical when you are growing vegetables.

    The levels of N and K in our garden where between sufficient and surplus. The level of P was sufficient. That is a happy result for now. I do not need to add anything. At the end of the summer I will test the soil again. So i will know how to organise my winter garden.

    A simple laboratory test.

    You can also send in a soil sample to have it tested. A laboratory will do the test for you.

    Apart from NPK the laboratory test also gives you information about the most important, so called micro-nutrients: Calcium; Magnesium; Sulfur and Natrium.

    An extended laboratory test.

    Sending a sample too an official agricultural laboratory can be very expensive. It does come with a more in depth advice though. It will often give you the amount of organic matter that you have in your soil as well. As a starting gardener I would not spend the money. With the information you get from the simple test kit or from the more complicated you will have enough information to get your garden going. Large laboratory test provide a lot of data which are important for a larger scale farmer, but not to us small scale farmers. Too many data can also be confusing…

    The next step: how to improve your vegetable garden soil.

    You can be lucky and find out that your soil is very good and has all the nutrients that a plant needs to grow. In that case you might not need to add anything right away. You will still need to prepare your garden. If something is lacking you might need to add something. In the next blog we will tell you more about it.


  • Sweet Basil, all you need to know to grow it.

    Sweet Basil, all you need to know to grow it.

    Sweet Basil is an easy, straight forward plant to grow. In this blog you will find all the things you need to know for planning, companion planting, use and storage of Sweet Basil. It also provides you with information about the type of soil it needs and the pH it will grow in. One place to find it all.

    Sweet Basil is just a choice of many types of Basils that are available for growing. I like the Genovese. It has big tender leaves to harvest and I love the taste and structure for making pesto.

    From all the anual Basil I tried to grow, this one came out the best. It grows relatively easy. The other thing is that I think, most smaller leaved anual basil have a hard leave for harvesting. I don’t like hard leaves in salad and for making pesto. For me salad contains tender things. For pesto making the small leave variaties don’t quit make a smooth paste.

    Plant characteristics

    English name: Basil, Great Basil, Saint-Joseph’s-wort

    Latin name: Ocimum basilicum

    Family of: Lamiaceae (mint)

    Maximum size plant: height, 20-60 cm width 15-20 cm

    Root structure and depth: 20-30 cm, round structure

    Spacing (plantafstand): 20-25 cm

    Companions: tomatoes, apricot, asparagus, cucumber, fennel, zucchini, stinging nettle. Sweet Basil needs sunlight to grow. When growing them next to high plants like tomatoes and asparagus, make sure they are on the sunny side of the high plants.

    Not companion with: Rue Herb, Chard/Silverbeet, Wormwood

    Remedies for: Aphids, Fruit Fly

    Water needs: medium in loamy soils. In sandy soils water properly otherwise they will go into flowering very quick.

    Food needs: no fresh manure, compost, tolerates fresh compost.

    Light: lots of sun

    What type of soil: Sandy soils of any kind, loam/clay soils when they are rich in organic matter. Loves it fluffy. For more information about soil types click here. For finding out more about analysing your vegetable garden soil click here.

    pH: 5.1-8.5

    Weed tolerance: does tolerate some weeds as long as it is bigger than the weeds.

    This is how it looks:
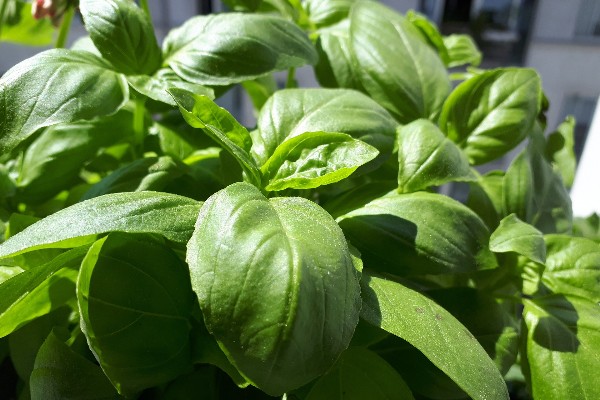
    Basil Genovese
    Picture 1: Full grown Sweet Basil, time to harvest.
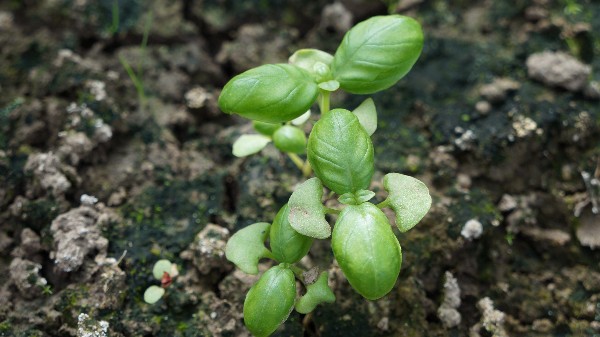
    Young Sweet Basil plants
    Picture 2: Young Sweet Basil plants. The first two leaflets are still visible.
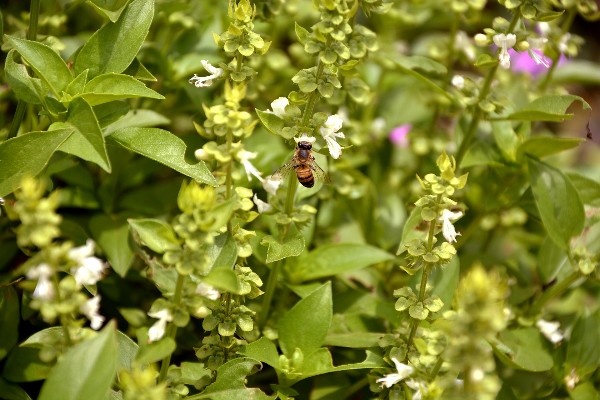
    Flowering sweet basil
    Picture 3: Flowering Basil. Leaves will be less tender. When you take the flowers out it will continue growing. You can use the flowers as well.

    How to seed

    Pre seeding: When the season, where you are, is short you can pre seed in pots.

    Make sure you buy the right soil. Soil for growing pot plants is to rich for seedlings. The special soil for seeding is the one that works.

    Handy and time saving is to seed them in trays. Peet seeding trays can be used integral. You do not need to take the plants out but plant the plant together with the pot. This way you do not disturb the roots, which gives the plant a growth advantage. This might be handy if you only have a short growing season.

    You can also use the cheaper reusable seeding trays, when your season is longer. I would put some flat trays under the seeding trays to catch the surplus water when watering the trays. Here you find some affiliate options. When you use these links you will support our farm. Please feel free to click on the picture.

    Seeding directly: In long season areas you can seed directly. I usually seed a small row next to where I want to grow them so I can easily plant them out. To recognise the small seedlings: make sure the seedbed is well weeded and raked.

    Seed distance: 5 cm

    Depth of seeding: 0,3 cm

    Tip for saving time:  buy a pot with basil in the supermarket and plant them in your garden. The growers usually squeeze a lot of plants in the pots. Turm the pot you bought up side down and carefully take the earth and plants out. After that carefully separata the plants. Now you have lots of plants to plant out. They will still grow a fair amount.

    This can be done until later in the season. When you just want to grow a few plants this might be a good option.

    Growth

    Germination temperature: 21-29°C. This is essential for growing Sweet Basil. It will not germinate when the temperature is not high enough. Best is when the soil has warmed up till 21°C. Give the soil a week or so to warm up a bit. Note: in clay soils the temperature of the soil stays cool longer, this might stop your Basil from germinating.

    Germination time 5-10 days

    Duration from seed to Harvest: 60 days max

    Seedlings: Seedlings start to grow with two heart shaped leaflets. In picture two these small leaflets are still visible.

    Harvest

    Harvest when full grown and leaves are lush (see: picture 1). You can stil harvest when it is flowering, leaves will not be as tender. The flowers (picture 3) have a strong taste and are good to harvest too.


    How many plants will you need?

    It depends on what you want to make from it. With the two of us we, ideally, grow between 30 and 50 plants. We grow them only once a year. We make a lot of pesto for the rest of the year. When we have no time to cook a big meal we use the pesto with some pasta and dried tomatoes. Easy and quick. So a lot of basil fits in our household.

    When you just like it every now and then in the salad you might be all right with just 10-12 plants. When you have a long growing season you can plant a few plants early and some later in the season.

    Storage

    When you dry Sweet Basil it will lose most of it’s charming taste. So, I think that is not really an option. I think eating it fresh or making it into pesto are the best two option for Sweet Basil.

    To preserve I freeze the pesto (see: recipe). You can also use jars to keep the pesto, but do not add the cheese. I do not know why it works with the jars of pesto that you buy in the supermarket. It always goes of when I add the cheese, no matter what I do.

    When you preserve pesto in jars be aware that there is, however small a change of getting botulism into your jar. For this add some lemon juice to the mixture. It will keep the color nice and prevent the bacteria that cause botulism to produce the poisonous botox by lowering the pH.

    Recipes

    Pesto

    Fill up an blender jar for 2/3 with Sweet basil leaves. Add three or four hand full of nuts. Just any nuts will do.

    The official recipe is with pine nuts, but these are very expensive where I live. Almonds and wall nuts are much cheaper here so I use those.

    Add the juice of halve a lemon and two or three cloves of garlic.

    Blender it & freeze it in portions. It is not easy to cut it when frozen, so it is better to freeze it in desired portions.

    Add some grind cheese when used.

    Tomatoes, Basil and Mozzarella

    This is so easy to make and it is delicious.

    Slice some tomatoes in 1-2 cm thick slices.

    Lay them on a large plate.

    Slice the mozzarella in 1-2 thick slices.

    Put the slices on top of the tomatoes.

    Sprancle on a fair amount of Balsamico.

    Cover the whole with Basil leaves (one leave per tomato slice).


  • About the soil in your vegetable garden, what you need to find out.

    About the soil in your vegetable garden, what you need to find out.

    Let’s go deeper into the soil matter. In this next chapter you will see what you need to find out about the soil in your vegetable garden.

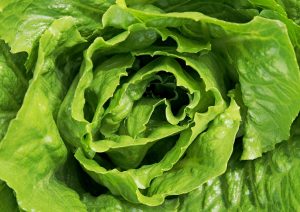
    lettuce

    Soil… What is soil anyway?

    Soil that is good for agriculture consists of more or less: 48% minerals, 25% water; 25% air and 2% organic material. These 2% organic material seem to be very little, but it is of the greatest importance. From this 2% just 5% is alive. The living soil is small in volume but incredibly large in numbers of microorganisms.

    What organic material does.

    A lot of creatures are living in the soil of our garden. Moles, mice, worms, insects. These once you can see, but there is also live in the soil that you can not see. Microorganisms they are called. And they are large in numbers.

    These invisible creatures munch the bigger organic matter in the soil into smaller parts. And then in even smaller parts until what is left is a chemical part that can be ‘eaten’ by the plants. Some of it is eaten by the plants and some stays in the organic matter as a buffer for later. Like a pantry.

    Besides the food for the plants that is produced by the microorganisms in the organic matter, the organic matter contributes to a good soil structure. The soil will be able to contain air and water in a good balance as well.

    Learning more about the soil in your garden

    What type of soil you have in your garden will determine what you will be able to grow well. By knowing what kind of soil you have, you will also know how you can improve your soil so you can grow as many different vegetable as possible. Learning about your garden soil is the basis of good gardening. It is very important as you will see as we go along.

    There are three main thing you need to know as a starting vegetable gardener:

    What acidity your soil has; what type of soil the garden plot has and the amount of nutrition that is available for the plants in the soil.

    Acidity

    Some plants like potatoes like it more acid, some like peas and bell peppers, like it a bit less acid. Where potatoes can still grow, bell peppers might not. The acidity of the soil influences the amount of nutritions that the plants can take out of the soil. Bell peppers might not be able to get as many nutritions as they need out of the soil when it gets too acidic for them, while at the same acidity potatoes would still do fine.

    Knowing what acidity the soil in your garden has, means to know what grows well. It is also possible to influence the acidity of the soil by adding something alkaline, like lime. But you need to be very careful with adding lime, because once added too much you can not reverse to getting it more acidic. A lot of plants can not grow on a soil that is too alkaline.

    So be aware that you can create an irreversible problem by adding too much lime. There might be other reasons why your plant does not want to grow. Check these first before applying lime. How to check your soil will be discussed in the next blog.

    Acidity is scientifically expressed in pH. The pH scale goes from 0 to 14. A value of 7 is called neutral. That means it is not acid nor alkaline. Values under 7 are called acidic and values over 7 are called alkaline.

    Pure water has an acidity of 7. Lemon juice, vinegar and rain water are on the acidic side of the scale. Egg white, solved chalk and soap are on the alkaline side.

    If you want a more scientific explanation of pH click here. This link also tells you something about the history of the term pH. Ever thought about it why it is called pH?

    pH tolerance of vegetables

    To give an idea of what grows in which range here are some examples:

    Potatoes: 4.2-5.3
    Onions, leek, lettuce, spinach:  5.4-6.4
    Cucumbers, tomatoes: 5.7-6.4
    Bell peppers, beans: 6.0-6.5

    You can find a longer list of pH tolerance of plants when you click here (scroll down the page).

    Why are the potatoes in the link growing at an acidity of 4.8-6.5 and in this blog from 4.2-5.3 ? It might be that the potatoes are from a different variety. Or the soil that functions as a standard is different. The 4.2-5.3 counts for a sandy soil. The 4.8-6.5 might counts for a loamy soil. This is quite a technical story so I will not go there. But be aware that these indications are an indication and not an absolute figure. And that there is always a correction depending on the soil you have. The correction for the sandy soils more to the acidic side and the correction for the clay soils is more on the alkaline side.

    The type of soil

    Roughly soil types are divided amongst clay, sand and silt soils. The clay soils have a very fine structure, the particles are very small. Clay is sticky and greasy when wet. The sand has a more coarse particle then clay, the particles are loose, even when wet. Silt soil is somewhere in between the two.

    There are three main reasons why you want to know what type of soil you have.

    1. The ideal pH for your garden depends on the type of soil. In the description below I will point out the ideal pH per type of soil.
    2. The different type of soils can contain more or less air and/or water.
    3. Specific plants can have preferences for a certain type of soil.

    Here is a quick overview which soil does what:

    clay

    Clay

    Clay contains tiny particles that are hard and which compact easily. It is a heavy difficult soil to plant and shovel in. In Holland heavy clay soils are ploughed before the frost, leaving big wet lumps of clay on the fields. The water in the lumps freezes in winter. And because water expands when frozen it breaks the clay. This way the clay becomes workable for agriculture in spring. Potatoes, cabbages and onions are grown on these soils.

    These soils are not 100% clay, if so they would be you could not work them. Pure clay is the soil that you make pottery from. Clay hold water when soaked. But because the structure is so dense the water will run of very easy when the clay is dry. Clay that dries can crack and it will not hold a lot of air.

    Clay soils when wet feels a bit greasy and it is sticky. When rolled between the hands the clay forms a role that will not break.

    Clay is slightly alkaline. The ideal pH to grow vegetables in clay soils is 7.2-7.7 .

    Sand

    Sand

    Sand particles are relatively course. You can see them with the bare eye. There is a lot of air between the particles and it does not compact. It drains the water too well so the water does not stay around the roots of the plants. It does not hold nutrition for the plants. Sand soils need a lot of compost or manure every year because the compost and the manure get washed through the sand with the rain. Roots however can easily find their way in the sand. Carrots, radishes and asparagus grow well in sandy soils.

    Sand is gritty to the tough. When squeezed it does not stick together at all.

    Sandy soils are usually slight acidic. The ideal pH to grow vegetables in sand is 5.2-6.5 .

    silt

    Silt

    The size of particles of silt are between those of clay and sand. It holds the moisture better than sand. Nutritions are better kept around the plants as well, so it is often fertile. It can still compact easily and is prone to erosion when not well maintained.

    The ideal pH to grow plants in in silt is 6.7-7.3 .

    loam

    Loam

    Loam is a mixture of Clay, Sand and Silt. It is easy to work with, holds the moisture and nutritions. This is the best garden soil, I think. It also contains enough air.

    There are all sorts of mixtures between Sand, Silt and Clay. In this drawing you will find them:

    Soil triangle

    Nutrition value

    Another thing that is important to know is: how fertile is your soil? How much nutritions does it have?

    The main food that plants need are Nitrogen (N); Phosphorus (P) and Potassium (K). Apart from that there are some important spore elements like Magnesium.

    The plants need Nitrogen for growth, color and density. Phosphorus supports the growth of new roots and shoots. Potassium supports the plants health in general. It also supports stress, disease and cold resistance in plants. All three elements are vital for plant growth.

    Back to your vegetable plot & the next blog

    So now that you know all this, how are you going to find out what the soil is like in your vegetable plot? What pH will it have? What type of soil? And will it have enough NPK?

    For this you need to analyse the soil. You can find out how to do this in our blog: How to Analyse the Soil from Your Vegetable Garden.


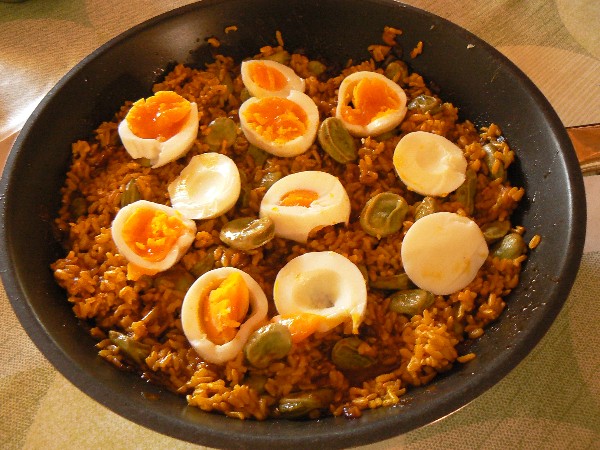
  • Fava beans with rice and eggs

    Fava beans with rice and eggs

    In the south of Portugal this is the time of the fava beans. So now we are eating them almost every day.  That is okay as long as we have enough recipes to use.

    When we don’t like them any more I dry the rest for later in the year.

    I like recipes that use what we have available. Here is one for fava beans.

    Ingredients:
    Brown rice
    Fava beans
    Onions
    Butter
    Sugar
    Salt
    Curcuma
    Pepper
    Cajun spice
    Mild Curry powder
    Optional: Whey
    Eggs
    Action:

    Put the brown rice in a pot with a finger pad of water on top. Ad a bit of Curcuma pepper and salt. Place  the pot on the stove and cook it until it’s done. Put it in your bed to keep it warm. A bed is a good place to keep rice warm. Make sure you wrap a towel around so your bed does not get sticky…

    Chop the onions in small squares. Fry this in a pan with some butter, sugar, salt, mild curry powder and caramelise the onions. Than ad some cajun spices, tomato ketchup and if you have some sweet soy sauce and a glass of water.
    Let it simmer for 4 minutes.
    In the mean time boil the fava beans in water (or whey, if you have) for 5 minutes. When cooked ad them to the sauce.
    Mix everything and serve with fresh boiled eggs on top.
    Enjoy your meal!
    fava beans recipe
  • Chop and drop in the vegetable garden, how to do it.

    Chop and drop in the vegetable garden, how to do it.

    Chop and drop is a way to create good soil in your garden for growing vegetables. In our vegetable garden I use green manure to chop and drop. It is less work than making compost and when applied right, it can bring the same results.


    Masanobu Fukuoka’s way

    The way I use chop and drop is inspired on Masanobu Fukuoka’s way of growing a combination of white clover barley and rice. By closely observing what was happening in his field, he figured out a beautiful non tilling way of growing rice. He used white clover and barley straw to cover and mulch the soil so the rice had a better chance to grow in competition with the weeds. He also used ducks in the field to help, these animals would add manure to his system.

    It is this organic way of carefully observing and consciously playing around with mulching, chop and drop and manure that inspires me. It is the way I love to garden. Observe and play, observe again and continue until a system is working with just a little help.


    Forest soils’ secrets

    It is also inspired by the way a tree creates its own soil to grow in. It drops its leaves every fall and year after year the leaves builds up layers of good soil. Mushrooms and fungi help to digest the nutrients in the fallen leaves to food for the tree. It is a beautiful functioning system. I don’t know if you have ever tried forest soil in your garden. We have, it is incredibly potent. Fortunately there is no chop there, but a lot of drop…


    Chop and drop inspired on Fukuoka and forest soil

    What comes out of these two incredible systems is that you can use material that is right at hand. Seeding green manure is not such a heavy job, especially when your soil is already tender after having used chop and drop. It surely takes less effort than getting in forest soil or making compost.

    Another thing is both systems work with layers of organic material. Used consequently this approach will lead to a soil that is similar to a forest soil. It will be rich in humus. It will also create the right circumstances for fungi and bacteria that will make nutrients available for plants.

    And last but not least, it is a no till system. This is important. I don’t want to say that tilling is always bad. There are good, non deep, tilling systems in combination with green manure as well. But for this system it is important not to till. By doing so you would destroy this type system.

    What is also an advantage is that the soil is permanently covered. Again this creates the optimal circumstances for organisms like worms, bacteria and fungi to grow because it regulates the soils temperature and prevents the soil to get too dry.


    So what do I do with chop and drop in our garden? And why?

    Gardening, for me, is trying to create the right circumstances to grow vegetables. That means the circumstances in the soil have to be optimal for microorganisms and animals that improve the soil. Animals like toads and worms. That is why I am more focused on the condition of the soil than on the plants. I think that when the soil conditions are right and plants are seeded or planted at the right time in the season, they will grow well. Creating good functioning living soil is key to gardening.

    Using compost could be part of this system too. And in our case it is. The only problem is that I do not always have enough compost to use compost alone. It is hard work and time consuming too, to make it. Chop and drop is a bit less heavy work and it also brings humus into the ground when you keep on doing it layer after layer. This means I can sometimes skip the compost. Which means I can use less compost, which than will save me some work.

    When done at the right time you can even add layers of animal manure. You could combine this with the right crop rotation. So plants that can take fresh manure are planted in the plots where you have used fresh manure. This way you could completely skip the compost making. Or just make one yearly compost pile for the weeds.


    Covering the soil with the right thing.

    Because there is either plants growing or chop laying on the soil, the soil is always covered. This is also important for the microorganisms that are living in the soil.

    I do not use weeds for chop and drop. Some weeds grow to big and to woody. Others are too invasive. Grass is very competitive to the vegetables that I want to grow so I don’t want these either. Having said this, there are some weeds you can use for chop and drop, like chickweed. You do need to know what you are doing here, just using any weed can produce a lot of work, as I have seen in some veggie gardens.

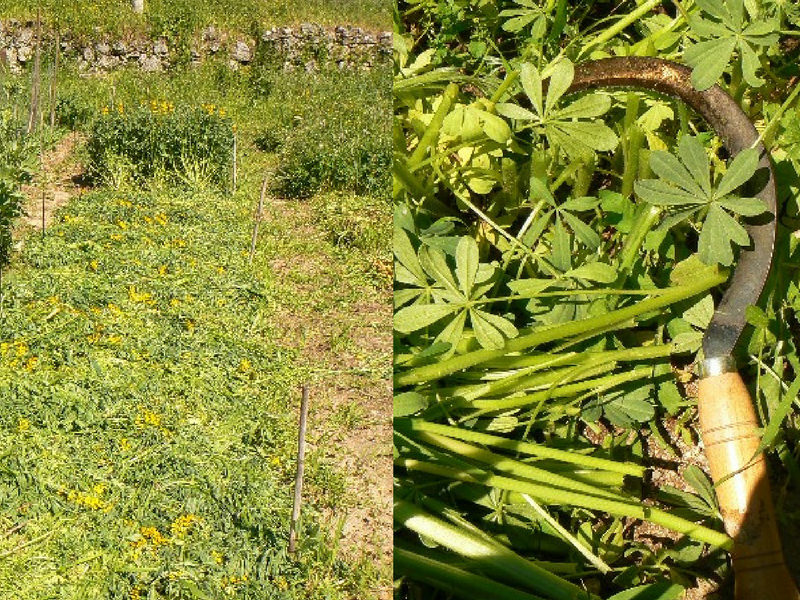
    In stead of using weeds I chose one of my favourite green manures, like fodder fava beans. These plants grow very lush in our sandy soil garden. They produce a lot of green mass.

    Another reason I chose these fodder fava beans is because it is a nitrogen fixer. It will fix nitrogen in small blobs on the roots. By chopping the fava bean plants I leave the nitrogen blobs with the roots in the soil, so whatever grows after the fava beans can use the nitrogen that is fixed in these blobs.


    Seeding in rows.

    I seed the fodder Fava beans in rows. I have 2 reasons for seeding in rows. One is that I do know where they will grow and so I also know where I can do some weeding. I do some weeding in the first weeks when the green manure is growing so it gets a good go ahead of the weeds. At a certain point I stop weeding because the plants get lush and cover the ground and the weeds get no light to grow.

    The second reason I seed the fodder fava beans in rows is that I use drip irrigation. The fava beans are seeded along the line of the irrigation dripping pipes, so I am sure they get enough water.

    I carefully chop the fava beans when they are just flowering. Right above the root on the soil level. You can chop them earlier as well, but make sure you have enough green mass to cover the soil when you drop it. After chopping I organize the greens between the rows so it covers the soil like a mulch.


    The next layer of green manure

    It is the end of April now. After having chopped the fodder fava beans, in my summer crop plot, I will seed three rows of buckwheat in the fava bean mulch. This will be a second green manure before the summer crops go in. I do this because I need to keep the earth covered until the bell peppers, courgettes and eggplants are big enough to be planted.

    I will chop and drop the buckwheat where the courgettes, aubergines and bell peppers are going to be planted, the rest of the buckwheat I will leave. When the plants get bigger I will make some more space for the plants by chopping and dropping more buckwheat. My hope is that the buckwheat will flower by the time the summer crops are also flowering. Buckwheat attracts a lot of small insects that are good for pollination and also for pest control. The latter is why I use buckwheat in this case.


    Different green manures that you can use.

    Different green manures have different characteristics. Which one you chose depends on the effect you want to achieve.

    I use oats for a better soil structure because it makes a lot of tiny roots. Incarnate clover and fodder fava beans for the nitrogen fixing. Serradella for a good ground cover and buckwheat for attracting useful insects.

    You can use them all for chop and drop. You can also use vegetables like mustard or spinach for chop and drop. There is a german companion planting system that starts with seeding spinach in rows that are 50 cm apart. Between the spinach other crops are sown or planted. Some spinach is consumed, the rest is used for chop and drop between the vegetables.

    I have used it for a while when we were still living in Holland. There it worked very well. Here in the south of Portugal the spinach does not want to grow so well so I use different systems now.


    More ways to use chop and drop

    There are more ways to use chop and drop. As we go through the year I will describe some more ways to use this method. In the summer when the sun is battering the soil I use green manure to protect seedlings. When the green manure gets too big and the seedlings are small strong plants, I use the chop and drop as a way of mulching the small plants with the green manure chop. In spring I plant the seedlings directly in the fava bean rows. Keep an eye on my blogs, there will be more information on this topic.

    Pin it for later:

    Chop and drop