Author: Monique Volkers

  • Two ways of making compost

    Two ways of making compost

    This blog teaches you two ways of making compost. It gives a detailed description of how to make quick and slow compost.  What you need, how much you need and what type of construction you need.


    What you basically need to make a compost heap is three types of organic material: brown material, green material and manure. Brown materials are dried weeds, hay, straw or dried or rotting leaves; green materials are fresh greens, herbs or grass; manure which can be from any animal, even from humans.

    If you want to use humananure (from a compost toilet) for composting make sure it is pre-composted on its own for 9 month. This way you get rid of all the pathogens that can be in human faces, which can make you ill.

    You can also mix your kitchen scabs into the compost heap. They will probably be some kind of mix of the first two, brown and green materials. Other things we mix into the compost are a bit of lime, wood ash and some clay. If your soil has clay, you can also add a bit of soil. I use the special clay from the cat litter box, the one that makes the lumps. I use this because our soil has very little clay. What you exactly use depends on what you have on your site. So have a good look around to find what you have available, you will need quite a bit of everything.

    How much compost do you need for your garden

    If your compost is well made and mature you can not use too much. When you notice that plants in your garden get signs of over fertilisation It usually means the compost was not mature. So you might have to adapt the process.

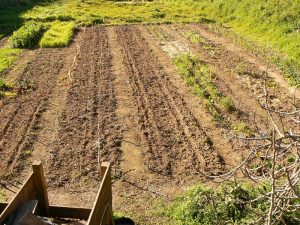
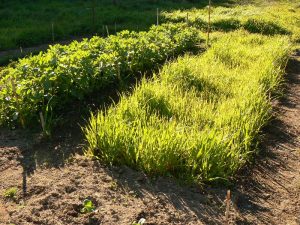
    Ideal is to put a layer of 2 cm of compost on your garden beds every year. In our 400 m² vegetable garden which is organised in 1.20 m beds and 60 cm paths we need about 11 m³ compost to have this layer of two cm in the whole garden.

    Some things, like potatoes we do not give compost but fresh manure. That saves us making some m³ of  compost. It is worthwhile to keep a compost plan of your garden so you know which part had compost when. It is easy to lose track because usually you can not make all the compost at once, unless you have a small garden.

    Since you might not have all the material at hand for making one heap at once it is not a problem to collect things first in separate heaps. Only the green stuff needs to be fresh, but the collected older green stuff can be used as brown stuff.

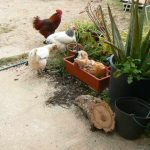
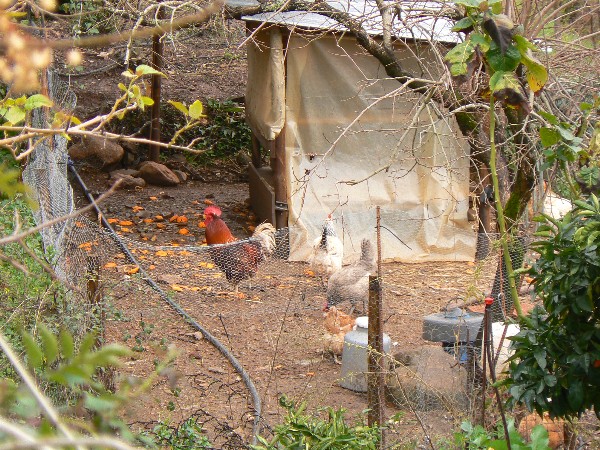
    We make two types of compost, one quick compost that takes 5 weeks to be ready and a slow compost that takes 6 month. Here are two ways of making compost described. There are some other ways which I find also interesting. Making compost with chickens is one of them. We do not have this system (yet), but Geoff Lawton did some pretty nice experiments with this method. Here is the video. There is also one method that provides compost in 18 days, interesting, but I find it a lot of turning in a short time. Besides this, you need to stick to a tight schedule which can be problematic in our case, but might not be in yours. Here is an article about this method.

    Quick compost

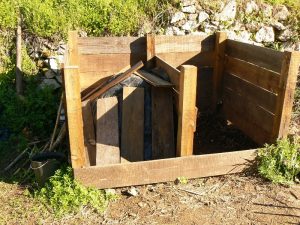
    Construction and site of the quick composting heap.

    For the quick compost we constructed a frame with two compartments, each one has a volume of a cubic meter. The frame is made of old planks, we brushed on a layer of line seed oil to slow down the rotting of the wood a bit. It will be eaten in the end, we know. That is okay for us, we will make a new one every so many years.

    I did not use branches or bamboo because my fork, I turn the compost with always gets stuck between the branches, this way I ruin the construction very fast. So sheets or planks work better for me. Just use anything you like as a material. Important is that the heap stays together and does not wash or blow away. You will have to make two compartments next to each other so it is easy to scoop the heap from one to the other.

    Around the heap I have some extra space for collecting material that goes into the next heap. I also make some space where I can put things like sunflower and cabbage branches so they can pre compost and become soft before they go into the main heap.

    Building up the compost.

    So I start building a m³ of compost which in the end this will shrink to about ⅓  of a m³ . I build up the composting heap by making layers of brown and green material and manure. I start with a layer of brown material then add a layer of green material and then a layer of manure. These layers are about 8 cm thick.  After that I sprinkle a bit of lime, clay and wood ash on top. I repeat this until the material is finished.

    In total I use 3 full big bags of manure, the 30 kg bags where you buy the animal fodder in. Then I use two equal parts of brown and green material in total.

    What exactly you put in depends on what you have, but what you put in will influence the end result. When you put in nitrogen rich material this will make your compost richer, therefor we like to put in green material that is rich in nitrogen, for instance lupines. I use lupins in the vegetable garden, a nitrogen fixer, as a green manure and when they get too big (not too big, then they become woody) I pull them out and put them in the compost heap.  The same for the brown material, in autumn I like to use the Alder tree leaves, another nitrogen fixer. So you could if you wish, grow stuff in the garden that is good for the compost heap. Comfrey is an example. We do not have it because it does not grow well in our climate zone, but it might grow in yours.

    Balancing the heap.

    The lime that is added balances the pH, it needs just a view hands, not too much. You do not want an alkaline compost heap since most plants will not like that. Cabbages, which do like lime can have some more when you plant it. Potash comes with the wood ash, I think I add about halve a 10 l  bucket of wood ash, again not too much. Another thing you could add is urine, it contains valuable phosphorus. Wee in a bucket dilute it 1 to 8 and you can pour it in and over the compost heap You can also use it to fertilize any plant you like. It is incredibly potent. What the clay does is a bit of a mystery to me, but it really improved the quality of the compost.

    There are also some things that you do not want in your compost heap. When you add grass cuttings be careful to spread them through the heap so they do not form lumps that are not digestible. Make sure all the material is soft. If you put in branches or woody herb or cabbage stems turning the compost heap will be a nightmare. The woody bits intertwine. You want to be able to scoop out the heap little by little and not in big pieces that are to heavy because of the intertwined woody bits.

    Adding water.

    Now comes the crux of the compost making: the amount of water you need to add. This is not easy at all. It is important in order to get the right circumstances for an aerobic digestion in the heap. Too much water will suffocate the microorganisms you want in your heap and favour the once that you do not want. When the the heap is to dry it does not work at all.

    It depends on the weather conditions and on the material you are using and how humid this material is. Grass, dry weeds, hay and straw use quite a bit of water in the composting process.

    The best is to add water while you are building up the heap, to make sure that the water is also in the heap.  Adding the right amount of water is something you will have to find out by practising. And even after a lot of practice it can still go wrong. You simply do not know all the weather conditions ahead. In dry weather you might give it a good go and then the weather changes and the heap turns out too wet….

    This is how I test whether the amount of water was right or not: when the soil sticks together like a cream it was to wet, when there are ants in the heap it was too dry. The end result should be smelling like forest soil. If it does you know the amount of water was good.

    When it rains a lot I cover the heap with some plastic against too much water, when it is too hot I cover it too, so the water doesn’t evaporate. You will have to play around with it for a while to get it right.

    Turning the heap.

    I leave the heap for a week, because I go to the garden once a week. It works good for me and for the compost. After a week I scoop the the layered heap into the other compartment so everything gets mixed. During 5 weeks I repeat this every week and then I sift and use the compost.

    If you want to do this more precise you can do the following. Buy a compost thermometer. This is a 40 cm long thermometer that you can push into the heap to measure the temperature inside the heap. After you have made the layered heap it starts heating up inside. It takes a day or two but then it really goes up. As soon as the temperature hits 55°C you turn the heap. Then wait until the heap warms up again and when it hits 55°C, turn it again until it stops doing that, which should be 3 or 4 times.

    Compost making is all about feeding microorganisms. Because you create an optimal situation for microorganisms to grow, which is what you do. When you build up your heap in layers, you are practically setting the table for them. Once your heap is set up the feast begins, and this creates the heat in the heap, just like a party. But it can also overheat, just like a party. That is why you stop the heap from heating up further by turning it in time. This way you keep the optimal circumstances for the microorganisms to grow.

    The active compost that you are making contains all the ingredients that the soil in the garden will need to feed your plants. It contains many microorganisms that help to transform the minerals and materials in the garden soil  into edible portions for the plants. That is why good compost works so well. You are not just spreading homemade soil, you are spreading live. I think that is amazing.

    Some compost makers think that heating up the heap to 55°C is not enough. It should be at least 60°C they say. At 60°C all the weed seeds that are still alive in the heap will be killed, so you will not spread weeds with your compost. This is hard to achieve if you do not have a professional installation. I think it is questionable too. I Weed my garden any way and I have not noticed an extra amount of weeds because I am spreading my compost. If you want to raise seedlings you can pasteurize the compost before you use it.

    Sifting the compost

    Not everybody sifts the compost since it a quite a bit more work, but I found out that it works much better in the garden. For this I made a sieve from some small square planks and a piece of rabbit wire. I make it so it fits on a wheel barrel, so I can easily bring the sifted compost to the beds. The pieces that do not pass the sieve, I through into the next compost heap I am making.

    Sometimes I make an exception, that is when I see that the earth is fiberless and makes a crust. The fibers stop the crust from forming. v

    Slow compost heap.

    Compared to the quick compost making this is a lot less work, but it takes longer too. It is basically the same thing but you just leave the layered heap untouched for halve a year. This is how we use this method.

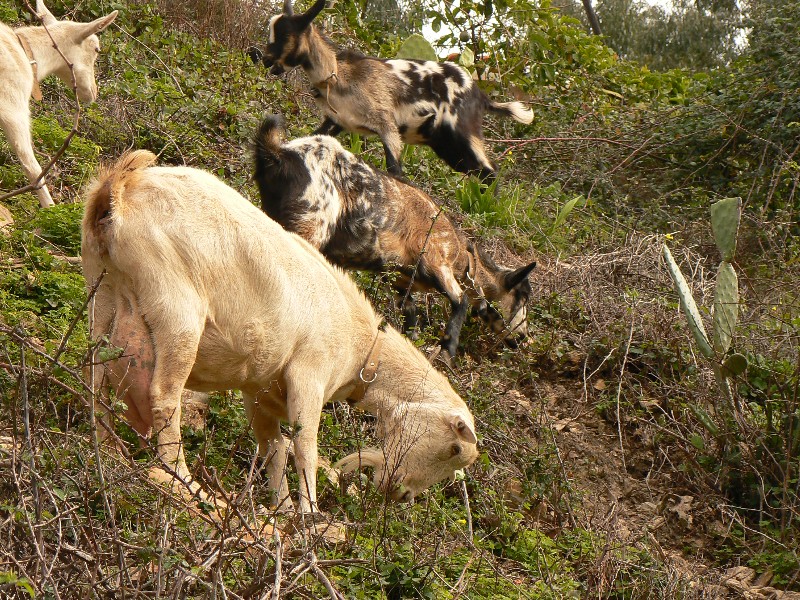
    In our goat place we use a system that is called deep litter. We clear out the goat place twice a year. After it has been cleared out, a thick layer of straw is put back on the floor of the goat place, when this layer is starting to soil we put in another layer. We keep the top layer fresh. The layers below the top layer start composting, it is always nice and warm in the goat place.

    When we clear out the goats place we already have the brown material and manure mixed. And it is already pre composted. So we pile the compost heap in layers of stuff from the goat place and with green material. We make sure the composting heap has enough water, this process needs more water than the other, I am not sure why. Maybe because of the straw that is in the heap, but that is just a guess.

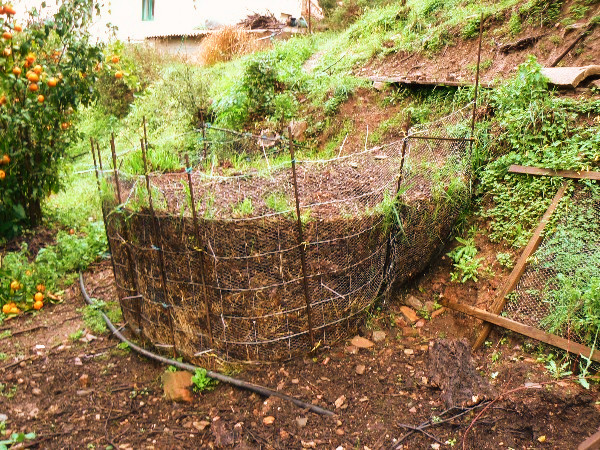
    The construction of the slow composting heap.

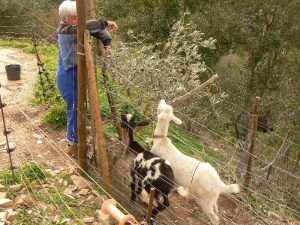
    We support the pile with a construction as you can see in the picture above. The terras above the heap is used to pour the goats place litter into the construction. The construction is made of concrete reinforcement iron rods hammered in the ground in a semicircle. Then we fix ( with tight ribs) a piece of goat fencing in the inside, and on the inside of the goat fencing we fix a piece of rabbit wire. This way the compost stays inside.

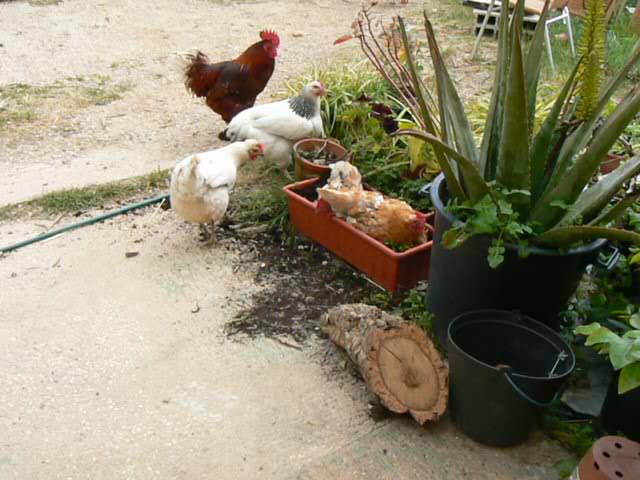
    We make sure the whole thing is fixed to the terrace bank so the chickens will not be able to get into the sides of the heap. If they could they would undermine the whole heap. It is okay if they roam around at the top since the heap is well contained. Again like with the other heap, you can use what you have available, for us this is a cheap well working construction.

    Building up the heap.

    This is how we build up this heap. One person stands in the construction to organise the layers. Two or three people empty the goat place and carry it to the compost heap.

    The amount of water we have to add depends a lot on the weather conditions. But by experience we know it uses a lot. We spray water on almost every second layer, with a garden hose. The layers are thicker then in the quick composting heap, about 10-15 cm. After the heap is build up we leave the heap open since we discovered that works best. In summer we irrigated the compost heap together with the trees around it, without this irrigation it gets too dry.

    After halve a year we use the compost. It works as well as the quick compost. You can also sift this compost before use.

    Finally

    If you want to make your own composting heap you will have to translate what we do to your own circumstances. There is not a site the same. In cold climate zones the whole composting process stops in winter because it is too cold.  In tropical areas the process will be much faster and you might not need to pre compost branches and stems. You might also be better of using bamboo instead of wooden planks since the termites will eat the planks. In climate zone 9, where we are, we can make compost the whole year but we need to water the compost heap in summer. As long as you get the principle idea you can work it out.


    I hope you enjoyed my blog. Feel free to send me an email when you have any questions. We would love to help you. If you want to give some feedback be welcome especially when your experience is very different from ours. Making the perfect compost is a big debate after all.

    Would you like to follow our activities on the farm on a more daily basis, please follow our Terra do Milho facebook.

    Pin it for later:

    Two ways of making compost

  • How to sterilize bottles in the oven.

    How to sterilize bottles in the oven.

    Instead of buying bottles for bottling your home made juice, syrup, wine or whatever you have, it makes sense  to reuse old ones. How to sterilize bottles is described below. There is an easy way to sterilize them in the oven. It is very important to sterilize the bottles very well so all the effort that you have put into your homemade product is not in vain.

    This is how I do it:

    1  

    When I am using old wine bottles I first remove the bottle cover so I can clean the top of the bottle as well.

    2  

    After that I clean the inside with a brush. It is important that your use a brush that reaches all the way down into the bottle. I prefer the special bottle brushes that have a plume at the top. I use water and organic detergent. The detergent I spray on the brush not into the bottle because that way it is easier to flush the soap out of the bottle again, it will need a lot less water this way.

    3  

    After brushing the inside of the bottle I flush it and let it dry in a bottle rack, so all the water can drip out. I leave them in the rack until they are completely dry.

    4  

    After that they go into the preheated oven for 10 min at a temperature of 100 Celsius/212 Fahrenheit.

    When I have lids that go with the bottles I boil them in a bit of water. Some lids have a plastic seal that does not take the dry oven heat.

    That’s it, now the bottles are safe to use for your wonderful products.

    Pin it for later:


    sterilize bottles

  • Fire Protection Campaign in Portugal

    Fire Protection Campaign in Portugal

    2017 was a hot year for Portugal. It was a warm summer, but the real and dramatic heat came from an unbelievable amount of fires in the country.

    The 2017 Portugal’s fires have burnt 520,000 hectares of forest, representing nearly 60 percent of the total area burnt in the entire European Union in that year. The amount of land burnt in 2017 is the highest ever in Portuguese history. And tragically also with a lot of lives lost.
    About the cause of all this, there is a national debate going on. Accusing climate change, blaming the eucalyptus industry – 20% of the forest area is covered with the oleiferous easily burning eucalyptus – but during this debate the government has also decided to take measures straightaway, to avoid another dramatic year like the country just had.

    Mandatory rules and advices have been brought to the landowners in Portugal, and a deadline to follow these rules and advices: 15 march.
    It is the date and the rules that brought quite a bit of panic amongst the people in rural Portugal. A lot of rumours and myths have been spread the last weeks. Therefore it is maybe be handy and clarifying to put down here the government rules and advices, which you can also find in “The Portugal News” of 24 february.

    The mandatory rules:
    By 15 march all landowners should clear their land “within a range of 50 metres around every building on their property, whenever these lands are occupied by forest, shrubs or natural pastures
    With other types of use of your property in rural areas people have to create a clear range of at least 10 metres around every building.
    The space between treetops should be at least 4 metres.
    People should cut of side-branches of trees till 50% of the height of the tree, fruittrees excluded.
    Trees and bushes must be 5 metres away from any building on a rural property.
    Do not keep firewood or other inflammable material within this 5 metre zone.

    The government’s advices are:
    Non-inflammable pavement around your buildings
    Be choosy with inflammable vegetation.
    Have a good working hose-water system on your land.
    Keep your roof and gutters clean
    Protect your doors and windows with blinds, shutters or double glazing
    Keep the access to your house unobstructed
    Have a list of emergency-contacts

    A whole list of obligations and recommendations. How to deal with them? Is it possible to bring all of them into practice?
    A few issues keep coming back, when talking to people: what about the trees and what to do will all the pruning waste?
    About the trees: 50% of the stem has to be pruned up till a maximum of 4 metres (depending on the length of the tree of course). This rule doesn’t count for fruit-trees.

    Pruning-waste is often burnt. But there is also another option, which contributes to the richness of the soil as well: mulching. People with a piece of land would make a good decision, investing in a chipper. Chipped wood can be used as mulch on your land to keep the soil more moist and it suppresses the weeds to grow. Another advice we can give to all those people who work so hard now to clear there land: do the most necessary things before 15 march, but spread the rest of the clearing throughout the year. Then you will start the next year with a piece of land that already looks well-maintained when you are beginning. And last but not least: don’t prune and clear because you have to, but because you will be more safe when the hot dry summer comes.

    For more information:
    www.safecommunitiesportugal.com and their Facebookpage

    Pin it for later:

    Fire protection campaign in Portugal
    Clearing land
  • Using chickens in an orchard as Medfly pest control.

    Using chickens in an orchard as Medfly pest control.

    Using chickens in an orchard as Medfly pest control is an very effective way to get rid of the flies in an organic orchard. Chickens are very useful animals. They provide you with very nutritious eggs without a big effort and chicken meat is also good to eat. Apart from that you can also use them to prepare your vegetable garden; or to keep your orchard free of Mediterranean fruit flies or Medfly.


    These little flies breed during the hot month in the area where we live. They lay their eggs in fruit, there the eggs come out and the worm produces a kind of enzyme that destroys the fruit from the inside. It then looks mushy and brown and is not tasting good anymore. It can destroy your whole fruit harvest.

    In latin the small fly is called Ceratitis capitata. Since we are growing organic certified fruit we can and do not use chemical treatments and we have to search for more natural ways of pest control. So we looked into the life cycle of the fly and discovered that after the larvae have grown in the fruit the larva or sometimes the whole fruit drops on the ground, the larva becomes a fly and the fly destroys the next fruit by laying an egg in it.With chickens you can interrupt the cycle from taking place. We have very positive experiences with using chickens.

    The first fruit that is endangered is the St.Antonio plum it ripens around St. Antonio’s day which is the 13th of June. It depends a bit on the weather whether there are just a few or many flies. As soon as the plums start to ripen we put our electric chicken fence around the terrace where the plum trees are, put our portable chicken house under the trees and move some chickens in, mostly 5  or 6. The chickens love to eat the larvae,  they even pick them out of the fallen fruit and prevent the larvae from becoming a fly.

    After the plums the first apples start ripening, so we move the chickens to the apple terrace. By the time the pears are ripening the flies are almost gone. They do not have a chance.

    Last year we had the chickens free ranching and we did not have a single infested fruit. The free ranching of the chickens however can be problematic if you have non walled terraces like we do. The chickens can destroy the terrace banks, so we prefer to fence them in.

    Pin it for later:

    chickens in an orchard as Medfly pest control

  • Prepare your vegetable garden with chickens.

    Prepare your vegetable garden with chickens.

    Did you know you can prepare your vegetable garden with chickens? Chickens can help you in your garden and orchard in many ways. We use them as our little helpers. One of the things we use chickens for is to prepare the vegetable garden.


    A month before we start  the garden, we fence in the area where we want to make the vegetable garden. We use an electric chicken fence with a portable fence charger with a battery feed. It has to be powerful enough to charge the whole grid of the fence. It not only keeps the chickens in but also keeps the animals that want to eat the chickens out.

    The chickens will eat all the weeds and weed seeds that are on the plot. Which will make weed control in the garden very easy at the beginning.

    For 100 m² you will need about 5 chickens for a month to do the job. They will need a small shelter where they can roost and a place where they can lay their eggs, fresh water and some extra food. We made an A-frame chicken house with handles so we could carry it around on our steep land. For the future I will make one from lighter material that can be moved easily.

    On the plots where we have vegetables every year I want to make permanent chicken houses, so we only need to move the chickens. We move the chickens during the night in the dark when they are not so active. We put three chickens in a jute bag, the once that can carry 30 kg of grain. They stay very quiet in the bag and three chickens are easy to carry. If you think that is still to heavy you just put in two chickens. Sometimes we had a group of chickens that would just follow the chicken house wherever it went, but unfortunately this did not work with all the chickens that we had.

    At the end of the month I start bringing some extra compost to the plot. I just make small piles here and there, the chickens will spread it and clear it from weed seeds that survived the compost making process. After that we simply take the fence away and use a rotavator to soften up the earth because the little chicken’s feet make a dense crust at the service of the soil we have here. This might be different with the type of soil you have. Then you can go ahead and start organizing your vegetable garden and start seeding and planting.

    Pin for later:

    Prepare your vegetable garden with chickens

  • Farming story: Goats, Milk and Cheese…

    Farming story: Goats, Milk and Cheese…

    In the morning, when we get up I see our goat Bianca through the window. She is looking though the window into our sleeping room, thinking: “maybe they are up and bring me some food”… So the morning starts; and our little farming story. After breakfast I go down to the goats to feed and milk them.

    Goat
    Our goat Bianca on our terrace.

    Feeding our goats

    Goats need enough nutrients to give a good amount of milk. In the past, and still in some regions of this world, goats used and are kept very low profile. They are not fed at all, they were just herded in sometimes poor landscapes. The production of milk was very low and the loss of animals was high.

    Although some people still keep their goats in the old traditional way, nowadays goats are mostly kept for a high milk production. The Dutch white milking goat who descents from the Saanen goat, gives up to 4 liters of milk per goat per day. These goats are kept inside in large barns and they are fed special food high in nutreints. We want  to stay somewhat in the middle.

    Our Bianca gives us about 2 liters of milk a day. She gets 1800 grams of a mixture of Luzern, barley, oats, fodder broad beans and sunflower seeds a day. All our goats get the same mixture but the amount is in accordance with their weight and situation. The situation can be that they are pregnant, giving milk or non of the two. Goats that give milk need to eat the most. If you want to read more about what to feed goats check or blog: ‘What do goats eat?

    Free ranging goats

    Our goats have about a hectare of land where they can walk freely. So they can choose what they want to eat. Most of the year they stay in their area where they can eat what grows inside and where we feed them cuttings from the trees and bushes that we have to clear or prune.

    During the winter month (January and February) we take them through the orchard for two hours a day, which they enjoy a lot. This also ads valuable nutrients to their diet. When the early apples start to bloom we have to stop otherwise they will eat the flowers and we will be without apples. You can reed more in our blog ‘Clearing Land With Goats’.


    Goat kid
    Goat kid

    Milking and making cheese

    We build a shelter for the goats where they can walk in and out during the day.  Attached to the shelter is our milking parlour where the goats are milked twice a day, every morning and evening.

    After milking the milk gets pasteurised. After it has cooled down it goes into the fridge until we have enough milk to make a batch of cheese.

    Most of the time I make fresh cheese but when I have too much milk I make cured cheese, like Caerphilly, Gouda or Romano.

    The milk of our goats does not taste very goaty when it is pasteurised straight away. It is also very creamy, delicious for making cheese with.

    Cheese making goes way back into the European history, long before the romans. Nobody really knows when and where it started, but I can imagine that it was a good way to deal with the not so tasty sour milk. Turn the sour stuff in something useful with a good taste.

    Fresh cheese Terra do Milho
    Fresh cheese from Terra do Milho

    Eating cheese back in the days was not without danger. People had no clue about hygiene, things sometimes got out of hand and people got poisoned. Working clean really makes some sense.

    Why pasteurizing is important

    Another thing that people sometimes forget is that pasteurising milk has a purpose. When Louis Pasteur invented pasteurisation he solved a problem. People got really ill from drinking cow’s milk, it was a cause of tuberculosis. You can also get a nasty thing from raw goats milk, it is called Brucellosis and it feels like a terrible flew that takes forever. Luckily our goats are tested every year, so we know they don’t have it and their raw milk is safe. We also intent to use our own bucks for mating the ladies, which reduces the risk of infection. Pasteurising even eliminates the risk further, also I mainly use it because of the soft taste the cheese gets. Eating matured cheese was and is never a risk in this case, the diseases disappear when the cheese is maturing.

    Blue cheese from Terra do Milho
    Making cured blue cheese.

    I had never milked a goat, nor made cheese before

    When we bought our first two goats I never had milked a goat and I never made cheese myself. Apart from some paneer, which is more like cooked milk with lemon and then drained through a cloth. No, I mean real cheese making. After reading a very good Dutch book on cheese making, ‘Kaas je kaasje’ I just started making cheese. It was surprisingly easy and before I new I invented my own type of fresh cheese, which I still make today.

    The little booklet explains the principles of cheese making very well. It encouraging you to invent your own cheese. For making the matured cheeses I adjust cows milk recipes, this works fine. If you want to know more of how I make fresh cheese check this recipe.  I have it all in a document with some pictures which I can send to you.

    Pin it for later:

    Goats, goatsmilk, cheese
    Farming story…
  • Our vegetable garden in Monchique

    Our vegetable garden in Monchique

    Garden layout organic garden
    Garden layout

    We live about 6 km from the town of Monchique , which is a pittoresk town in the hinterlands of the Algarve. In the town there are many terraces where people keep their vegetable gardens, mostly from people who live in town.

    Our friends Anna and Carlos, who live in town decided to share  their terraces with people from the Monchique Transition group.  As one of the founders of this group we joint in.

    We use one of the plots that was available, this plot is about 400 m² wide. Our layout is very simple and straight forward since we use a drip irrigation system that only works when laid out straight. There are 8 beds of 21 m  long and 1.20 m wide. Two beds with asparagus, which is a perennial (for 12 years), and 6 beds for crop rotation.  The planting schedule is carefully planed.

    composter
    Composter with compost in its way.

    Compost making is key in an organic garden

    In the garden the vegetables are grown organically. Hence compost making is a key activity in our garden. To make compost we build a composter ourselves. In the composter we build up a compost heap from green manure, weeds without seeds and manure from our goats. We mix the goat manure with straw. Some times we use composted humanure as well. Every week we turn the compost into the other compartment of the compost maker. After five weeks the compost is ready to use in the garden. To read more about making compost check our blog: ‘Two ways of making compost’.

    In the picture below you can see the broad beans growing on the compost, they are doing very well.

    Green manure
    Oats grass as green menure

    Always cover the earth.

    To make sure that the soil is never naked we use oats and lupins as a green manure. Green manure improves the quality of the soil. It covers the soil so it does not dry in the battering sun, as a result micro-organisms and small useful insects have a better chance to survive. The green manure that we removere can be used in the compost heap to make compost. Lupines are nitrogen rich, which will enrich the compost. When you dig in the green manure when it is still young it will ad fibers to the soil that will become humus. This prevents the soil from making a crust and it will keep nutrients in the soil. If you want to stay updated subscribe to our blog news or follow us on Facebook.


    Pin it for later:

    Gardening
    An introduction to our garden. Gardening for starters.
  • Clearing land with goats.

    Clearing land with goats.

    Every year in January and February we walk the goats over our terraced orchard. Yes! Right though our orchard. Clearing land with goats and having fruittrees at the same time is very possible.

    We have about 80 fruittrees on our terraced land. In summer the trees are irrigated and nothing much grows under the trees. But in during the winter month weeds start to grow and by January – February there is a lush layer of weeds growing. Clearing our land with goats saves us quite a bit of work. The secret is that most fruit trees do not have leaves at this time of  the year. That is why the goats are not interested in the trees at all; however, they do love the weeds amongst and under the trees. You still need to watch them because you never know with goats. They can suddenly do crazy things.

    land clearing - goats
    Feeding the goats with cuttings

    Clearing the terraces is important because it helps the fruit trees to grow. It also reduces the risk of wildfires on our land. In this way the goats help us, and we help the goats have a great healthy meal. There is a wide variation of herbs growing under the trees, by eating these the goats will be able to balance their diet. See more about this topic in our blog ‘What do goats eat’.

    When the goats are back in their pasture we also give them the greens from our own clearing activities. They will eat the leaves from the branches, which makes it easier for us to put it in the mulching machine.

    Pin it for later:

    Clearing with goats
    Clearing your Orchard with goats…