Author: Monique Volkers

  • Fava beans with rice and eggs

    Fava beans with rice and eggs

    In the south of Portugal this is the time of the fava beans. So now we are eating them almost every day.  That is okay as long as we have enough recipes to use.

    When we don’t like them any more I dry the rest for later in the year.

    I like recipes that use what we have available. Here is one for fava beans.

    Ingredients:
    Brown rice
    Fava beans
    Onions
    Butter
    Sugar
    Salt
    Curcuma
    Pepper
    Cajun spice
    Mild Curry powder
    Optional: Whey
    Eggs
    Action:

    Put the brown rice in a pot with a finger pad of water on top. Ad a bit of Curcuma pepper and salt. Place  the pot on the stove and cook it until it’s done. Put it in your bed to keep it warm. A bed is a good place to keep rice warm. Make sure you wrap a towel around so your bed does not get sticky…

    Chop the onions in small squares. Fry this in a pan with some butter, sugar, salt, mild curry powder and caramelise the onions. Than ad some cajun spices, tomato ketchup and if you have some sweet soy sauce and a glass of water.
    Let it simmer for 4 minutes.
    In the mean time boil the fava beans in water (or whey, if you have) for 5 minutes. When cooked ad them to the sauce.
    Mix everything and serve with fresh boiled eggs on top.
    Enjoy your meal!
    fava beans recipe
  • Preparing for your homestead.

    Preparing for your homestead.

    Looking at all these beautiful blogs about homesteading you might think is the most beautiful way to spend your life. We do enjoy our live here on our homestead, but it is not what it seems to be. There is hardships and sad stories to tell as well.


    If you really want to start a homestead yourself, please check these other stories as well. It will give you a far better picture of what it is about. This way you will be much better prepared when you start.

    There are a view brave homesteaders that wrote confessions about their homesteading. I enjoyed reading them very much. It is all very recognisable. These stories give a glimpse of what homesteading and having a homestead truly means. So you really know what it is about and you can make the right choices for yourself.


    Nice confessions.

    Here are some I really liked that you can look into later.

    10 Confessions from a modern Homesteader
    Confessions of an Ordinary Everyday Mom…Who Happens to be a Prepper
    Solemn Confession of a Rookie Off-Grid Homesteader

    In this blog Alyssa describes very well how they thought it was much different than they thought. Don’t worry they are still building up their homestead as you can see on their blog.

    http:///purelivingforlife.com

    You don’t need to go radical

    There are many ways you can improve your lifestyle and live more sustainable. One is not necessarily better than the other. The shift to sustainable living does not need to be super radical. You can sometimes even do more than you think where you are. Or by just moving to another neighbourhood in the same area or town. Going out in the wild does not always mean that you can live more sustainable.

    It is not as black and white as it seems. Here on the homestead we use things that you would use in a town too. Like plastic bags(although I do not like them), a diesel car, electricity, T-shirts…We don’t have the money to always buy organic products or to buy solar panels. Being out here in nature does not mean you can do everything perfect.

    Yes, you can do what we did and move to another country, with another climate. Out into the ‘wild’. To start your own small or big farm. However It is far better to be prepared for the real thing  than to follow a romantic idea.

    Here are some things to consider.


    Romantic Mother Nature and her whims

    Mother Nature is often depicted as a Gaia that provides everything that you need. Living in a city like we were, not really confronted with her whims, you might be deceived by this picture of Gaia as we were.

    Turns out that Mother nature is not the big protecting mama that is going to feed you whenever you open your mouth to tell her that you are hungry. No, in real she is going to smack your bum really hard when you are lazy. She is going to teach you the hard way that you have to work hard to get your food. You have to follow her principles, she will make you miserable if you don’t.

    Mother nature will dictate your agenda. Yes, pretty much like a dictator. Here down south in Portugal the climate is very friendly to us humans. You can grow things the whole year around. When you work hard, the work will be rewarded. There will be plenty. But more up north it can be quite different. When you miss a crop, you have missed it and it can not be replaced with another. You will miss the food.

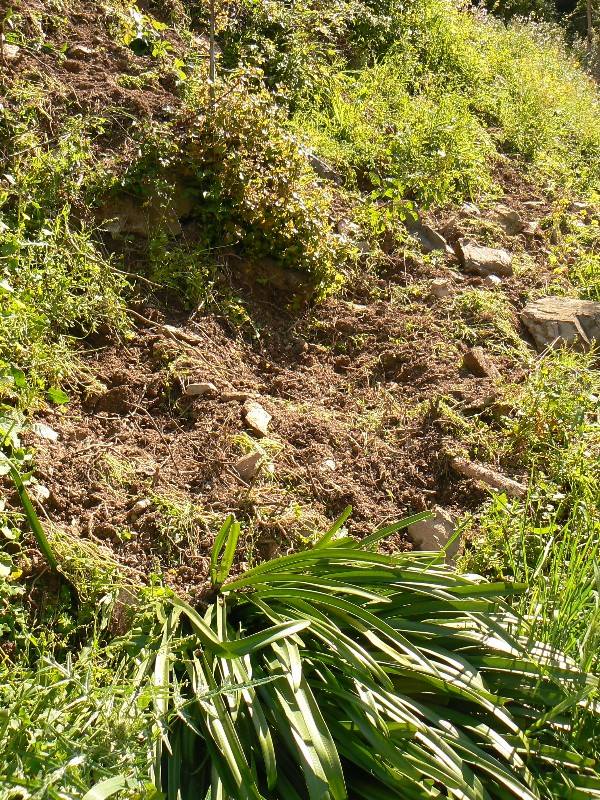
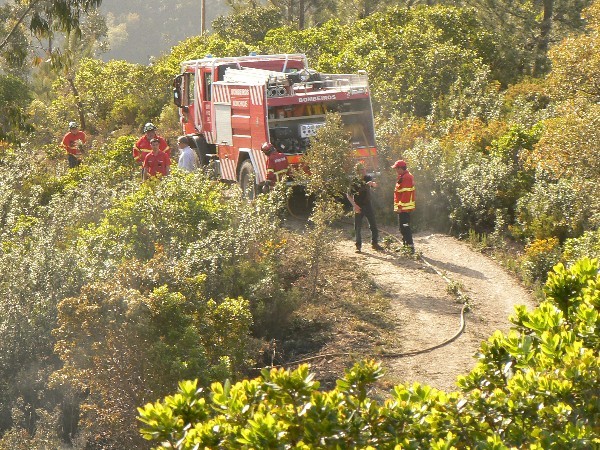
    Mother nature has more whims. There are storms that blow your greenhouse away that you had so carefully made out of plastic bottles. The wildfires that she brings (maybe supported by human action) destroy your food forest. It took you years to build up the small ecosystem or guilt. You feel you need to protect yourself against these energies, which puts even more pressure on your agenda and budget.

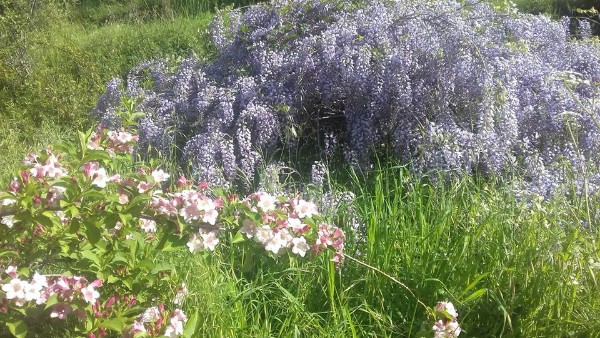
    There are a lot of romantic stories about Mother Nature. She is beautiful indeed, but not easy going. As most permaculture people will know, there is a lot to learn from her to our advantage. But cruelty and destruction are also part of the play. Be prepared.

    (psssst: using a proper Permaculture design can save a lot of sorrow.)


    Grow your own food: Gardening skills and deceiving pictures.

    You can gain by making sure your garden skills are okay before you start your homestead. Get yourself an allotment and practice, or make a corner in your garden. Start easy by buying plants and some organic manure of some sort. Take it from there and slowly use more advanced methods. It is not as easy as it looks.

    Pretty much like learning how to swim. You see those people swimming in the pool and think: Wow, that looks easy. You jump in, like I did as a kid, and guess what, I sank…I am a good swimmer now though.

    Don’t forget that most of the pictures you see with the fancy ways and walls to grow plants in and on, are set up. For the picture big lettuces are put into the bottles to make it look nice. You can see this when you look carefully, they all have exactly the same size. Now, that is suspicious. Don’t be deceived. You can grow plants that way, but you do need to know what comes with it. Also we bloggers have the tendency to clear our garden before taking a picture. Or, like I do, we will take the picture so you do not see the messy parts.


    Principles: Selling surplus?

    Using permaculture principles on the farm we produce for our own consumption first. This reduces our ecological footprint a lot, since the food does not need fuel to be transported to us. It is already there. We also know what we are eating. So to us that makes sense. After we have filled our stomages and our canning jars, we can sell our surplus. Can we?

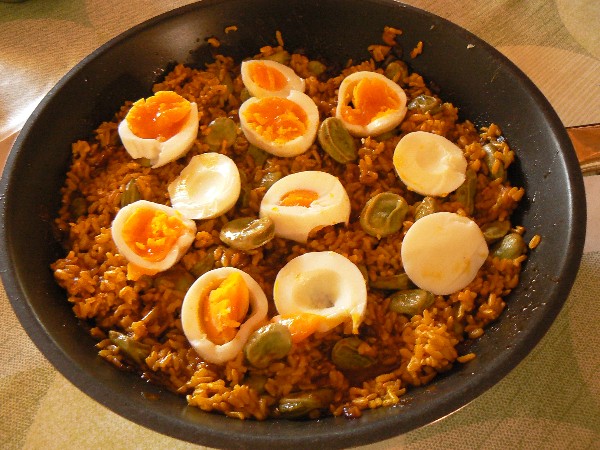
    Since we are living in a rural area where everybody grows pretty much the same stuff it’s not so easy. So selling surplus at the local market sometimes does not work. When you have fava beans everybody has them. People will not buy our fava beans because the neighbours share them for free. That is a good principle too. But it does not bring in an income for us.

    We are happy that we can sell our organic fruit to a colleague who sells it in the nearest big town. When this town would not be there we would not be able to sell our fruit. So selling surplus sounds fair in theory but is not as easy as the principle suggests.

    What I want to say here is that some principles sound really easy when read from a piece of paper. Put into practice is quite a different story.


    How much money does it really cost?

    The budget is another think to carefully think about. Building a new house costs money. You can use what you have on your land to a certain extent. But what about the tools you need? The nails, the screws, the light switches, the solar panels, the filling materials? In the end you will save some money on the wood you did not have to buy. But when the wood you can buy is cheap than you might not save at all. Because you will need extra material to turn your logs into proper planks. You will need material to make a space where your planks can dry etc. So building a house however way you do it, costs money.

    Unless you want to go very radical and live in a log hut. But that is rough. You need to be able to shoot your own rabbits…I mean there are a lot of skills needed for that lifestyle.

    I think It is good to think the costs through completely.

    We did not. We had two good incomes before we went to Portugal and build the place up with the money we had spare. That worked fine until we went back to one income and Lehman brothers filed for bankruptcy, which led to a world wide crisis 2 years later. This was the moment that we started.

    Coming from a comfortable situation we just didn’t imagine things were going to be so tough. Our budget shrank to one fifth of what we used to have and we had a massive project ahead. We survived, managed to build up our homestead, still not having a bathroom in our house, but who cares. There are two bathrooms in the tourist accommodations that we use in winter. In the summer we use the garden hose behind the house. We have a compost toilet in the house so we do not need to sit in the rain. Many tears and a lot of sweat later we made it to the other side. I could think of wiser ways to get there.


    Using raw material is time consuming.

    Also using material that you have on the land is mostly very time consuming. It can be very hard work too. Sometimes much more work than earning money and buying material.

    When you buy prepared material a lot of effort is already put into the material to make it ready for use. Because this is done in large numbers it can be done cheaper than you can do it yourself. It is all a matter of calculation.

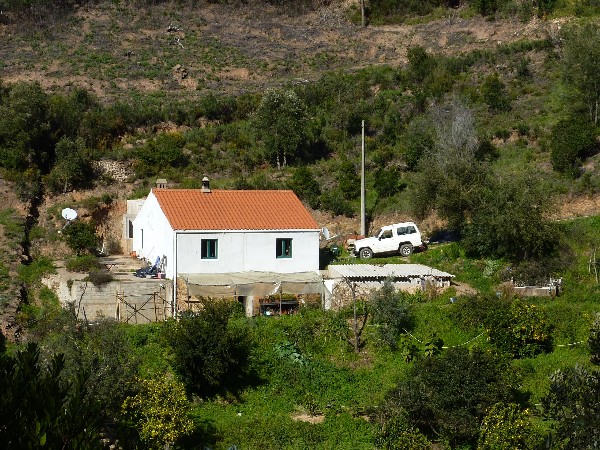
    Our site is very steep. Some hardliners who have joined our building projects had critics on the fact that we use cement.

    Building projects need a lot of preparation. The preparations are time consuming, boring and sometimes costly. So preparations are very often not presented in courses where you can learn about using cob, straw bales or logs.

    Dragging stuff down on our land without a donkey is hard work. And with a donkey it would take ages. So you go for the lighter materials, in this case part of it being cement. Again don’t be deceived by the romantic picture.


    Making money from the homestead.

    Making money with a homestead and building it up in one go is also not so easy. There are many ways to make money with a homestead but there are only 24 hours in a day. From those 24 hours you need to sleep and eat. If you do not want to burn out you will need to rest as well. And remember you were still building a house. This needs to be thought through very carefully.

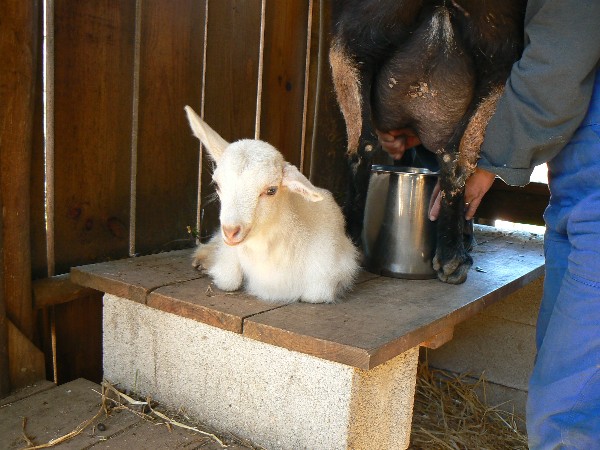
    For example: Here in Portugal a good tasty egg brings in 20 cents. A good chicken lays one egg a day. To have an income from eggs, say 800€ a month, how many chickens do you need? One chicken lay 30 eggs a month worth 6€ a month. Calculating losses, non laying chicken (because they are not laying yet) etc. in you will need 200 chickens. That is a lot for a small income. In Europe with 200 chickens you already need to meet a lot of regulations, which means you will have to invest. Will selling some eggs help? Yes, it does, if only to get your eggs for free. But it will not help you get all the investments you need for building up your place together.


    The other strategy is to do more than one thing. You do need to pick these things carefully though, because they will consume time. It is not possible to handle too many things. So what you pick needs to bring in a substantial amount, without having to do to big an investment. After all you will need the investment for your home. And just remember whatever you pick everything takes effort and time to get it started.

    In the coming blogs I will pay more detailed attention to the different topics described here. Connect with us or follow our Facebook and you will get notified by email or Facebook.

    PIN IT FOR LATER:

    Preparing a homestead


  • April 2018 farm updates

    April 2018 farm updates

    Wild boar on the land

    We found some really bad damages on the land from the wild boar. It seems that they are with quite a group. After some talk with the neighbours we know they are not only making havoc on our land, but in the whole neighborhood.

    Ideal would be if we could put an electric fence around our terraced orchard where the wild boar have been digging around. But we are too busy clearing the land at the moment. So we used some other means that are simpler to apply straight away.

    We dug out our old radios and placed them strategically so the wild boar would think there are humans around. Did a whee here and there in the field, so there was even the smell of the humans. They stayed away for awhile.  But then they changed their route to come into the orchard. After that we on our side changed the position of a radio. They have not been here since. Lets hope they will stay away for some time.

     Flowers April 2018

    Spring has started

    Most of the fruit trees blossom this month. It is a beautiful view to see the plums, apples and cherries trees in blossom. After that the trees started to get their fresh green leaves. Some of the trees like the alder trees are already full in their leaves.


    Not only the trees have flowers. There are many herbs having flowers as well. Giving our land a very colorful appearance.

    Since it has been raining a lot the herbs and grasses on the orchard terraces are growing like mad. It is about hip high now. It’s time to get the strimmer out and scythe the grass so we can then dry it for hey for the goats.

    Emma goat

    Goats and cheese making

    Last month April we had some guests at the goat front. Our friends goat and sheep were here for almost a month. I had never milked a sheep before so that was quite an experience. It also meant we had some extra milk at the end of the day. Which I used for making some hard cheeses and to try out another blue cheese recipe. We already tasted the Pecorino and the Caerphilly I made. It is always a joy to experience these pure cheese tastes. Especially when it’s your own homemade cheese.

    Emma our little goat that was born from our goat Kimberly, during the heavy storms we had the past months, is doing very well.

    Asparagus

    Vegetable garden and land clearing

    Because we were so busy land clearing it was very hard to keep up the garden. Still some things got planted and harvested. We mainly lived from asparagus, leek and Swiss chard greens. Now the onions can be added. Because the temperature stayed low for a long time and then went up very fast, the onions we planted in November are all going into flower. Now we need to harvested them at once. I hope the weather will be good enough to dry them outside. Good we have it dryer in the house too. When it keeps on raining we can still dry the onions. We can also pickle some.

    After the many oranges we had in February we are now having our grapefruit. There are also still many lemons on the trees. I still have to make a lot of lemonade..

    Office and blog

    On the office front we work very hard at the moment. The website has been updated were needed and still needs some more. Some high contend blogs have been added. Something we want to keep on doing. Our Facebook has been very active as well. Plenty, plenty to do and learn still.

    Fire on Terra do Milho

    Land on fire

    One afternoon I was working in town and suddenly got a phone call from a very worried Tom. He was telling me that he was burning wood from the land clearing and that the fire got out of hand. He had already called the Bombeiros (fire brigade). So I rushed home. At home he told me the story. In Portugal we have to call the fire brigade to ask for permission to make a fire, so he did. It seemed okay. But when he started his very tiny fire a small branch sparked on the land that he already had strimmed, out of reach from where he was. The twigs on the ground caught fire and it quickly spread up the mountain. Then he realised he couldn’t stop it and called the fire brigade. Some bushes were burned, but other than that nothing was destroyed by the fire. Thanks to our excellent fire brigade of Monchique. Chapeau! Later we saw on the site fogos.pt that there were many small fires in Portugal that day, over a hundred…


  • Making Mayonnaise in 2 minutes!

    Making Mayonnaise in 2 minutes!

    Making mayonnaise is much easier than you think. It hardly costs anything and you can make it exactly as you like it. Once you know how to make mayonnaise, you will never buy it again. And it only takes two minutes!

    I learned making mayonnaise from Claudia from Andalusia. She did a three month Erasmus exchange on our farm. She is a good cook.

    What you need

    making mayonnaise
    Sunflower oil, musterd, egg, lemon, a large high cup and a blender. Eggs and oil need to have the same temperature.

    Lets make mayonnaise

    Take the large high cup. And put in a whole egg

    making mayonniase
    Egg in large cup

    Add a tea spoon of musterd or more if you like and add the sunflower oil. The amount of the sunflower oil is about 4 times the volume of the egg. Some people like to add more to make more mayonnaise from one egg. I like the eggy taste of mayonnaise so I stick to 4 times the volume of the egg.

    Than put the blender right down to the bottom of the large cup so it covers the egg. This is very important!

    making mayonnaise
    Sunflower oil 4 times the volume of the egg. Blender is right doen on the egg.

    Turn on the blender and keep it at the bottom of the cup. Wait until you see the mayonnaise coming up.

    Making mayonnaise
    Wait until the mayonnaise comes up. It is the white stuff in the cup.

    Then very, very slowly pull the blender up. Until you hear that the blender plops out of the thick mayonnaise. There might still be some liquid oil above the mayonnaise. Put the blender on again and push it back in the mayonnaise and move it up and down until all the oil is gone.

    Making mayonnaise
    Very(!) slowly pul up the blender.

    Add some lemon or vinegar. I add a tablespoon. It depends on how sharp you want the mayonnaise to be.

    Now you can add some garlic for making aioli. Salt, pepper, or bell pepper powder, or curry powder. You can use your creativity now. Just add everything on top and mix it all in with the blender, pushing it up and down. Do not put these things in at the start, it will screw up the process, just put them in at the end.

    And there you go:

    making mayonnaise
    Have nice fries!


  • Chop and drop in the vegetable garden, how to do it.

    Chop and drop in the vegetable garden, how to do it.

    Chop and drop is a way to create good soil in your garden for growing vegetables. In our vegetable garden I use green manure to chop and drop. It is less work than making compost and when applied right, it can bring the same results.


    Masanobu Fukuoka’s way

    The way I use chop and drop is inspired on Masanobu Fukuoka’s way of growing a combination of white clover barley and rice. By closely observing what was happening in his field, he figured out a beautiful non tilling way of growing rice. He used white clover and barley straw to cover and mulch the soil so the rice had a better chance to grow in competition with the weeds. He also used ducks in the field to help, these animals would add manure to his system.

    It is this organic way of carefully observing and consciously playing around with mulching, chop and drop and manure that inspires me. It is the way I love to garden. Observe and play, observe again and continue until a system is working with just a little help.


    Forest soils’ secrets

    It is also inspired by the way a tree creates its own soil to grow in. It drops its leaves every fall and year after year the leaves builds up layers of good soil. Mushrooms and fungi help to digest the nutrients in the fallen leaves to food for the tree. It is a beautiful functioning system. I don’t know if you have ever tried forest soil in your garden. We have, it is incredibly potent. Fortunately there is no chop there, but a lot of drop…


    Chop and drop inspired on Fukuoka and forest soil

    What comes out of these two incredible systems is that you can use material that is right at hand. Seeding green manure is not such a heavy job, especially when your soil is already tender after having used chop and drop. It surely takes less effort than getting in forest soil or making compost.

    Another thing is both systems work with layers of organic material. Used consequently this approach will lead to a soil that is similar to a forest soil. It will be rich in humus. It will also create the right circumstances for fungi and bacteria that will make nutrients available for plants.

    And last but not least, it is a no till system. This is important. I don’t want to say that tilling is always bad. There are good, non deep, tilling systems in combination with green manure as well. But for this system it is important not to till. By doing so you would destroy this type system.

    What is also an advantage is that the soil is permanently covered. Again this creates the optimal circumstances for organisms like worms, bacteria and fungi to grow because it regulates the soils temperature and prevents the soil to get too dry.


    So what do I do with chop and drop in our garden? And why?

    Gardening, for me, is trying to create the right circumstances to grow vegetables. That means the circumstances in the soil have to be optimal for microorganisms and animals that improve the soil. Animals like toads and worms. That is why I am more focused on the condition of the soil than on the plants. I think that when the soil conditions are right and plants are seeded or planted at the right time in the season, they will grow well. Creating good functioning living soil is key to gardening.

    Using compost could be part of this system too. And in our case it is. The only problem is that I do not always have enough compost to use compost alone. It is hard work and time consuming too, to make it. Chop and drop is a bit less heavy work and it also brings humus into the ground when you keep on doing it layer after layer. This means I can sometimes skip the compost. Which means I can use less compost, which than will save me some work.

    When done at the right time you can even add layers of animal manure. You could combine this with the right crop rotation. So plants that can take fresh manure are planted in the plots where you have used fresh manure. This way you could completely skip the compost making. Or just make one yearly compost pile for the weeds.


    Covering the soil with the right thing.

    Because there is either plants growing or chop laying on the soil, the soil is always covered. This is also important for the microorganisms that are living in the soil.

    I do not use weeds for chop and drop. Some weeds grow to big and to woody. Others are too invasive. Grass is very competitive to the vegetables that I want to grow so I don’t want these either. Having said this, there are some weeds you can use for chop and drop, like chickweed. You do need to know what you are doing here, just using any weed can produce a lot of work, as I have seen in some veggie gardens.

    In stead of using weeds I chose one of my favourite green manures, like fodder fava beans. These plants grow very lush in our sandy soil garden. They produce a lot of green mass.

    Another reason I chose these fodder fava beans is because it is a nitrogen fixer. It will fix nitrogen in small blobs on the roots. By chopping the fava bean plants I leave the nitrogen blobs with the roots in the soil, so whatever grows after the fava beans can use the nitrogen that is fixed in these blobs.


    Seeding in rows.

    I seed the fodder Fava beans in rows. I have 2 reasons for seeding in rows. One is that I do know where they will grow and so I also know where I can do some weeding. I do some weeding in the first weeks when the green manure is growing so it gets a good go ahead of the weeds. At a certain point I stop weeding because the plants get lush and cover the ground and the weeds get no light to grow.

    The second reason I seed the fodder fava beans in rows is that I use drip irrigation. The fava beans are seeded along the line of the irrigation dripping pipes, so I am sure they get enough water.

    I carefully chop the fava beans when they are just flowering. Right above the root on the soil level. You can chop them earlier as well, but make sure you have enough green mass to cover the soil when you drop it. After chopping I organize the greens between the rows so it covers the soil like a mulch.


    The next layer of green manure

    It is the end of April now. After having chopped the fodder fava beans, in my summer crop plot, I will seed three rows of buckwheat in the fava bean mulch. This will be a second green manure before the summer crops go in. I do this because I need to keep the earth covered until the bell peppers, courgettes and eggplants are big enough to be planted.

    I will chop and drop the buckwheat where the courgettes, aubergines and bell peppers are going to be planted, the rest of the buckwheat I will leave. When the plants get bigger I will make some more space for the plants by chopping and dropping more buckwheat. My hope is that the buckwheat will flower by the time the summer crops are also flowering. Buckwheat attracts a lot of small insects that are good for pollination and also for pest control. The latter is why I use buckwheat in this case.


    Different green manures that you can use.

    Different green manures have different characteristics. Which one you chose depends on the effect you want to achieve.

    I use oats for a better soil structure because it makes a lot of tiny roots. Incarnate clover and fodder fava beans for the nitrogen fixing. Serradella for a good ground cover and buckwheat for attracting useful insects.

    You can use them all for chop and drop. You can also use vegetables like mustard or spinach for chop and drop. There is a german companion planting system that starts with seeding spinach in rows that are 50 cm apart. Between the spinach other crops are sown or planted. Some spinach is consumed, the rest is used for chop and drop between the vegetables.

    I have used it for a while when we were still living in Holland. There it worked very well. Here in the south of Portugal the spinach does not want to grow so well so I use different systems now.


    More ways to use chop and drop

    There are more ways to use chop and drop. As we go through the year I will describe some more ways to use this method. In the summer when the sun is battering the soil I use green manure to protect seedlings. When the green manure gets too big and the seedlings are small strong plants, I use the chop and drop as a way of mulching the small plants with the green manure chop. In spring I plant the seedlings directly in the fava bean rows. Keep an eye on my blogs, there will be more information on this topic.

    Pin it for later:

    Chop and drop

  • Body Condition Scoring for dairy goats, made easy.

    Body Condition Scoring for dairy goats, made easy.


    Why Body Condition Scoring?


    Body Condition Scoring (BCS) is a practical DIY tool to find out what fat and muscle reserves a goat has. It is a way to find out about the well being of a goat. Whether it gets enough nutrition and is living in the right conditions. It can be used as a feeding management tool.


    What is a Body Condition Scoring?


    It is a scoring scale with which you can visually score the condition of, in the case of this blog, a goat. There are BCS scales for horses and for pets as well. The BCS scale for goats goes from 1 to 5. Score 1 indicating an extreme deficiency of fat and muscle reserves and score 5 indicates an extreme accumulation of body fat.

    A score of two and below means the goat has insufficient reserves for a high level of production. When the score is approaching 5 there is a risk of pregnancy toxaemia, metabolic disease and difficulty kidding.

    For an ideal score you would stay between these extremes. Which for a goat in the prime of its life, would be somewhere between the score of 3-3,5. When the goat is in a good condition it means it will have less health problems and it will reduce the number of babies lost in the first week after they were born.


    Factors that will influence the goat’s body condition.


    There can be a variation of reasons why the score is in these extremes. Scores below 2 can indicate dental problems, parasites, cancers or infections. We are talking about extreme situations, so I think in case this happens to your goats it is time to contact a vet. As a good goat keeper you will probably be contacting a vet long before your goat hits this score.

    A goat that scores approaching 5 is likely be overfeeding or has a lack of exercise. Some dominant goats can steel almost all the food from the other goats and doing so get overweight.

    Here is a more detailed description of the factors that influence a BCS for a goat.

    Nutrition

    When high producing breeds are producing milk and are not fed according to the production level, they do not always reduce their productivity. Instead they would use their muscle and fat reserves to produce the milk.

    Even if goats have a rich pastor that has everything in it they need, they might still not eat what they need. Goats can be very picky in what they eat. So when they are  producing milk they might not adjust their habit in what they like to eat in the pastor. The result can be that they do not get the nutrients that they need and might have to be fed additionally.

    Level of production

    To keep an ideal score the level of production and the feeding schedule need to be in balance. If the high producing goats gets to little nutrients the score will go down. On the other hand goats that are fed on a high producing schedule and do not give the high production of milk will go up in the score. So the amount of feed and the production are very related.

    Stage of lactation and gestation

    In the first 60 days of lactation goats will lose 0,5-1  scores. This is during their peak of lactation. In general, after 150 days of lactation they will start gaining the los back to their normal level. This is a natural thing and does not need any worry. When conditions are ideal they will then keep their scoring until drying off Which is usually two month before kidding. During this last two month of the pregnancy it is desirable that  the goat maintains the same score.

    Sometimes goats are dried off but are milked through for a variation of reasons. When milking through the goat will naturally increase in scoring. For this reason some goat keepers milk their goats through only for 2 years. However new insights have shown that it does goats no harm if you milk them through for many years when you adjust the feeding to their scoring.

    When goats are kept dry for long it can also result in a higher scoring and the feed has to be adjusted to keep them on an ideal score.

    Age

    When goats are older than 7 years it is harder for them to keep the same muscle and fat reserves. It is a natural thing that will happen, to most goats. It is desirable though to not let them go too low on the score so they will maintain an acceptable body condition.

    Age of kidding

    Goats that kid at an early age, around a year old, and that give an adequate amount of milk, can hardly be overfed. When goats are kidding at 1,5 – 2 years, you will have to keep an eye on their score and might have to adjust their feed.

    Health

    Serious goat health problems will lead to a decrease of muscle and fat reserves. This can be parasites, viral or bacterial disease, dental problems and many other chronic conditions.

    Problems in bone structures and misalignment of teeth

    A dairy goat with problems in the bone structure might be less able to walk to feed, forage and water. When the problem is less serious it might still be problematic to compete with the other goats in the group for feed.  less able to compete with other animals in the group, and to get to and from the milking parlor.

    A misalignment of teeth can cause difficulties to eat, which can result in slow eating.


    How to use BCS as a management tool?


    This scoring is done by scoring each animal individually. I could imagine that if you have a lot of goats you start making an estimate on sight to start with. And when you see that some animals need a closer look, you than separate them to take an individual scoring.

    Managing your goats so they will each of them, more or less, be at an ideal score means you have to organise your goat place in a way so this is possible. Goats are herding animals which have a strong social order. This means you sometimes have to give the lower in rank the chance to ge to their feed. It can be done by feeding goats individually.

    We do this while they get milked. So we know they all get enough (and fore some, not too much) of their basics. The hey and fresh greens are fed collective in our small goat barn. The greedy ones naturally get more. If I see that this leads to an imbalances in the scoring I divide them in smaller groups and feed these groups separately. Usually there is enough feed in the shrub lands to balance it. Only in the very dry summers which can last until September, there is not enough feed in the shrub lands. That is when I have to watch them.

    The goats will never be exactly the same. Our dominant goat Bianca will always get more feed then our goat Kimberly, but the differences will be within acceptable limits.

    Goats that are only free ranged and do not get extra nutrition will have a low BCS. This is how for many centuries goats were and are kept in the poorer agricultural areas. The backside of this system is that the loss of goats is relatively big and the production very low. For modern standards, I think, it would be considered an inefficient system for production.

    Adding new goats from outside the family can also cause some problem for the newcomers to get to their feed. It is good to keep an eye on that and manage it a bit at the start, so they will get enough too.


    How is the scoring done?


    I did quite a bit of research for this blog, and doing so I came across a very good Youtube video. I could not explain it better than Elizabeth Henning, appraiser from the American Dairy Goat Association. She does it all by heard. The good thing of this scoring is that you do not need to turn your goat upside down, as you need to do with some of them.

    The video, which is made by UC Davis Vet Med, gives the information very quickly so I made a small summery below. You might want to read this first. Some things are easy to miss or hard to remember afterwards. In the picture below you can see where the regions are on the goat’s body.

    Here is the link: Dairy Goat Body Condition Scoring

    The scouring is done in three regions of the goats body.
    1. Shoulder region
      1. Underline of the neck; shoulder region into the brisket; accumulation of flesh at the brisket.
      2. Neck meets the shoulder blade, amount of fleshing from wethers to the point of shoulder; fullness and degree of fill; fleshing overline the neck, shoulder and ribs./li>
      3. Over the ribs above (!) the point of elbow palpable or visible.
    2. Loin; rump; hips and pins
      1. The degree of muscle and fat covering the loin.
      2. The amount of filling at the end of the spine (the ‘flatish’ part before the tail).
    3. Tail and tail head (only score 2 and below and approaching score 5)
      1. The amount of fleshing and the flexibility of the tail skin, you will have to take the tail in your hand with your thumb above and your fingers under it.
      2. The amount of fleshing visible above the tailbone at the base of tail.


    Goat for BCS

    Pin it for later:

    [pmc_box border_color=”#ccce44″ text_color=”#000″ background_color=”#cdcea5″ ]For this blog I used information from the video Dairy Goat Body Condition Scoring ; the website https://www.sheepandgoat.com/ and from an the article DAIRY GOAT BODY CONDITION SCORING.[/pmc_box]

  • Fresh Cheese Recipe

    Fresh Cheese Recipe

    This is my Fresh Cheese Recipe. Before I made this cheese I had never made cheese in my life. So do not worry this cheese making recipe is easy. You need a view things like renet, which you might have to buy in a special shop. The rest you will probably have in your kitchen.

    I do not have much official cheese making stuff. I use mainly normal pots and pans from the kitchen.

    Here is my list with things you will need.

    • 1l  jars or bottles to keep the milk in the fridge. I milk my own goats and use their milk to make my cheese. Fresh non-homogenised, pasteurised or raw milk is best to use. Sterilised milk does not work and when you use homogenised milk you have to add Calcium Chloride; 1ml per gallon ( 3.785 l), otherwise the curd will be too soft to make cheese. You can use goats, sheep or cows milk. If you get your milk fresh from a farm make sure you store it in a sterilized container.
    • Cooking pot that can contain at least 3 liters of milk, best is stainless steel.
    • Thermometer that reads up to 31C.
    • Big knife.
    • Stainless steel skimmer.
    • A container with holes. I use an official cheese mold now. Before I used to have yogurt container in which I made holes with a hot iron nail. You will need 4 or 5.

      cheese making container DIY
      Yogurt container with holes.
    • To let the cheese drain I use a big pot with one of those grids that you use to cool down a cake on, in it. On top of the grid I put a cheese net. Anything with a fine netted structure that is for preparing food will do.
    • Ferment. You can buy this on the internet, I use cheese ferment that is used for Gouda cheese. You can also buy buttermilk and use that instead.
    • Rennet. In Portugal you can buy it at the farmacy. It is an artificial one, I prefer the real, natural one. I buy it on line at a Dutch online store. If you just want to try the cheese making and do not know if it’s really your thing the stuff from the farmacy will do.


    This is how I make the fresh cheese:

    I sterilize all my tools first. It is very important to work clean. I use boiling hot water to sterilize. some people use a Chlorine solution, but I so not like it because I think you can taste the chlorine in the end product.

    I use three liters of milk, which I poor in the stainless steel pot. If you use bottled milk from the supermarket you have to add the Calcium Chloride now.

    Heat up the milk until 21C while stirring. Turn off the flame and add 1 tablespoons of ferment or 4 tablespoons of buttermilk. Leave it for 30 minutes.

    After that I heat up the milk until 31C. I then take the pot from the fire and add the rennet. I use liquid rennet. So I stir the milk until it is spinning around in the pot, then I drip in 7 drops of rennet and spinn the milk abit more. Then I stop the movement of the milk by counter stirring it with some force. The liquid needs to be still after this exercise. Now I leave it for an hour.

    Then I open the pot and with my knife check if the curd is hard enough. If not it needs to sit longer. I do this by pulling the curd of the side of the pot, when it comes lose I know it is ready. Now I can cut the curd in 2cm squares. And I leave it for half an hour.

    checking curd
    Checking the curd


    checking curd
    Checking the curd


    Cutting curd
    Cutting the curd


    Then I take the skimmer and scoop the cut curd in the cheese containers with the holes. Then the forms are placed in the big pot and let them sit there overnight. I put the lid on the pot and leave it slightly open so the cheese gets some air. I cover the opening with a cloth so flies can not spoil the cheese.

    Scoping curd
    Scoping the curd
    Scoping curd
    Scoping the curd

    The next morning, after 12 hours. I turn the mold upside down. Do not take the molds of yet! The evening after that I take the molds of and turn the cheese once more and leave them another 12 hour. Them I roll them in salt and I am done.

    Cheese making
    Next morning
    making cheese
    Turned forms, leave them on for 12 ours.
    cheese making
    The cheese forms taken off and the cheeses turned
    Making cheese
    Salting the cheese

    In case there is a problem with the cheese making please leave a comment and notify me. I will help you until it works. I very much appreciate your feedback.

    Pin it for later:

    Fresh cheese recipe
    Fresh cheese recipe.
  • Growing Asparagus

    Growing Asparagus

    When wanting to grow a vegetable cash crop why not choose a sexy one? Figs are supposedly the most erotic fruit, but its vegetable compeer is without doubt the asparagus.


    Nowadays asparagus is a speciality in North-West Europe, but it has a history that goes back to Roman and originally even Egypt times. That history gave us the idea to start growing them in the Algarve. If the oldest terraces in the Algarve are built by Romans – as they say – , why not grow ancient Roman asparagus on these terraces today?

    Two varieties are known by the consumer: white and green ones. These two are actually not different species, but differently grown. The white ones are white, just because they don’t see daylight before picking: they grow in sandy mounds, you have to dig them out. The green ones simply grow above the soil, as you would expect from vegetables.

    This is how you grow the plants.

    To start growing asparagus, you have to be patient. Especially when you seed them, like we did.

    First, in springtime, you seed them in a tray, under plastic. A month after seeding, when the young and fragile plants are already up to 20 cm, you have to transplant them into separate pots. Forget about the rule “transplanting when the first real leaves appear, after the two germ-leaves, because asparagus is a Lily-variety, a monocotyledon, so it doesn’t have germ-leaves. You just transplant them, when they’re big enough.

    Then it takes a year for the fragile little plant to become firm enough to be planted on the spot where you want to keep them for their lifetime. Make sure you put them in sandy but very fertile soil. Once they are planted on their spot, it takes another 2 years before you can start harvesting them. The picture below shows the plants in the second year on their spot. But once they are strong enough to do so, oh my dear, what a yield you have.

    The harvest.

    To avoid exhausting the plant, you shouldn’t harvest them longer than 21/2 months per year though. In north-west Europe that period is from april up to mid June, but in our Algarve we have them already at the end of February and the harvesting goes on till mid may.

    After the harvesting months, the asparagus sprouts grow rich and high (up to 2 metres!) until late autumn. Asparagus takes a lot of space, in width and height.

    When you give the asparagus compost every year, they will stay alive for about 15 years. They also appreciate a bit of chalk now and then. After all those years, when the plant starts to grow weaker, and eventually dies, you can not plant new asparagus on the same spot, it simply refuses to grow there. So, make sure that you migrate to another piece of soil when you want to continue growing asparagus after 15 years.

    Asparagus is a nice cash crop for us, and we enjoy the aphrodisiac asparagus frequently ourselves.

    Pin it for later:

    growing asparagus

  • What do goats eat?

    What do goats eat?

    Rather than being grazers, goats are browsers: they look beyond the grassy pasture to the shrubs and small trees. While they occasionally (and possibly disastrously) love fresh green herbs and vegetables from the garden, their preferred diet is a mix: some grass, some herbs, and some leaves of the trees and shrubs. If it’s the right season and they can reach it, they might pick a fresh apple, or eat one that dried on the tree. Yum! Goats also have individual preferences. Some of our goats like carob, others don’t even look at it.

    To survive goats don’t need a lot. Traditionally in Europe  goats were kept in herds, they could be kept in mountainous areas where nothing much would grow. However losses of goats kids and adults were high and the milk production low. The great thing of goats is that if you provide them with better conditions they will be much more profitable. Well fed goats can, depending on the breed produce up to 5 liter of milk a day.

    We want to give our goats a healthy basis, and make goat keeping economic. That is why we provide them with a meal twice a day. Our goats, regardless of what else they eat, get a grain-alfalfa based mix twice a day while they get milked. Since we are doing this we have no more losses in goat babies, the babies are strong, our goats look healthy, and we hardly have any medical issues. So if you have a pasture, use the goats for weed control or herd them or what ever, give them a good dietary base.

    Buying or making a feed mix?

    There are two things you can do, you can buy a good goat mix, or as we do, you can make a mix yourself.

    There are some reasons why we mix our own. It  is slightly cheaper in our case. The ingredients we buy: alfalfa pellets, barley, oats, sunflower seeds and feed broad beans. When available we also buy carob. Buying the ingredients separate is cheaper than buying a pre mix. Another reason is that the pre mix contains GMO corn, which we do not wish to use because of the potential risk of pesticide remnants.  When you have a lot of space and energy you could even grow the ingredients of our mix yourself, there is nothing very fancy in there, yet it keeps the goats healthy.

    The mixture we made is based on a study of a table of cattle food values. From these values we made a calculation. The outcome is a mix of 4 parts alfalfa pellets, 3 parts barley, 3 parts oats, 1 part feed broad beans, 1 part carob and 2% sunflower seeds (then latter can be done by estimation).
    These are the amounts we give to our adult goats daily (the ration depends on the weight of the goat):

    Milking goat: 1800 gr
    Pregnant goat: 1400 gr
    Regular maintenance: 1000gr
    Billy goat outside breeding season: 200gr
    Billy goat with in breeding season: 1200gr

    The other food sources our goats have is a pasture on shrub land where they can freely snack; in January and February they are taken out every morning for 2 hours for a walk in an orchard with a lot of herbs and grass. The goats always have hey available.

    Pin it for later:

    What do goats eat?

  • Simple Savoury Cupcakes

    Simple Savoury Cupcakes

    This Savoury cupcakes recipe is simple and quick to make for those who love good food from their own ingredients and who don’t have much time to cook. These cupcakes I invented myself. You can do the same and use the same basic recipe and just change the ingredients, nobody will notice. You can even change the type of flour. I used ricotta, but you can also use yoghurt or buttermilk or milk or even cream. This amount fits into a 12 cupcake form.

    The basic recipe.

    This is a variation of my grandmothers sweet cake recipe, the sugar that is normally mixed with the butter is left out and salt and pepper are added:

    150 gr butter
    3 eggs
    150 gr white flour
    tsp baking soda
    salt
    pepper

    As a choice:

    4 full tbsp ricotta
    1 big carrot
    2 big leaves of Swiss chart
    bit of ginger
    1 glove of garlic
    1 onion
    1/2 tablespoon of sugar
    1/2 tbsp curry powder
    bit of oil

    Here is how you make it:

    The batter: Melt the butter a bit so it is very soft. Mix the eggs in one by one, mix it well. Add the ricotta. Mix the flour with the baking soda and mix this into the butter, eggs and ricotta.

    Chop the onions and keep them separate. Cut vegetables, garlic and ginger. Fry the onions in a bit of oil when they start to be shiny pour the sugar on the onion and let them caramelize a bit. Then add the rest of the vegetables, curry powder and salt, very short, the vegetables will still go into the oven so thy should not be too soft. Add the fry to the dough and mix.

    Carefully scoop the mix into the cupcakes with a tablespoon. Pre heat the oven for 10 minutes on 165°C. When the oven is preheated place the form on the oven and bake for 25 min. When the cupcakes are a bit big it might need 5 more minutes.

    Enjoy your meal.