Tag: Vegetables from your garden

  • Cooking Cheese and Spinach Quiche with Fresh Farm Ingredients.

    Cooking Cheese and Spinach Quiche with Fresh Farm Ingredients.

    This blog is written by Anna Tonk. She volunteered at Terra do Milho for two month.

    What happens in the kitchen during winter on a Homestead?

    Living on a Homestead and having to cook for the hardworking people there seemed like a daunting task, because usually as a city dweller I am used to having everything on hand around the corner. Everything is pre-cut, ready-to-eat, or prepared using all sorts of baking mixes

    Hence my cooking started with a slight anxious feeling trying to think of a suitable recipe for the available ingredients.

    [button_simple link=”https://terradomilho.eu/2019/01/learning-easy-homesteading-skills-seasonal-cooking/” target=”_orange” background_color=”#ffffff” border_color=”#000″ text_color=”#000″ ]Click here for more about Seasonal Cooking[/button_simple]

    How to cook with fresh farm ingredients ?

    When you start really thinking about your meal, the farm suddenly becomes your playground, like a giant pantry full of surprises, new flavours, odd fruits and vegetables, and you discover you have everything on hand already. Or you could just go and search on the internet (or browse Monique’s cabinet full of cookbooks) for a recipe with some of the main ingredients found on the farm.

    Beets, carrots, apple, potatoes and a freshly picked laurel leaf became beetroot soup. Potato, onion and picked leaf-cabbage became Korean pancakes accompanied by found-in-pantry soy-sauce with garlic from the land and homemade sambal. But the loveliest recipe of the first week was probably the goat cheese and spinach quiche.

    There are chickens on the land so for this recipe we only had to use flour, butter and cream that weren’t from Terra do Milho.

    Cheese and Spinach Quiche


    For the crust:

    – 1 ½ cup all-purpose flour
    – 2 tablespoons full grain flour added when the dough seems too wet (and to add a little fiber)
    – 140 gr cold diced butter (10 tablespoons)
    – one large egg  mixed with 2 tablespoons of icy cold water
    – pinch of salt

    Whisk the egg and water together in a separate cup or little bowl. Then in a larger mixing bowl mix the flour with the salt and mash in the butter with a fork, or use the blender until everything looks like crumbs. Add the whisked egg and water. If the dough is too sticky add the whole grain flour, if it’s too crumbly still, add some water. Butter the pie dish and sprinkle some flour on top, your quiche will come out easily! Spread  the dough over the pie dish with a spoon (or with cold hands) and make holes in the bottom with a fork (no soggy bottom!). Put it in the fridge (this will ensure good baking results).

    For the filling:

    – 4-5 eggs
    – Whatever vegetables that go well with goat cheese (spinach)
    – 1 onion and 2 cloves of garlic
    – Half a homemade goat cheese
    – 200 ml cream
    – salt and pepper (and additional spices if you want to)
    – Some fresh chopped parsley

    Preheat the oven to 180 degrees Celsius. Chop your vegetables, the onion and the garlic in small pieces. Sautee the onions and garlic in some oil or butter and add the vegetables. Cook until done and drain the moisture out of the pan. Put all the vegetables in a strainer to drain. Whisk the cream and the eggs together very well. Season it and mix in the vegetables. Take the crust in the pie dish out of the fridge and fill it up with the filling. Set the oven timer to 30 minutes, or check until the quiche is a deep golden brown (see picture!). It may even take 40 minutes. Serve in the pie dish! For garnish just put some parsley on top, but it is also nice to eat fresh with the quiche.

    Good luck in the kitchen at Terra do Milho. There is always something that you will discover you can eat.

    Spinach Quiche


  • Sweet Basil, all you need to know to grow it.

    Sweet Basil, all you need to know to grow it.

    Sweet Basil is an easy, straight forward plant to grow. In this blog you will find all the things you need to know for planning, companion planting, use and storage of Sweet Basil. It also provides you with information about the type of soil it needs and the pH it will grow in. One place to find it all.

    Sweet Basil is just a choice of many types of Basils that are available for growing. I like the Genovese. It has big tender leaves to harvest and I love the taste and structure for making pesto.

    From all the anual Basil I tried to grow, this one came out the best. It grows relatively easy. The other thing is that I think, most smaller leaved anual basil have a hard leave for harvesting. I don’t like hard leaves in salad and for making pesto. For me salad contains tender things. For pesto making the small leave variaties don’t quit make a smooth paste.

    Plant characteristics

    English name: Basil, Great Basil, Saint-Joseph’s-wort

    Latin name: Ocimum basilicum

    Family of: Lamiaceae (mint)

    Maximum size plant: height, 20-60 cm width 15-20 cm

    Root structure and depth: 20-30 cm, round structure

    Spacing (plantafstand): 20-25 cm

    Companions: tomatoes, apricot, asparagus, cucumber, fennel, zucchini, stinging nettle. Sweet Basil needs sunlight to grow. When growing them next to high plants like tomatoes and asparagus, make sure they are on the sunny side of the high plants.

    Not companion with: Rue Herb, Chard/Silverbeet, Wormwood

    Remedies for: Aphids, Fruit Fly

    Water needs: medium in loamy soils. In sandy soils water properly otherwise they will go into flowering very quick.

    Food needs: no fresh manure, compost, tolerates fresh compost.

    Light: lots of sun

    What type of soil: Sandy soils of any kind, loam/clay soils when they are rich in organic matter. Loves it fluffy. For more information about soil types click here. For finding out more about analysing your vegetable garden soil click here.

    pH: 5.1-8.5

    Weed tolerance: does tolerate some weeds as long as it is bigger than the weeds.

    This is how it looks:
    Basil Genovese
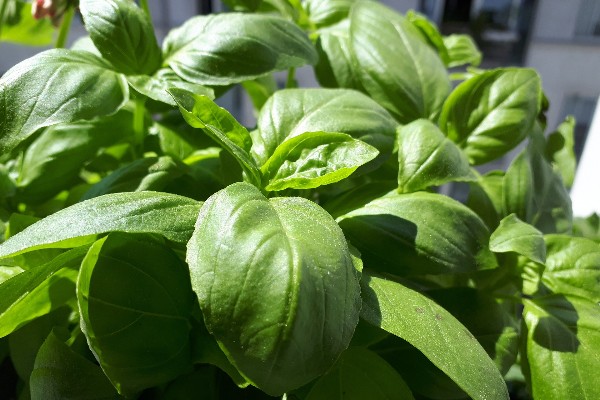
    Picture 1: Full grown Sweet Basil, time to harvest.
    Young Sweet Basil plants
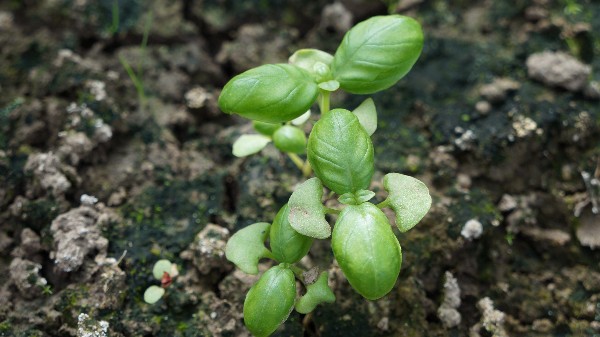
    Picture 2: Young Sweet Basil plants. The first two leaflets are still visible.
    Flowering sweet basil
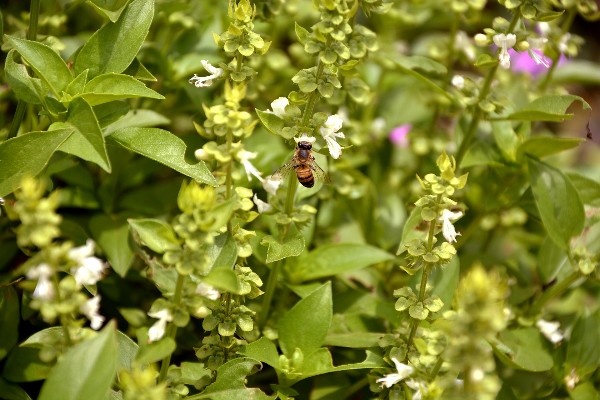
    Picture 3: Flowering Basil. Leaves will be less tender. When you take the flowers out it will continue growing. You can use the flowers as well.

    How to seed

    Pre seeding: When the season, where you are, is short you can pre seed in pots.

    Make sure you buy the right soil. Soil for growing pot plants is to rich for seedlings. The special soil for seeding is the one that works.

    Handy and time saving is to seed them in trays. Peet seeding trays can be used integral. You do not need to take the plants out but plant the plant together with the pot. This way you do not disturb the roots, which gives the plant a growth advantage. This might be handy if you only have a short growing season.

    You can also use the cheaper reusable seeding trays, when your season is longer. I would put some flat trays under the seeding trays to catch the surplus water when watering the trays. Here you find some affiliate options. When you use these links you will support our farm. Please feel free to click on the picture.

    Seeding directly: In long season areas you can seed directly. I usually seed a small row next to where I want to grow them so I can easily plant them out. To recognise the small seedlings: make sure the seedbed is well weeded and raked.

    Seed distance: 5 cm

    Depth of seeding: 0,3 cm

    Tip for saving time:  buy a pot with basil in the supermarket and plant them in your garden. The growers usually squeeze a lot of plants in the pots. Turm the pot you bought up side down and carefully take the earth and plants out. After that carefully separata the plants. Now you have lots of plants to plant out. They will still grow a fair amount.

    This can be done until later in the season. When you just want to grow a few plants this might be a good option.

    Growth

    Germination temperature: 21-29°C. This is essential for growing Sweet Basil. It will not germinate when the temperature is not high enough. Best is when the soil has warmed up till 21°C. Give the soil a week or so to warm up a bit. Note: in clay soils the temperature of the soil stays cool longer, this might stop your Basil from germinating.

    Germination time 5-10 days

    Duration from seed to Harvest: 60 days max

    Seedlings: Seedlings start to grow with two heart shaped leaflets. In picture two these small leaflets are still visible.

    Harvest

    Harvest when full grown and leaves are lush (see: picture 1). You can stil harvest when it is flowering, leaves will not be as tender. The flowers (picture 3) have a strong taste and are good to harvest too.


    How many plants will you need?

    It depends on what you want to make from it. With the two of us we, ideally, grow between 30 and 50 plants. We grow them only once a year. We make a lot of pesto for the rest of the year. When we have no time to cook a big meal we use the pesto with some pasta and dried tomatoes. Easy and quick. So a lot of basil fits in our household.

    When you just like it every now and then in the salad you might be all right with just 10-12 plants. When you have a long growing season you can plant a few plants early and some later in the season.

    Storage

    When you dry Sweet Basil it will lose most of it’s charming taste. So, I think that is not really an option. I think eating it fresh or making it into pesto are the best two option for Sweet Basil.

    To preserve I freeze the pesto (see: recipe). You can also use jars to keep the pesto, but do not add the cheese. I do not know why it works with the jars of pesto that you buy in the supermarket. It always goes of when I add the cheese, no matter what I do.

    When you preserve pesto in jars be aware that there is, however small a change of getting botulism into your jar. For this add some lemon juice to the mixture. It will keep the color nice and prevent the bacteria that cause botulism to produce the poisonous botox by lowering the pH.

    Recipes

    Pesto

    Fill up an blender jar for 2/3 with Sweet basil leaves. Add three or four hand full of nuts. Just any nuts will do.

    The official recipe is with pine nuts, but these are very expensive where I live. Almonds and wall nuts are much cheaper here so I use those.

    Add the juice of halve a lemon and two or three cloves of garlic.

    Blender it & freeze it in portions. It is not easy to cut it when frozen, so it is better to freeze it in desired portions.

    Add some grind cheese when used.

    Tomatoes, Basil and Mozzarella

    This is so easy to make and it is delicious.

    Slice some tomatoes in 1-2 cm thick slices.

    Lay them on a large plate.

    Slice the mozzarella in 1-2 thick slices.

    Put the slices on top of the tomatoes.

    Sprancle on a fair amount of Balsamico.

    Cover the whole with Basil leaves (one leave per tomato slice).


  • Growing Asparagus

    Growing Asparagus

    When wanting to grow a vegetable cash crop why not choose a sexy one? Figs are supposedly the most erotic fruit, but its vegetable compeer is without doubt the asparagus.


    Nowadays asparagus is a speciality in North-West Europe, but it has a history that goes back to Roman and originally even Egypt times. That history gave us the idea to start growing them in the Algarve. If the oldest terraces in the Algarve are built by Romans – as they say – , why not grow ancient Roman asparagus on these terraces today?

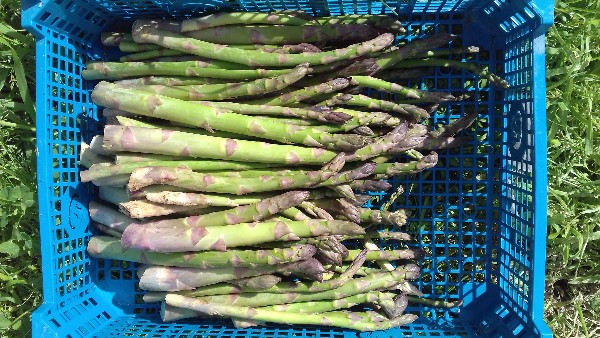
    Two varieties are known by the consumer: white and green ones. These two are actually not different species, but differently grown. The white ones are white, just because they don’t see daylight before picking: they grow in sandy mounds, you have to dig them out. The green ones simply grow above the soil, as you would expect from vegetables.

    This is how you grow the plants.

    To start growing asparagus, you have to be patient. Especially when you seed them, like we did.

    First, in springtime, you seed them in a tray, under plastic. A month after seeding, when the young and fragile plants are already up to 20 cm, you have to transplant them into separate pots. Forget about the rule “transplanting when the first real leaves appear, after the two germ-leaves, because asparagus is a Lily-variety, a monocotyledon, so it doesn’t have germ-leaves. You just transplant them, when they’re big enough.

    Then it takes a year for the fragile little plant to become firm enough to be planted on the spot where you want to keep them for their lifetime. Make sure you put them in sandy but very fertile soil. Once they are planted on their spot, it takes another 2 years before you can start harvesting them. The picture below shows the plants in the second year on their spot. But once they are strong enough to do so, oh my dear, what a yield you have.

    The harvest.

    To avoid exhausting the plant, you shouldn’t harvest them longer than 21/2 months per year though. In north-west Europe that period is from april up to mid June, but in our Algarve we have them already at the end of February and the harvesting goes on till mid may.

    After the harvesting months, the asparagus sprouts grow rich and high (up to 2 metres!) until late autumn. Asparagus takes a lot of space, in width and height.

    When you give the asparagus compost every year, they will stay alive for about 15 years. They also appreciate a bit of chalk now and then. After all those years, when the plant starts to grow weaker, and eventually dies, you can not plant new asparagus on the same spot, it simply refuses to grow there. So, make sure that you migrate to another piece of soil when you want to continue growing asparagus after 15 years.

    Asparagus is a nice cash crop for us, and we enjoy the aphrodisiac asparagus frequently ourselves.

    Pin it for later:

    growing asparagus

  • Our vegetable garden in Monchique

    Our vegetable garden in Monchique

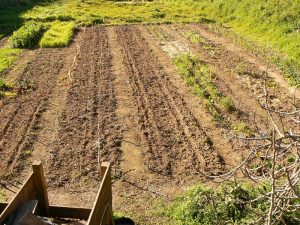
    Garden layout organic garden
    Garden layout

    We live about 6 km from the town of Monchique , which is a pittoresk town in the hinterlands of the Algarve. In the town there are many terraces where people keep their vegetable gardens, mostly from people who live in town.

    Our friends Anna and Carlos, who live in town decided to share  their terraces with people from the Monchique Transition group.  As one of the founders of this group we joint in.

    We use one of the plots that was available, this plot is about 400 m² wide. Our layout is very simple and straight forward since we use a drip irrigation system that only works when laid out straight. There are 8 beds of 21 m  long and 1.20 m wide. Two beds with asparagus, which is a perennial (for 12 years), and 6 beds for crop rotation.  The planting schedule is carefully planed.

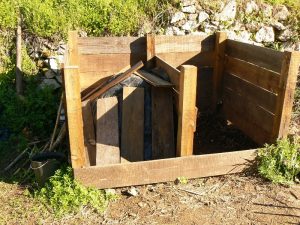
    composter
    Composter with compost in its way.

    Compost making is key in an organic garden

    In the garden the vegetables are grown organically. Hence compost making is a key activity in our garden. To make compost we build a composter ourselves. In the composter we build up a compost heap from green manure, weeds without seeds and manure from our goats. We mix the goat manure with straw. Some times we use composted humanure as well. Every week we turn the compost into the other compartment of the compost maker. After five weeks the compost is ready to use in the garden. To read more about making compost check our blog: ‘Two ways of making compost’.

    In the picture below you can see the broad beans growing on the compost, they are doing very well.

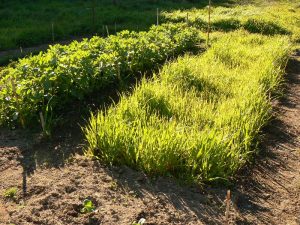
    Green manure
    Oats grass as green menure

    Always cover the earth.

    To make sure that the soil is never naked we use oats and lupins as a green manure. Green manure improves the quality of the soil. It covers the soil so it does not dry in the battering sun, as a result micro-organisms and small useful insects have a better chance to survive. The green manure that we removere can be used in the compost heap to make compost. Lupines are nitrogen rich, which will enrich the compost. When you dig in the green manure when it is still young it will ad fibers to the soil that will become humus. This prevents the soil from making a crust and it will keep nutrients in the soil. If you want to stay updated subscribe to our blog news or follow us on Facebook.


    Pin it for later:

    Gardening
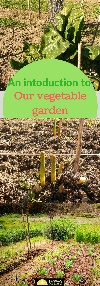
    An introduction to our garden. Gardening for starters.