Tag: Recipes

  • Cooking Cheese and Spinach Quiche with Fresh Farm Ingredients.

    Cooking Cheese and Spinach Quiche with Fresh Farm Ingredients.

    This blog is written by Anna Tonk. She volunteered at Terra do Milho for two month.

    What happens in the kitchen during winter on a Homestead?

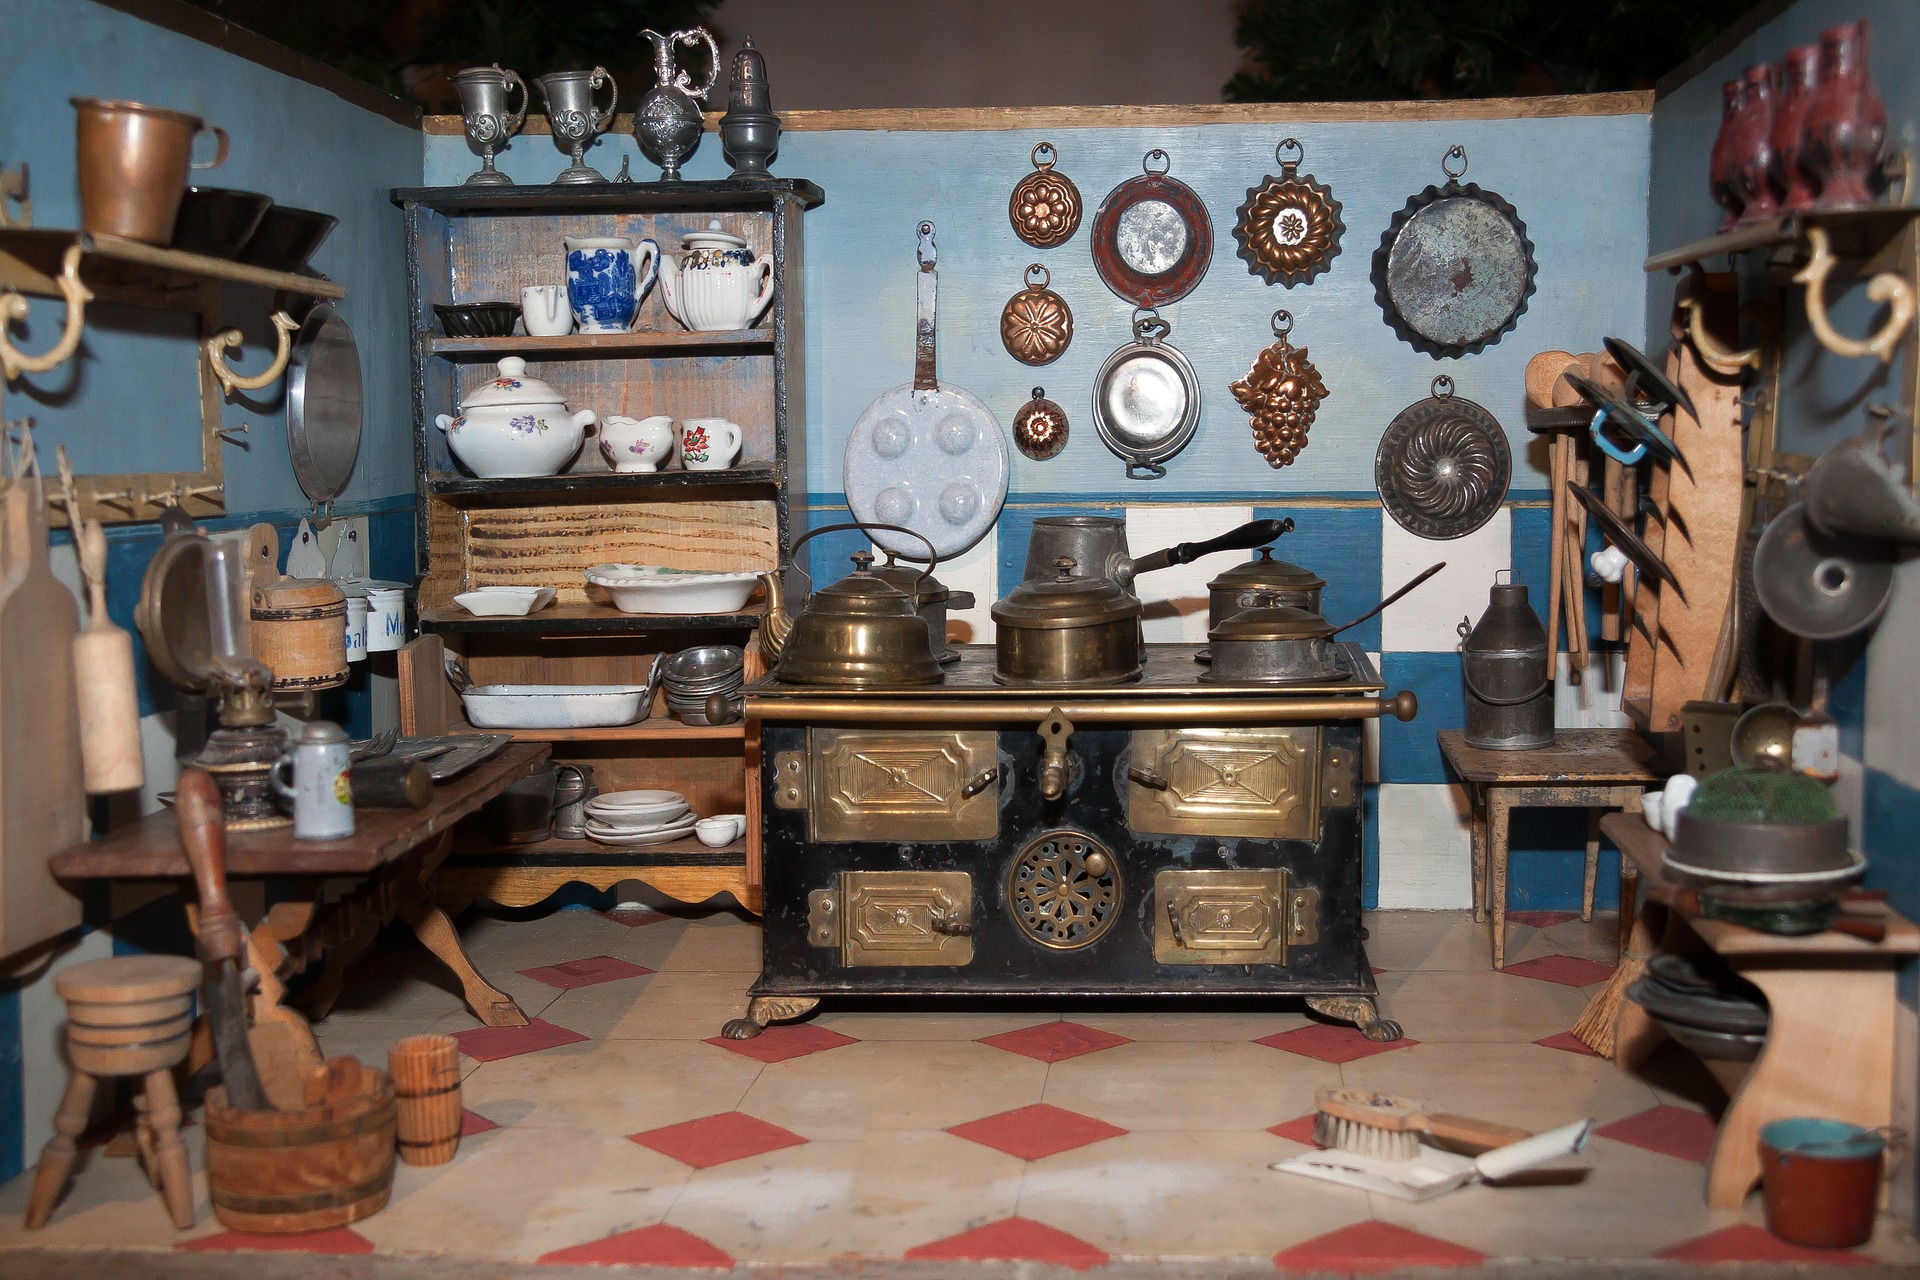
    Living on a Homestead and having to cook for the hardworking people there seemed like a daunting task, because usually as a city dweller I am used to having everything on hand around the corner. Everything is pre-cut, ready-to-eat, or prepared using all sorts of baking mixes

    Hence my cooking started with a slight anxious feeling trying to think of a suitable recipe for the available ingredients.

    [button_simple link=”https://terradomilho.eu/2019/01/learning-easy-homesteading-skills-seasonal-cooking/” target=”_orange” background_color=”#ffffff” border_color=”#000″ text_color=”#000″ ]Click here for more about Seasonal Cooking[/button_simple]

    How to cook with fresh farm ingredients ?

    When you start really thinking about your meal, the farm suddenly becomes your playground, like a giant pantry full of surprises, new flavours, odd fruits and vegetables, and you discover you have everything on hand already. Or you could just go and search on the internet (or browse Monique’s cabinet full of cookbooks) for a recipe with some of the main ingredients found on the farm.

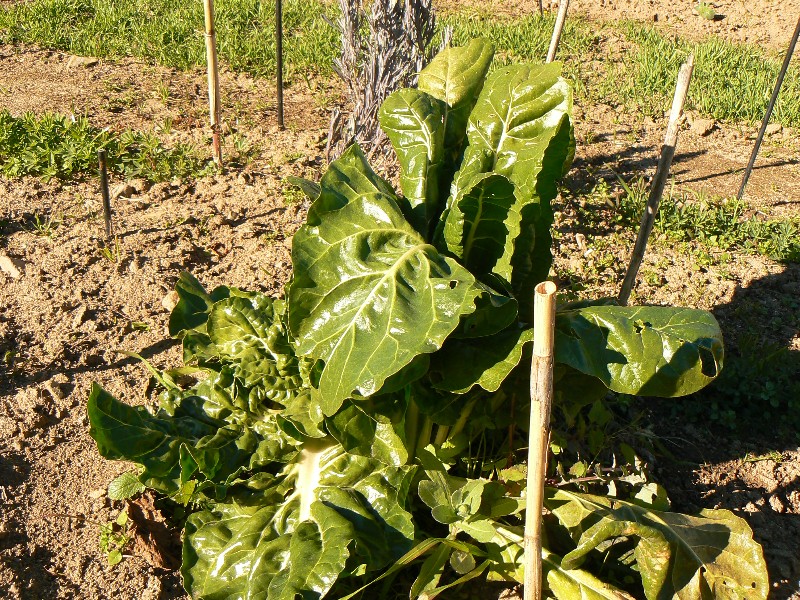
    Beets, carrots, apple, potatoes and a freshly picked laurel leaf became beetroot soup. Potato, onion and picked leaf-cabbage became Korean pancakes accompanied by found-in-pantry soy-sauce with garlic from the land and homemade sambal. But the loveliest recipe of the first week was probably the goat cheese and spinach quiche.

    There are chickens on the land so for this recipe we only had to use flour, butter and cream that weren’t from Terra do Milho.

    Cheese and Spinach Quiche


    For the crust:

    – 1 ½ cup all-purpose flour
    – 2 tablespoons full grain flour added when the dough seems too wet (and to add a little fiber)
    – 140 gr cold diced butter (10 tablespoons)
    – one large egg  mixed with 2 tablespoons of icy cold water
    – pinch of salt

    Whisk the egg and water together in a separate cup or little bowl. Then in a larger mixing bowl mix the flour with the salt and mash in the butter with a fork, or use the blender until everything looks like crumbs. Add the whisked egg and water. If the dough is too sticky add the whole grain flour, if it’s too crumbly still, add some water. Butter the pie dish and sprinkle some flour on top, your quiche will come out easily! Spread  the dough over the pie dish with a spoon (or with cold hands) and make holes in the bottom with a fork (no soggy bottom!). Put it in the fridge (this will ensure good baking results).

    For the filling:

    – 4-5 eggs
    – Whatever vegetables that go well with goat cheese (spinach)
    – 1 onion and 2 cloves of garlic
    – Half a homemade goat cheese
    – 200 ml cream
    – salt and pepper (and additional spices if you want to)
    – Some fresh chopped parsley

    Preheat the oven to 180 degrees Celsius. Chop your vegetables, the onion and the garlic in small pieces. Sautee the onions and garlic in some oil or butter and add the vegetables. Cook until done and drain the moisture out of the pan. Put all the vegetables in a strainer to drain. Whisk the cream and the eggs together very well. Season it and mix in the vegetables. Take the crust in the pie dish out of the fridge and fill it up with the filling. Set the oven timer to 30 minutes, or check until the quiche is a deep golden brown (see picture!). It may even take 40 minutes. Serve in the pie dish! For garnish just put some parsley on top, but it is also nice to eat fresh with the quiche.

    Good luck in the kitchen at Terra do Milho. There is always something that you will discover you can eat.

    Spinach Quiche


  • 4 Easy to Learn Homesteading Kitchen Skills for Starters

    4 Easy to Learn Homesteading Kitchen Skills for Starters

    When you want to start your own Homestead (or just started one) you can feel overwhelmed with all the things you need to learn.

    This is how we tackled the feeling of being overwhelmed: we took our time. There is no way you will be able to learn everything at once when you have your Homestead.

    The good news is: you can start learning some of the skills without having your dreamed Homestead.

    In this blog we will introduce you to 4 easy to learn kitchen skills that you can start learning right now:


    4 skills that you will need when you have your Homestead with your own vegetable garden and fruit trees. All 4 skills are more deeply discussed in linked blogs as you will find out down below.

    Vegetable gardening for beginners

    Seasonal Cooking, That Is What You Are Very Likely Going to Do.


    When you will have your own Homestead with your own vegetable garden, seasonal cooking will be the thing you will do.

    Seasonal cooking is different from cooking with non-seasonal ingredients. For example: it is end of summer and there is an abundance of tomatoes, bell peppers and zucchinis. You need to find or design recipes that use exactly these ingredients.

    Other times of the year like in spring there are only broad beans and peas to cook with.

    In that case you will need a variety of recipes with broad beans or peas that taste very different from each other.

    As you practice you will get better at it without boring your family members with broad beans or peas.

    As you go, you can start making your own database with recipes that use broad beans, peas, tomatoes, bell peppers and/or zucchinis.

    In my blog: “Learning Easy Homesteading Skills: Seasonal Cooking” I explain how seasonal cooking works. Click here to get to the blog.

    Canning

    Canning, a Must Have Homesteading Skill.


    Canning is something that is also very connected to having your own vegetable garden. Having a well working vegetable garden usually means having more to harvest than you can eat. The same will happen when you have a well producing fruit tree (or trees). There will be too much fruit to eat.

    Because canning is an easy skill that you can learn anywhere, why not start learning it now? It will save you a lot of stress later when you will have the pressure of growing vegetables that want to be harvested.

    But what are you going to can when you do not have a vegetable garden?

    No problem, just buy some. When you stick to seasonal vegetables and fruit it is most likely very affordable.

    In my blog: “Learning Easy Homesteading Skills: Canning” I will tell you all you need to know about canning. It gives you a simple way of starting to can and also tells you how you can do your canning save.

    Click here to get to the blog.

    Dehydrating

    The Advantages of Dehydrating Fruit and Vegetables


    Every year our trees carry fruit. It starts in early summer with apricots followed by plums then apples and pears a bit later in the summer. In fall we have our lemons, oranges and persimmons ripening. Once your Homestead is well established you will probably have the same richness as we are having now.

    Dehydrating has some good advantages over other ways of preserving food. It is quick, easy, does not take a lot of storing space and keeps the vitamins in the vegetable or fruit.

    It is a very easy to learn skill and it gives a lot of joy eating the dried fruit. With a dehydrator you can also make fruit leather and candied fruit. And then you could dip the candied fruit in chocolate, making your own candies. It’s a lot of fun.

    I wrote a blog about Dehydrating in which I explain how it works and what is needed for it. I also explain how the advantages of dehydrating work out.

    Click here to go to the blog: The Advantages Of Dehydrating Fruit And Vegetables

    Juice

    Why Using A Steam Juicer Is A Good Idea


    Apart from canning and dehydrating fruit, I love to make juices from our home grown fruit.

    Using a Steam Juicer makes Juicing to an easy job. Pick the fruit, wash it, put it in the steamer and after about an hour I have got some bottles filled with pasteurised fruit juice. When the juice is filled into well sterilised bottles and is well sealed it will keep forever.

    The juice can be good for drinking, but also serves as a good ingredient for making jellies or sauces or even wines.

    I especially like to use the steam juicer for soft fruit.

    In my blog: “Why Using A Steam Juicer Is A Good Idea”, you will find exactly why I think Steam Juicing is great. Click on the title to find out more about it.

    4 easy skills in 4 blogs


    This being just an overview of 4 skills that you can learn right now while you are still dreaming about your own Homestead, I would like to invite you to check out my blogs:

    Learning Easy Homesteading Skills: Seasonal Cooking

    Learning Easy Homesteading Skills: Canning

    The Advantages of Dehydrating Fruit and Vegetables

    Why Using A Steam Juicer Is A Good Idea

    I wish you a lot of reading pleasure!

    Homesteading

  • The Advantages of Dehydrating Fruit and Vegetables

    The Advantages of Dehydrating Fruit and Vegetables

    Don’t you know what to do with an overload of fruit and vegetables in summer and fall?
    Do you only have little time for preserving your dear harvest?
    Is your pantry not big enough to store all the goodies from the land?

    This blogpost contains affiliate links. By using this link to buy a product we will earn a small commission. This way we will be able to continue providing you with the best information we have about Homesteading. 

    Here is what you can do: dehydrate your fruit and vegetables.

    Check this short video to see what a dehydrator is and how it works.

    An overload of fruit and vegetables in summer and fall.

    Every year our trees carry fruit. It starts in early summer with apricots followed by plums then apples and pears a bit later in the summer. In fall we have our lemons, oranges and persimmons ripening.

    Some trees carry a lot of fruit, like our plum and persimmon trees. The persimmon trees can carry up to 100 kg. The plum trees something like 80 kg. Far too much to make jam from or to can. We would never eat all that jam or canned fruit in a years time. So I find the dehydrator a good solution to deal with these big amounts of fruit. Combined with the use of a steam juicer and with canning I manage to process a lot of it.

    Another thing that I love to dehydrate is tomatoes. Every year we have an overload of tomatoes in fall. Dehydrated tomatoes are very tasty and can be used the rest of the year when there are no fresh ones. They are lovely in pasta dishes .

    By dehydrating you will preserve vitamins.

    Our apple and pear trees carry less, but I still like to use the dehydrator to preserve these fruits since dehydrating means keeping the vitamins preserved as well. Apple and pear sauce tastes very good and I do make it, but by heating the fruit vitamins get lost. This is not so much the case when you dehydrate your fruit. So dehydrating is also a healthy way to preserve fruit and vegetables.

    Dehydrating is Easy and quick

    For canning or jam making a lot of steps are required. Not so much with dehydrating. I think it is a lot quicker and easier. That is why I like it.

    You do need to clean the fruit or vegetable so there is no dirt on it before it goes into the dehydrator. After that you just dry the fruit and put it in the dehydrator.

    When you dehydrate apples or pears it takes a bit more work. You need to take the center with the seeds out. If you want it more fancy you can peel the, something I do not do. It is a matter of taste.

    When you have a lot of apples or pears you can use a special knife to cut the center out. The are also practical peeling devices to make the peeling quicker.

    Saving space by dehydrating vegetables.

    Except for the tomatoes we did not dehydrate a lot of vegetables yet, but our neighbouring friends do. They dehydrate practically all their surplus vegetables. The reason is that it saves a lot of space to store dehydrated vegetables instead of canned vegetables.

    Dehydrated fruit can be a healthy, heavenly candy.

    One of the best things of dehydrated fruit is, I think, that you can produce super nice healthy candies.

    We always like to have some snacks in between. And sure you can make a cake or some muesli bars for that purpose. But the thing is: they contain added sugar… The dried fruit or fruit leather does not. For me (being over 50…) this makes dehydrated fruit the perfect snack for in between.

    As already mentioned dehydrating fruit also keeps most of the vitamins in the fruit.

    Costs

    Yes, you do need to buy a dehydrator. When you buy the one we have it will cost you a bit over 100€. There are also some smaller dehydrators for a bit less as well.

    Other then buying the dehydrator the costs are very low. Most dehydrators are pretty efficient in electricity use. There is no significant difference in our electric bill when I have been dehydrating fruit even though the dehydrator runs a long time. I try to use the dehydrator overnight even saving more since the night price of the electricity we buy is lower than the day price.

    Once done and packed away, there are no extra costs involved.

    [button_simple link=”https://www.brouwland.com/nl/bier/?tt=25813_12_329799_Dehydrating&r=%2Fen%2Four-products%2Fkitchen-canning%2Fherb-fruit-drying” target=”_blank” background_color=”#ffffff” border_color=”#000″ text_color=”#000″ ]Click here to check out what a Dehydrator costs.[/button_simple]

    What can you dehydrate?

    You can basically dehydrate all fruit and vegetables but some things are nicer to dehydrate then others.

    On our farm we use different techniques for preserving: canning, steam juicing and dehydrating. Simply because some techniques work better for some things then other things. And sometimes we use different techniques for one thing to get a bigger variety.

    Hard fruit like apples and pears do not steam juice very well when they are not 100% ripe. Sometimes we harvest the fruit earlier because if we leave them hanging birds and fruit flies will consume them. Making the fruit to hart to steam juice. In that case we use dehydration to preserve the fruit.

    Softer fruit like plums, figgs and apricots as well as berries do very well in the steam juicer, but can also be dried in the dehydrator. We do both. The juice can be used for making syrup or jelly. The dehydrates fruit can be eaten as candies. The juice and the dried fruit can even be used in fruit sauces. Soft fruits can also be canned or made into jam. Something we also do.

    Persimmons a special fruit

    Preserving persimmons is a story on it’s own. You can make jam and wine, but none of the two have proved very satisfying for us. We have about 100 kg of persimmons every year from just three trees, which is a lot to process.

    I can sell some of the fruit on the market to people who do not have persimmon trees. But because almost everybody has them I never sell a lot. So I get stuck with the fruit.

    Steam juicing persimmons is impossible.

    Making jam from persimmons gives us an excellent jam. The only problem is that you need to make small quantities at a time. Somehow the jam does not set well when you have a big pot full of fruit pulp to process into jam. So we do make some Persimmon jam but not a lot. The jam is not suitable for selling since it oxidizes, showing a brown coloring in the jar.

    The best solution for processing persimmons we found is dehydrating the pulp into fruit leather. It makes a wonderful candy without any additives and without sugar. The good thing is that I can process all the fruit we have. It will also sell very well because it is absolutely delicious. It can be packaged in paper wraps or jars easily.

    Check our short slideshow on making persimmon fruit leather.

    So that’s it about dehydrating fruit and vegetables.

    I think dehydrating fruit and vegetables is very easy. It saves space, costs and time. For me it is a great way to make nice healthy snacks.

    And the fruit leather…. , is sooooo good.

    [button_simple link=”https://www.brouwland.com/nl/bier/?tt=25813_12_329799_Dehydrating&r=%2Fen%2Four-products%2Fkitchen-canning%2Fherb-fruit-drying” target=”_blank” background_color=”#1e73be” border_color=”#000″ text_color=”#000″ ]Click here to buy a Dehydrator[/button_simple]

    Dehydrating food

  • Fava beans with rice and eggs

    Fava beans with rice and eggs

    In the south of Portugal this is the time of the fava beans. So now we are eating them almost every day.  That is okay as long as we have enough recipes to use.

    When we don’t like them any more I dry the rest for later in the year.

    I like recipes that use what we have available. Here is one for fava beans.

    Ingredients:
    Brown rice
    Fava beans
    Onions
    Butter
    Sugar
    Salt
    Curcuma
    Pepper
    Cajun spice
    Mild Curry powder
    Optional: Whey
    Eggs
    Action:

    Put the brown rice in a pot with a finger pad of water on top. Ad a bit of Curcuma pepper and salt. Place  the pot on the stove and cook it until it’s done. Put it in your bed to keep it warm. A bed is a good place to keep rice warm. Make sure you wrap a towel around so your bed does not get sticky…

    Chop the onions in small squares. Fry this in a pan with some butter, sugar, salt, mild curry powder and caramelise the onions. Than ad some cajun spices, tomato ketchup and if you have some sweet soy sauce and a glass of water.
    Let it simmer for 4 minutes.
    In the mean time boil the fava beans in water (or whey, if you have) for 5 minutes. When cooked ad them to the sauce.
    Mix everything and serve with fresh boiled eggs on top.
    Enjoy your meal!
    fava beans recipe
  • Making Mayonnaise in 2 minutes!

    Making Mayonnaise in 2 minutes!

    Making mayonnaise is much easier than you think. It hardly costs anything and you can make it exactly as you like it. Once you know how to make mayonnaise, you will never buy it again. And it only takes two minutes!

    I learned making mayonnaise from Claudia from Andalusia. She did a three month Erasmus exchange on our farm. She is a good cook.

    What you need

    making mayonnaise
    Sunflower oil, musterd, egg, lemon, a large high cup and a blender. Eggs and oil need to have the same temperature.

    Lets make mayonnaise

    Take the large high cup. And put in a whole egg

    making mayonniase
    Egg in large cup

    Add a tea spoon of musterd or more if you like and add the sunflower oil. The amount of the sunflower oil is about 4 times the volume of the egg. Some people like to add more to make more mayonnaise from one egg. I like the eggy taste of mayonnaise so I stick to 4 times the volume of the egg.

    Than put the blender right down to the bottom of the large cup so it covers the egg. This is very important!

    making mayonnaise
    Sunflower oil 4 times the volume of the egg. Blender is right doen on the egg.

    Turn on the blender and keep it at the bottom of the cup. Wait until you see the mayonnaise coming up.

    Making mayonnaise
    Wait until the mayonnaise comes up. It is the white stuff in the cup.

    Then very, very slowly pull the blender up. Until you hear that the blender plops out of the thick mayonnaise. There might still be some liquid oil above the mayonnaise. Put the blender on again and push it back in the mayonnaise and move it up and down until all the oil is gone.

    Making mayonnaise
    Very(!) slowly pul up the blender.

    Add some lemon or vinegar. I add a tablespoon. It depends on how sharp you want the mayonnaise to be.

    Now you can add some garlic for making aioli. Salt, pepper, or bell pepper powder, or curry powder. You can use your creativity now. Just add everything on top and mix it all in with the blender, pushing it up and down. Do not put these things in at the start, it will screw up the process, just put them in at the end.

    And there you go:

    making mayonnaise
    Have nice fries!


  • Simple Savoury Cupcakes

    Simple Savoury Cupcakes

    This Savoury cupcakes recipe is simple and quick to make for those who love good food from their own ingredients and who don’t have much time to cook. These cupcakes I invented myself. You can do the same and use the same basic recipe and just change the ingredients, nobody will notice. You can even change the type of flour. I used ricotta, but you can also use yoghurt or buttermilk or milk or even cream. This amount fits into a 12 cupcake form.

    The basic recipe.

    This is a variation of my grandmothers sweet cake recipe, the sugar that is normally mixed with the butter is left out and salt and pepper are added:

    150 gr butter
    3 eggs
    150 gr white flour
    tsp baking soda
    salt
    pepper

    As a choice:

    4 full tbsp ricotta
    1 big carrot
    2 big leaves of Swiss chart
    bit of ginger
    1 glove of garlic
    1 onion
    1/2 tablespoon of sugar
    1/2 tbsp curry powder
    bit of oil

    Here is how you make it:

    The batter: Melt the butter a bit so it is very soft. Mix the eggs in one by one, mix it well. Add the ricotta. Mix the flour with the baking soda and mix this into the butter, eggs and ricotta.

    Chop the onions and keep them separate. Cut vegetables, garlic and ginger. Fry the onions in a bit of oil when they start to be shiny pour the sugar on the onion and let them caramelize a bit. Then add the rest of the vegetables, curry powder and salt, very short, the vegetables will still go into the oven so thy should not be too soft. Add the fry to the dough and mix.

    Carefully scoop the mix into the cupcakes with a tablespoon. Pre heat the oven for 10 minutes on 165°C. When the oven is preheated place the form on the oven and bake for 25 min. When the cupcakes are a bit big it might need 5 more minutes.

    Enjoy your meal.