This blog is written by Anna Tonk. She volunteered at Terra do Milho for two month.
What happens in the kitchen during winter on a Homestead?
Living on a Homestead and having to cook for the hardworking people there seemed like a daunting task, because usually as a city dweller I am used to having everything on hand around the corner. Everything is pre-cut, ready-to-eat, or prepared using all sorts of baking mixes
Hence my cooking started with a slight anxious feeling trying to think of a suitable recipe for the available ingredients.
[button_simple link=”https://terradomilho.eu/2019/01/learning-easy-homesteading-skills-seasonal-cooking/” target=”_orange” background_color=”#ffffff” border_color=”#000″ text_color=”#000″ ]Click here for more about Seasonal Cooking[/button_simple]
How to cook with fresh farm ingredients ?
When you start really thinking about your meal, the farm suddenly becomes your playground, like a giant pantry full of surprises, new flavours, odd fruits and vegetables, and you discover you have everything on hand already. Or you could just go and search on the internet (or browse Monique’s cabinet full of cookbooks) for a recipe with some of the main ingredients found on the farm.
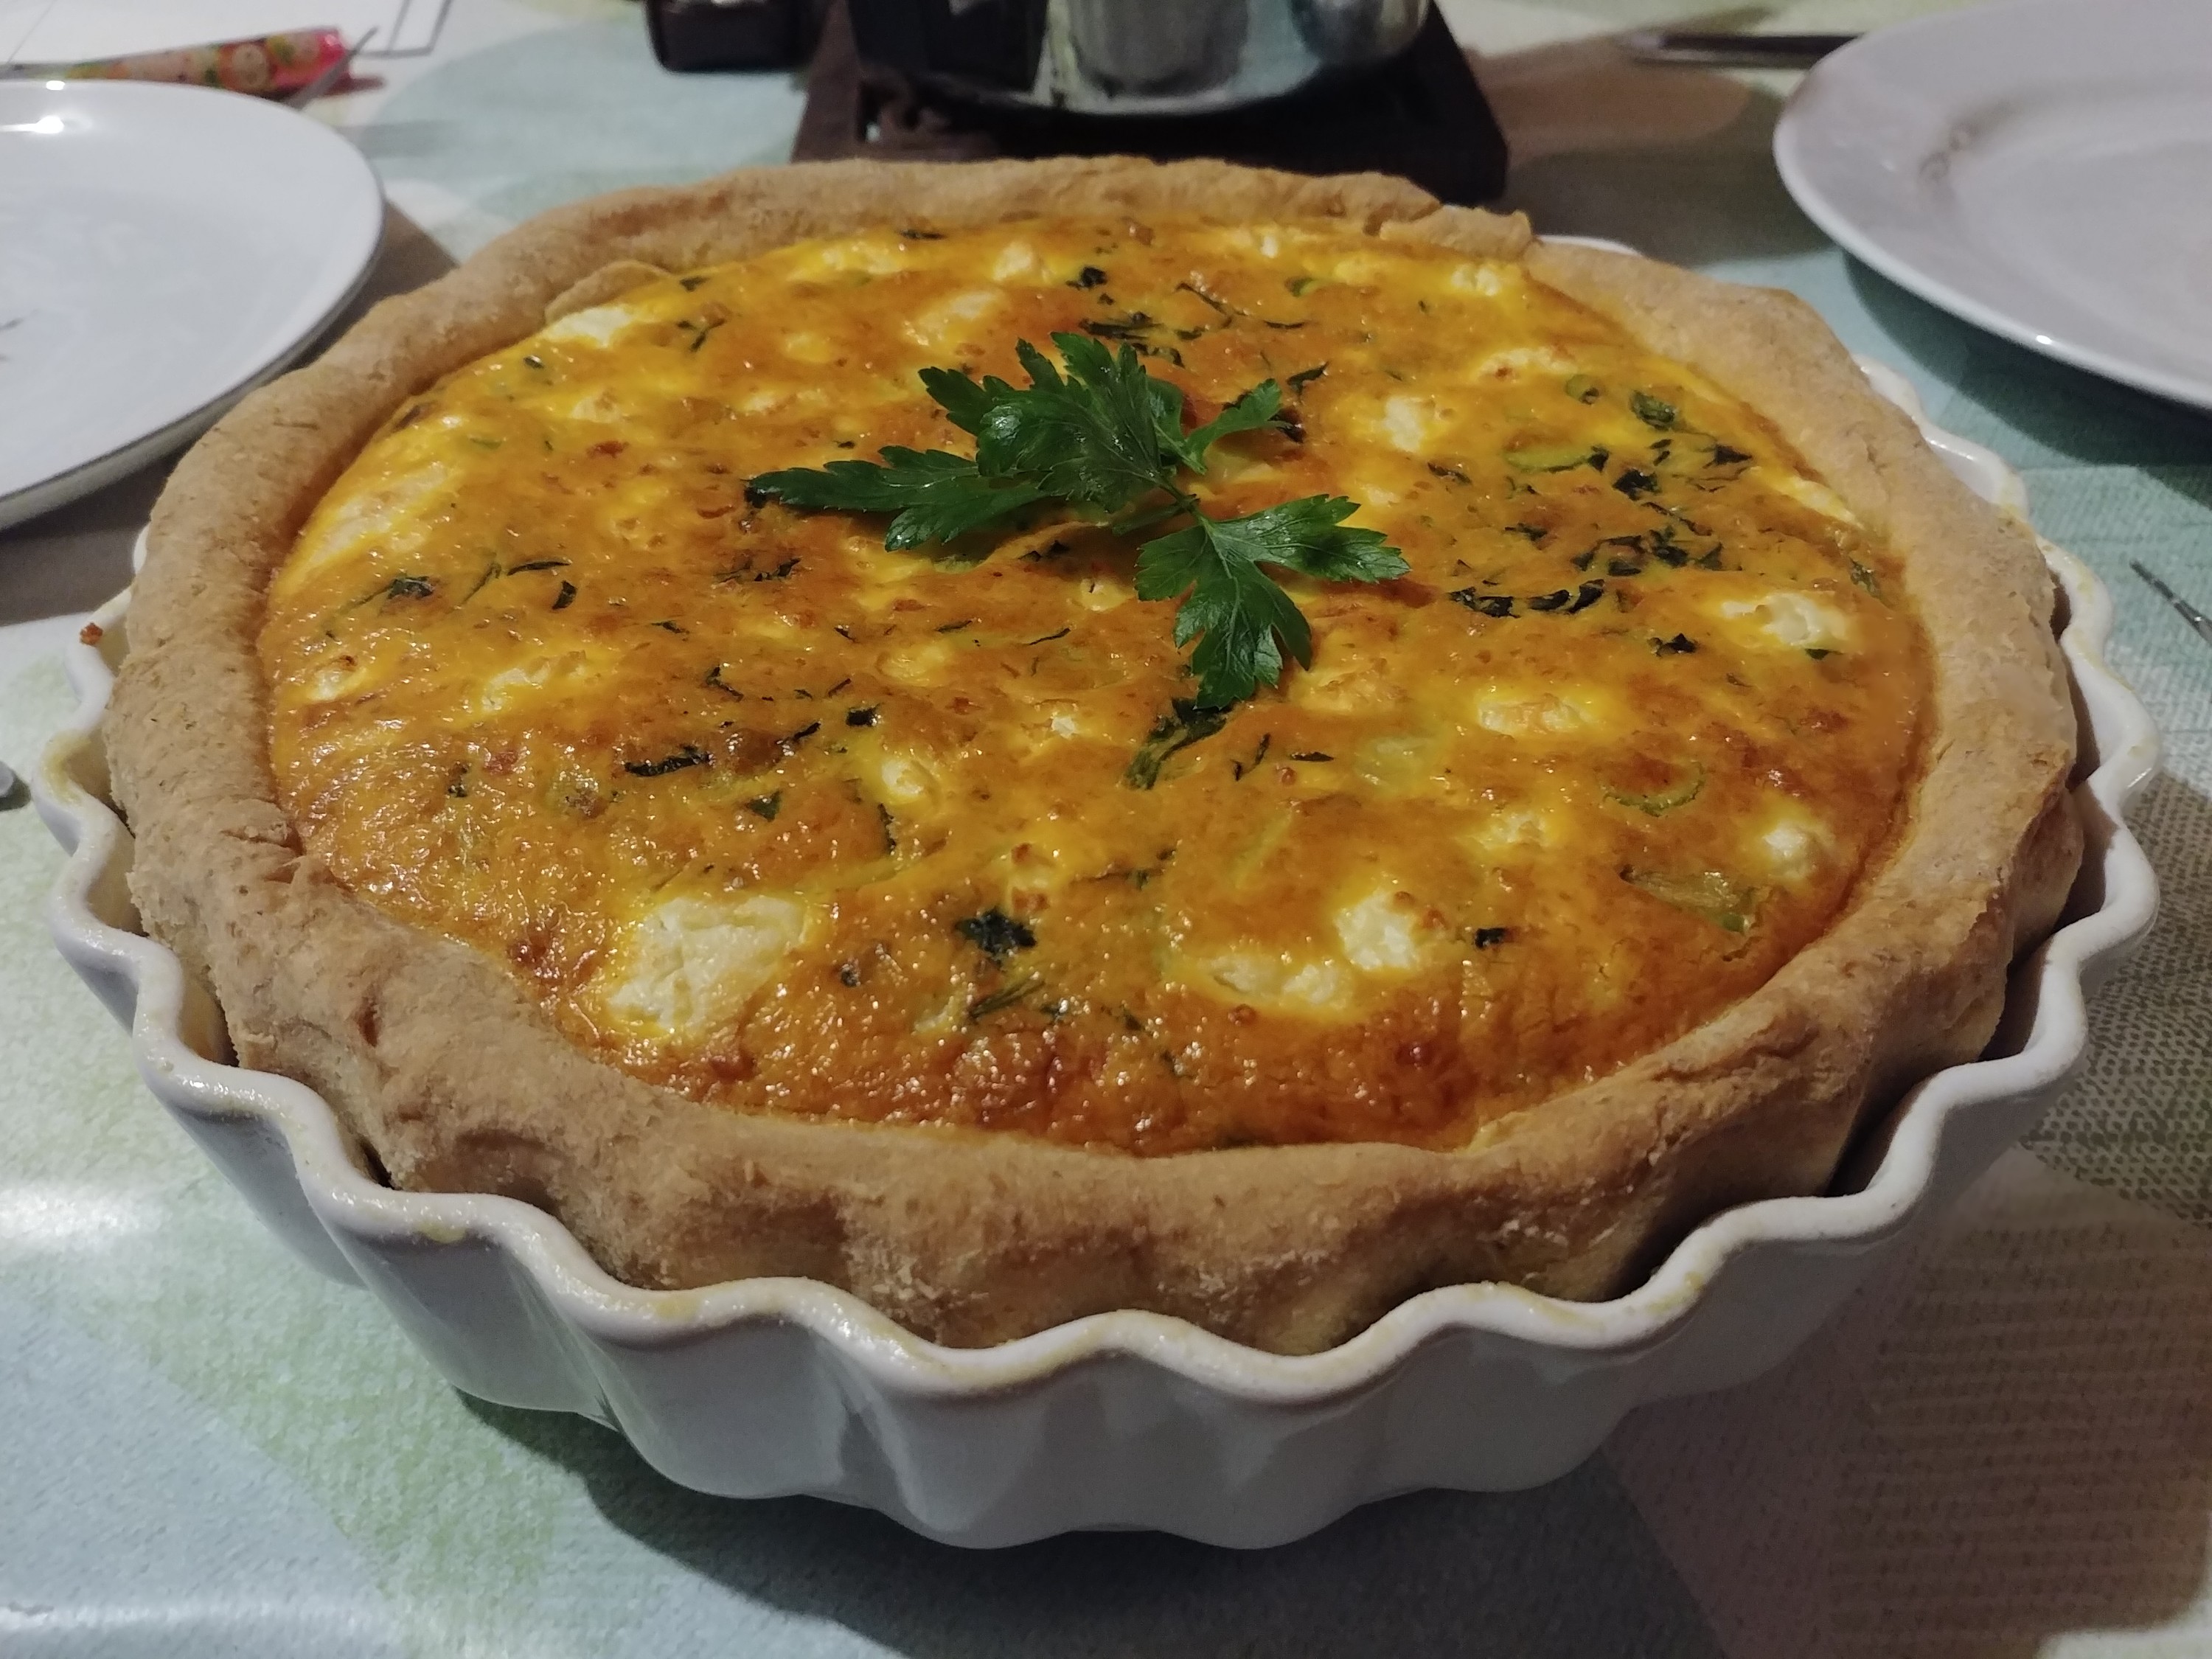
Beets, carrots, apple, potatoes and a freshly picked laurel leaf became beetroot soup. Potato, onion and picked leaf-cabbage became Korean pancakes accompanied by found-in-pantry soy-sauce with garlic from the land and homemade sambal. But the loveliest recipe of the first week was probably the goat cheese and spinach quiche.
There are chickens on the land so for this recipe we only had to use flour, butter and cream that weren’t from Terra do Milho.
Cheese and Spinach Quiche
For the crust:
– 1 ½ cup all-purpose flour
– 2 tablespoons full grain flour added when the dough seems too wet (and to add a little fiber)
– 140 gr cold diced butter (10 tablespoons)
– one large egg mixed with 2 tablespoons of icy cold water
– pinch of salt
Whisk the egg and water together in a separate cup or little bowl. Then in a larger mixing bowl mix the flour with the salt and mash in the butter with a fork, or use the blender until everything looks like crumbs. Add the whisked egg and water. If the dough is too sticky add the whole grain flour, if it’s too crumbly still, add some water. Butter the pie dish and sprinkle some flour on top, your quiche will come out easily! Spread the dough over the pie dish with a spoon (or with cold hands) and make holes in the bottom with a fork (no soggy bottom!). Put it in the fridge (this will ensure good baking results).
For the filling:
– 4-5 eggs
– Whatever vegetables that go well with goat cheese (spinach)
– 1 onion and 2 cloves of garlic
– Half a homemade goat cheese
– 200 ml cream
– salt and pepper (and additional spices if you want to)
– Some fresh chopped parsley
Preheat the oven to 180 degrees Celsius. Chop your vegetables, the onion and the garlic in small pieces. Sautee the onions and garlic in some oil or butter and add the vegetables. Cook until done and drain the moisture out of the pan. Put all the vegetables in a strainer to drain. Whisk the cream and the eggs together very well. Season it and mix in the vegetables. Take the crust in the pie dish out of the fridge and fill it up with the filling. Set the oven timer to 30 minutes, or check until the quiche is a deep golden brown (see picture!). It may even take 40 minutes. Serve in the pie dish! For garnish just put some parsley on top, but it is also nice to eat fresh with the quiche.
Good luck in the kitchen at Terra do Milho. There is always something that you will discover you can eat.
When you want to start your own Homestead (or just started one) you can feel overwhelmed with all the things you need to learn.
This is how we tackled the feeling of being overwhelmed: we took our time. There is no way you will be able to learn everything at once when you have your Homestead.
The good news is: you can start learning some of the skills without having your dreamed Homestead.
In this blog we will introduce you to 4 easy to learn kitchen skills that you can start learning right now:
4 skills that you will need when you have your Homestead with your own vegetable garden and fruit trees. All 4 skills are more deeply discussed in linked blogs as you will find out down below.
Seasonal Cooking, That Is What You Are Very Likely Going to Do.
When you will have your own Homestead with your own vegetable garden, seasonal cooking will be the thing you will do.
Seasonal cooking is different from cooking with non-seasonal ingredients. For example: it is end of summer and there is an abundance of tomatoes, bell peppers and zucchinis. You need to find or design recipes that use exactly these ingredients.
Other times of the year like in spring there are only broad beans and peas to cook with.
In that case you will need a variety of recipes with broad beans or peas that taste very different from each other.
As you practice you will get better at it without boring your family members with broad beans or peas.
As you go, you can start making your own database with recipes that use broad beans, peas, tomatoes, bell peppers and/or zucchinis.
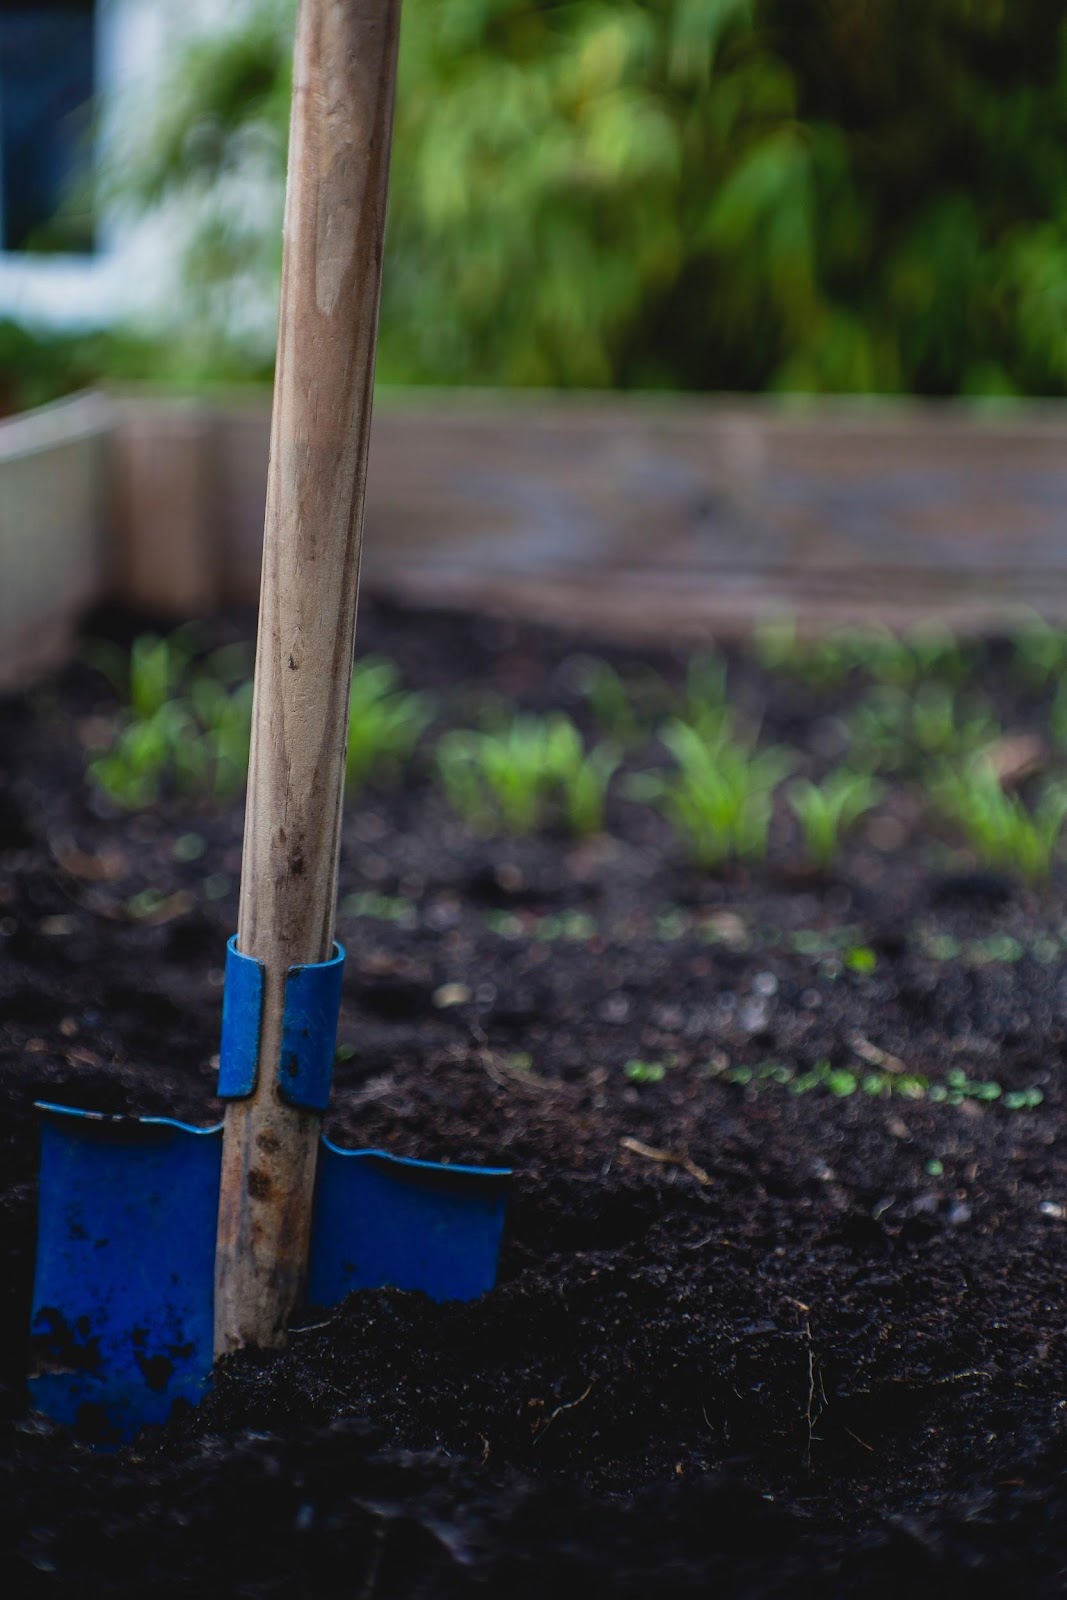
Canning is something that is also very connected to having your own vegetable garden. Having a well working vegetable garden usually means having more to harvest than you can eat. The same will happen when you have a well producing fruit tree (or trees). There will be too much fruit to eat.
Because canning is an easy skill that you can learn anywhere, why not start learning it now? It will save you a lot of stress later when you will have the pressure of growing vegetables that want to be harvested.
But what are you going to can when you do not have a vegetable garden?
No problem, just buy some. When you stick to seasonal vegetables and fruit it is most likely very affordable.
In my blog: “Learning Easy Homesteading Skills: Canning” I will tell you all you need to know about canning. It gives you a simple way of starting to can and also tells you how you can do your canning save.
The Advantages of Dehydrating Fruit and Vegetables
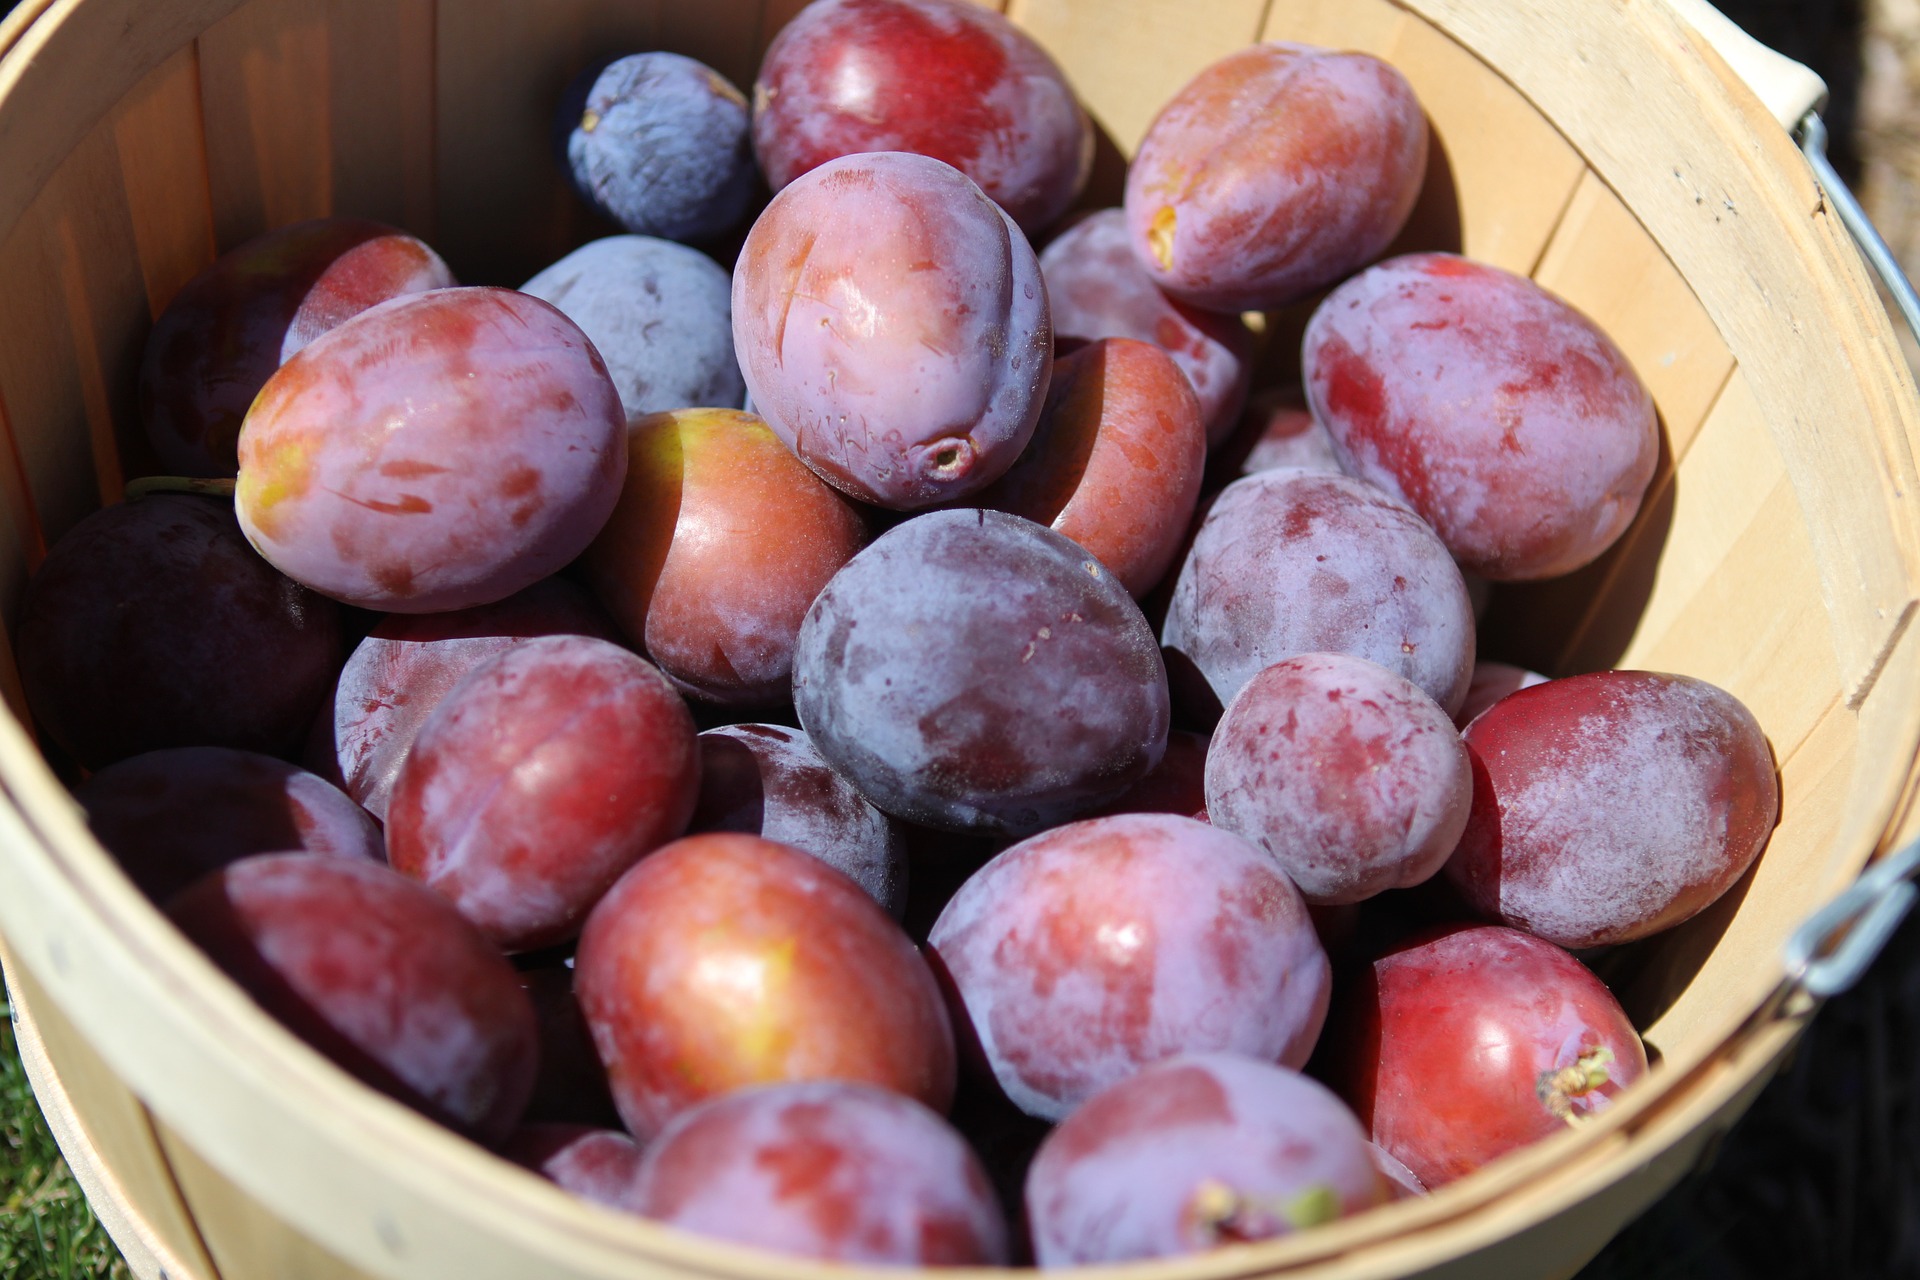
Every year our trees carry fruit. It starts in early summer with apricots followed by plums then apples and pears a bit later in the summer. In fall we have our lemons, oranges and persimmons ripening. Once your Homestead is well established you will probably have the same richness as we are having now.
Dehydrating has some good advantages over other ways of preserving food. It is quick, easy, does not take a lot of storing space and keeps the vitamins in the vegetable or fruit.
It is a very easy to learn skill and it gives a lot of joy eating the dried fruit. With a dehydrator you can also make fruit leather and candied fruit. And then you could dip the candied fruit in chocolate, making your own candies. It’s a lot of fun.
I wrote a blog about Dehydrating in which I explain how it works and what is needed for it. I also explain how the advantages of dehydrating work out.
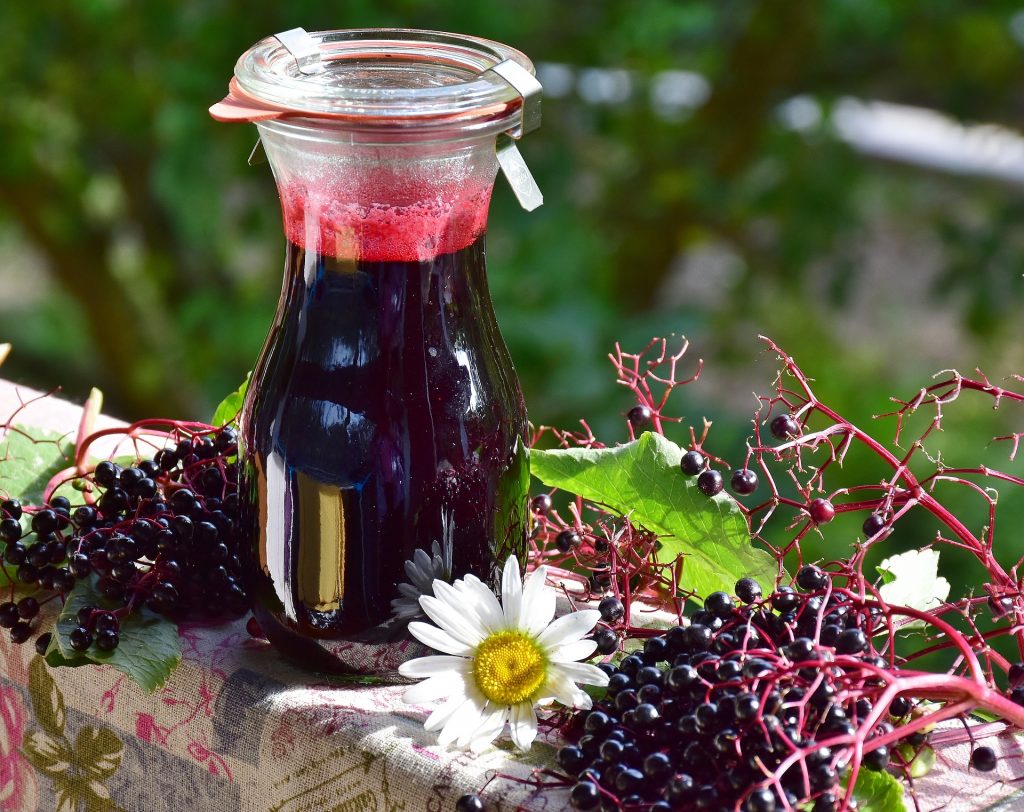
Apart from canning and dehydrating fruit, I love to make juices from our home grown fruit.
Using a Steam Juicer makes Juicing to an easy job. Pick the fruit, wash it, put it in the steamer and after about an hour I have got some bottles filled with pasteurised fruit juice. When the juice is filled into well sterilised bottles and is well sealed it will keep forever.
The juice can be good for drinking, but also serves as a good ingredient for making jellies or sauces or even wines.
I especially like to use the steam juicer for soft fruit.
This being just an overview of 4 skills that you can learn right now while you are still dreaming about your own Homestead, I would like to invite you to check out my blogs:
Don’t you know what to do with an overload of fruit and vegetables in summer and fall?
Do you only have little time for preserving your dear harvest?
Is your pantry not big enough to store all the goodies from the land?
This blogpost contains affiliate links. By using this link to buy a product we will earn a small commission. This way we will be able to continue providing you with the best information we have about Homesteading.
Check this short video to see what a dehydrator is and how it works.
An overload of fruit and vegetables in summer and fall.
Every year our trees carry fruit. It starts in early summer with apricots followed by plums then apples and pears a bit later in the summer. In fall we have our lemons, oranges and persimmons ripening.
Some trees carry a lot of fruit, like our plum and persimmon trees. The persimmon trees can carry up to 100 kg. The plum trees something like 80 kg. Far too much to make jam from or to can. We would never eat all that jam or canned fruit in a years time. So I find the dehydrator a good solution to deal with these big amounts of fruit. Combined with the use of a steam juicer and with canning I manage to process a lot of it.
Another thing that I love to dehydrate is tomatoes. Every year we have an overload of tomatoes in fall. Dehydrated tomatoes are very tasty and can be used the rest of the year when there are no fresh ones. They are lovely in pasta dishes .
By dehydrating you will preserve vitamins.
Our apple and pear trees carry less, but I still like to use the dehydrator to preserve these fruits since dehydrating means keeping the vitamins preserved as well. Apple and pear sauce tastes very good and I do make it, but by heating the fruit vitamins get lost. This is not so much the case when you dehydrate your fruit. So dehydrating is also a healthy way to preserve fruit and vegetables.
Dehydrating is Easy and quick
For canning or jam making a lot of steps are required. Not so much with dehydrating. I think it is a lot quicker and easier. That is why I like it.
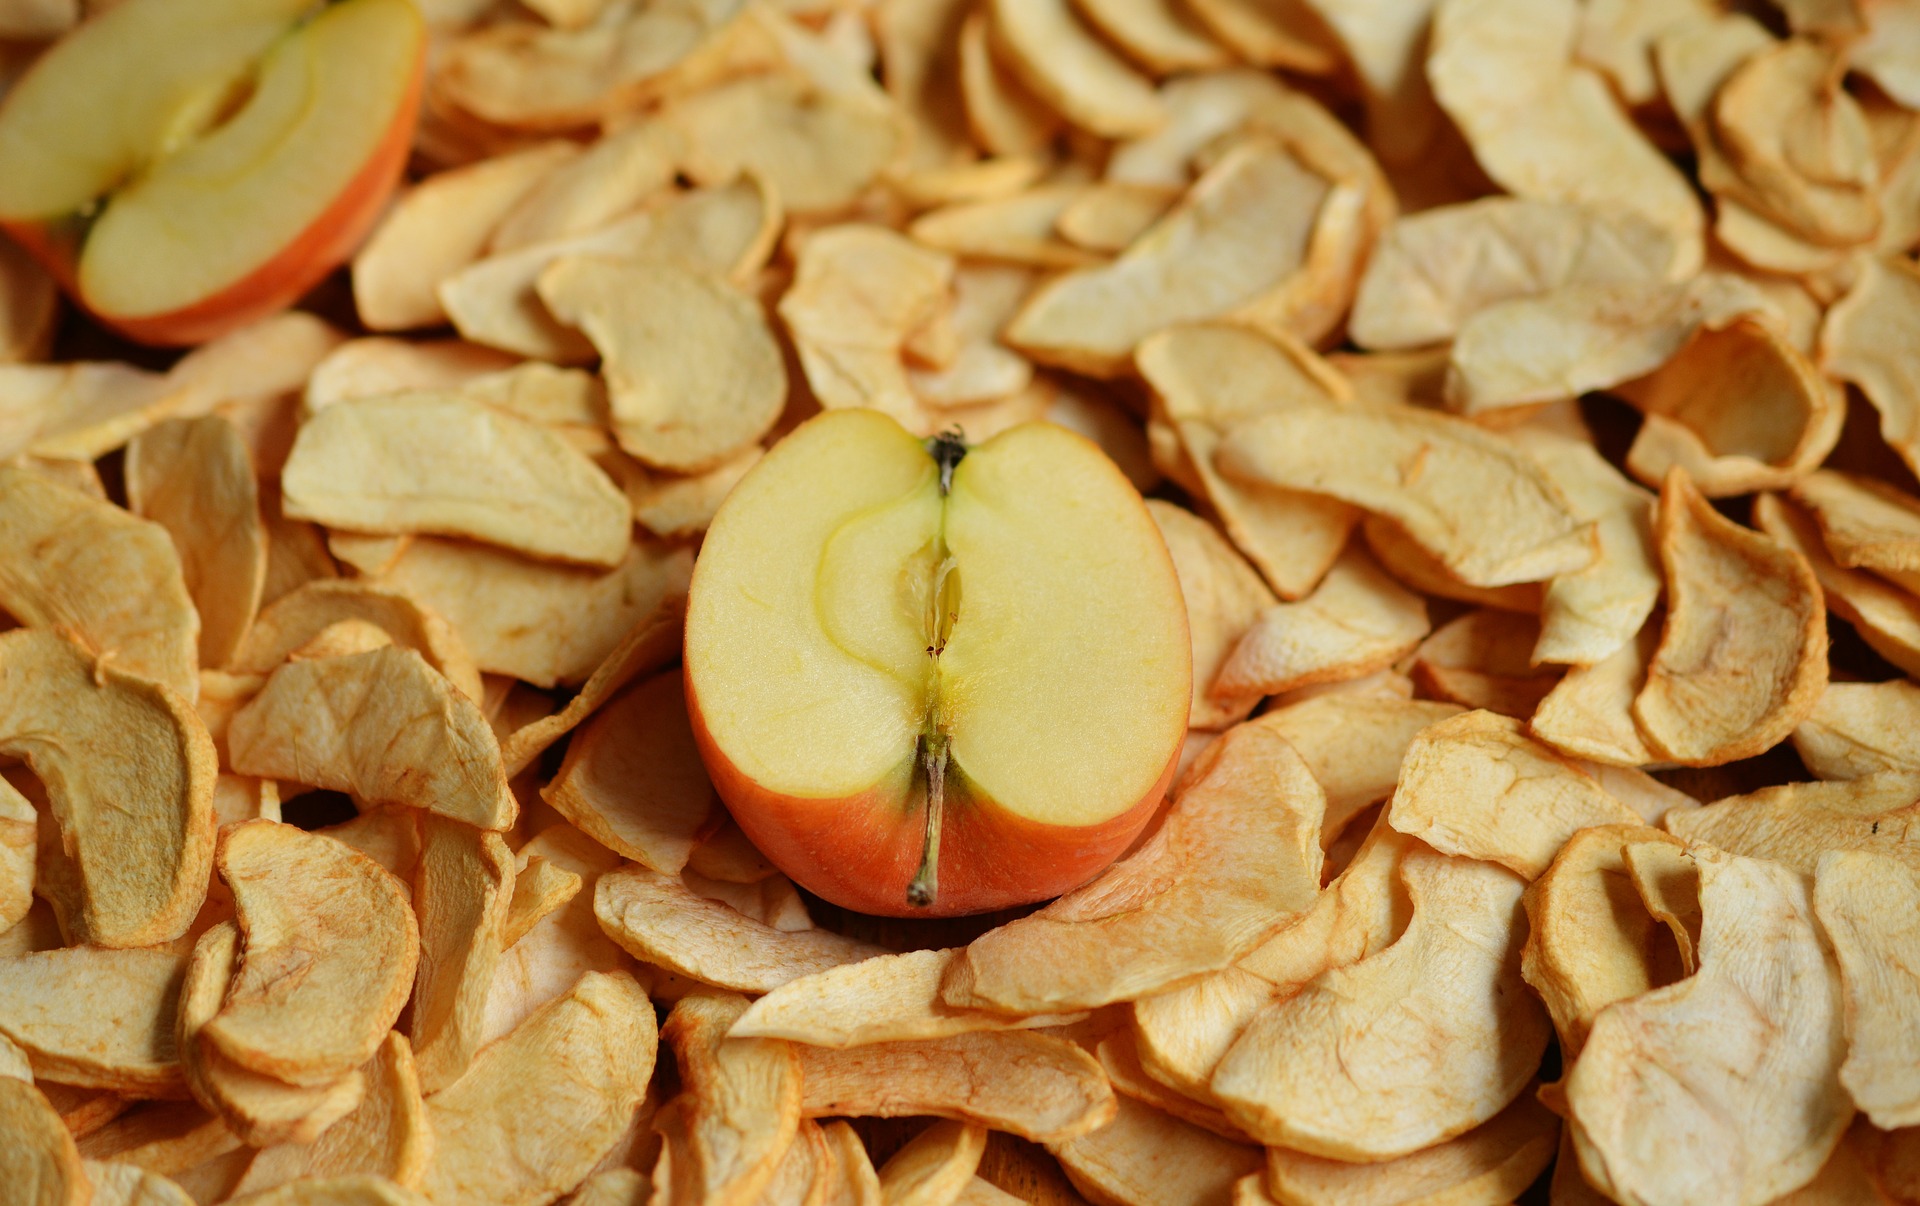
You do need to clean the fruit or vegetable so there is no dirt on it before it goes into the dehydrator. After that you just dry the fruit and put it in the dehydrator.
When you dehydrate apples or pears it takes a bit more work. You need to take the center with the seeds out. If you want it more fancy you can peel the, something I do not do. It is a matter of taste.
When you have a lot of apples or pears you can use a special knife to cut the center out. The are also practical peeling devices to make the peeling quicker.
Saving space by dehydrating vegetables.
Except for the tomatoes we did not dehydrate a lot of vegetables yet, but our neighbouring friends do. They dehydrate practically all their surplus vegetables. The reason is that it saves a lot of space to store dehydrated vegetables instead of canned vegetables.
Dehydrated fruit can be a healthy, heavenly candy.
One of the best things of dehydrated fruit is, I think, that you can produce super nice healthy candies.
We always like to have some snacks in between. And sure you can make a cake or some muesli bars for that purpose. But the thing is: they contain added sugar… The dried fruit or fruit leather does not. For me (being over 50…) this makes dehydrated fruit the perfect snack for in between.
As already mentioned dehydrating fruit also keeps most of the vitamins in the fruit.
Costs
Yes, you do need to buy a dehydrator. When you buy the one we have it will cost you a bit over 100€. There are also some smaller dehydrators for a bit less as well.
Other then buying the dehydrator the costs are very low. Most dehydrators are pretty efficient in electricity use. There is no significant difference in our electric bill when I have been dehydrating fruit even though the dehydrator runs a long time. I try to use the dehydrator overnight even saving more since the night price of the electricity we buy is lower than the day price.
Once done and packed away, there are no extra costs involved.
[button_simple link=”https://www.brouwland.com/nl/bier/?tt=25813_12_329799_Dehydrating&r=%2Fen%2Four-products%2Fkitchen-canning%2Fherb-fruit-drying” target=”_blank” background_color=”#ffffff” border_color=”#000″ text_color=”#000″ ]Click here to check out what a Dehydrator costs.[/button_simple]
What can you dehydrate?
You can basically dehydrate all fruit and vegetables but some things are nicer to dehydrate then others.
On our farm we use different techniques for preserving: canning, steam juicing and dehydrating. Simply because some techniques work better for some things then other things. And sometimes we use different techniques for one thing to get a bigger variety.
Hard fruit like apples and pears do not steam juice very well when they are not 100% ripe. Sometimes we harvest the fruit earlier because if we leave them hanging birds and fruit flies will consume them. Making the fruit to hart to steam juice. In that case we use dehydration to preserve the fruit.
Softer fruit like plums, figgs and apricots as well as berries do very well in the steam juicer, but can also be dried in the dehydrator. We do both. The juice can be used for making syrup or jelly. The dehydrates fruit can be eaten as candies. The juice and the dried fruit can even be used in fruit sauces. Soft fruits can also be canned or made into jam. Something we also do.
Persimmons a special fruit
Preserving persimmons is a story on it’s own. You can make jam and wine, but none of the two have proved very satisfying for us. We have about 100 kg of persimmons every year from just three trees, which is a lot to process.
I can sell some of the fruit on the market to people who do not have persimmon trees. But because almost everybody has them I never sell a lot. So I get stuck with the fruit.
Steam juicing persimmons is impossible.
Making jam from persimmons gives us an excellent jam. The only problem is that you need to make small quantities at a time. Somehow the jam does not set well when you have a big pot full of fruit pulp to process into jam. So we do make some Persimmon jam but not a lot. The jam is not suitable for selling since it oxidizes, showing a brown coloring in the jar.
The best solution for processing persimmons we found is dehydrating the pulp into fruit leather. It makes a wonderful candy without any additives and without sugar. The good thing is that I can process all the fruit we have. It will also sell very well because it is absolutely delicious. It can be packaged in paper wraps or jars easily.
Check our short slideshow on making persimmon fruit leather.
So that’s it about dehydrating fruit and vegetables.
I think dehydrating fruit and vegetables is very easy. It saves space, costs and time. For me it is a great way to make nice healthy snacks.
And the fruit leather…. , is sooooo good.
[button_simple link=”https://www.brouwland.com/nl/bier/?tt=25813_12_329799_Dehydrating&r=%2Fen%2Four-products%2Fkitchen-canning%2Fherb-fruit-drying” target=”_blank” background_color=”#1e73be” border_color=”#000″ text_color=”#000″ ]Click here to buy a Dehydrator[/button_simple]
Do you have a lot of soft fruit at once in your Orchard? Do you find it hard to process it all at the same time? In that case using a steam juicer is a good idea.
I struggled processing our fruit in the late spring. Hardest were the small plums which I had to de-stone before making jam. 70 kg of fruit to de-stone is very time consuming. It took all of my days to process them and there was still so much to do on the farm.
Then my friend told me that she had bought a steam juicer. I had heard about using a steam juicer but had no idea how it worked. I bought one on her advice and I was surprised. It took me a lot less effort and time to process our fruit.
This blog contains affiliate links. When you buy something trough these affiliate link you will help to keep us alive and be able to make more interesting blogs.
The advantages of a steam juicer.
For me there are a lot of advantages using a steam juicer.
You can process a lot of fruit in a very short time span without a lot of labour. Up to 10 l of fruit at a time. You can use the whole soft fruit and do not need to take the stones out.
The process of steam juicing is not complicated. There is not much that can go wrong.
The fruit juice that comes out of the steam juicer is pasteurised. When poured in a clean sterilised bottle it will keep for a very long time.
Steam juicing is very cost effective. Once the juice is made it does not need any extra electricity to keep it. It is ideal when you have a solar system. You can use gas to steam juice your fruit and then keep it forever without any extra energy input.
You can use the juice as a basic ingredient for all sorts of tasty home mades. Like Jellie, syrup to make drinks, sauces and ice cream. We use it to enrich our kefir drink.
In a steam juicer, you can also use over ripe fruit. So you will lose less fruit during the process.
A disadvantage is that it does not work as well for hard fruit, like hard apples or pears. For us this is not really a problem because it is easy to dry apples and pears in our dehydrator. To know more about dehydrating click on this link: “The Advantages Of Dehydrating Fruit And Vegetables“.
To go short, steam juicing is easy and it provides a quick way to process a lot of fruit. In our case it proved to be very effective to juice grapes, plums and berries.
How does a Steam Juicer Work?
Watch the short video to see what a steam juicer looks like and how it works.
The other thing you will need is bottles with a lid, washed and sterilised. For this I reuse beer bottles with a screw cap, rubber cap or a flip-top. You can also go fancy and use a special weck juice bottle.
I reuse just any kind of bottle. I wash them well and sterilise them. How to do this? Click on the link and see my blog: Sterilising Bottles in the Oven.
Summarising
Steam juicers are very useful for processing large quantities of fruit into juice. In this way you will save time for doing other things on your farm.
The juice can be stored for a long time and be used as a basic ingredient for lot of recipes.
I hope you enjoyed my blog and have a great steam juicing time.
Do you want to learn easy Homesteading skills? Don’t you have a Homestead yet?
No problem.
You don’t need to wait, you can start right now.
This is what you can learn right now: CANNING. Canning is a way of preserving food. A way us Homesteaders use a lot.
Why? Because we do not want to waste any fruit or vegetables, we have worked so hard for to grow. Anything you can not eat right away you can preserve by canning.
All the basics you need to know about canning are described in this blog.
These are the topics:
Why you should learn canning if you want to start a Homestead.
Why canning is something for you and not something to be afraid of.
A short overview of the most common ways of canning.
A simple way of canning for starters.
What do you need for canning? And how to spend next to no money on it.
How to make your canning into a success and do it savely.
Vinegar, salt and sugar three basic preservers and how to use them.
Lets go for it!
This blog contains affiliate links. When you buy something trough these affiliate link you will help to keep us alive and be able to make more interesting blogs.
Why canning if you want to start a Homestead?
As a homesteader you would most likely have a vegetable garden. Hopefully it will provide you with enough vegetables for the whole year. In our case we can grow vegetables year round, so it is a matter of planning the garden right to have food the whole year round.
When selling a vegetable is hard because everybody has it.
Sometimes however, it happens that we have a lot of a vegetable and we are not able to eat it all. In that case we could sell the surplus, you would think… But often when we have a lot of a certain vegetables our neighbour has the same problem…and not only our neighbour. A lot of people in our neighbourhood will have a lot of that vegetable, so we can forget selling it.
In that case canning is a solution. By canning we save some of the vegetables for later. This will enrich our diet, we will have more variety on the table year round.
When you live in a climate with cold winters.
Maybe you live in another climate, more up north, where the winters are too cold to grow vegetables. In that case you will have to grow everything in the spring, summer and autumn. If you want to have vegetables from your own garden in winter too, you will have to preserve some. Canning is one of the easy ways to preserve food. It is the cheapest as well.
Canning, a solution for future Homesteaders
So as a Homesteader of the future you will most likely have a vegetable garden and be canning your own vegetables. Because it is an easy skill that you can learn anywhere, why not start learning it now. It will save you a lot of stress later when you will have the pressure of growing vegetables that want to be harvested.
But what are you going to can when you do not have a vegetable garden? Well: buy cheap seasonal local vegetables. I made a blog on seasonal cooking that also covers the topic of buying local and seasonal vegetables. Check my blog on the topic, click on the link: Learning Easy Homesteading Skills: Seasonal Cooking.
Why canning is something for you and not something to be afraid of.
You don’t need to be a canning expert to do some canning. It is like driving a car, everybody can learn it. It’s one of those old skills that was very common in every kitchen.
It is best to start small and simple. You don’t need to do 50 jars at the time like grandma used to do. Sometimes I just do 5 jars of something.
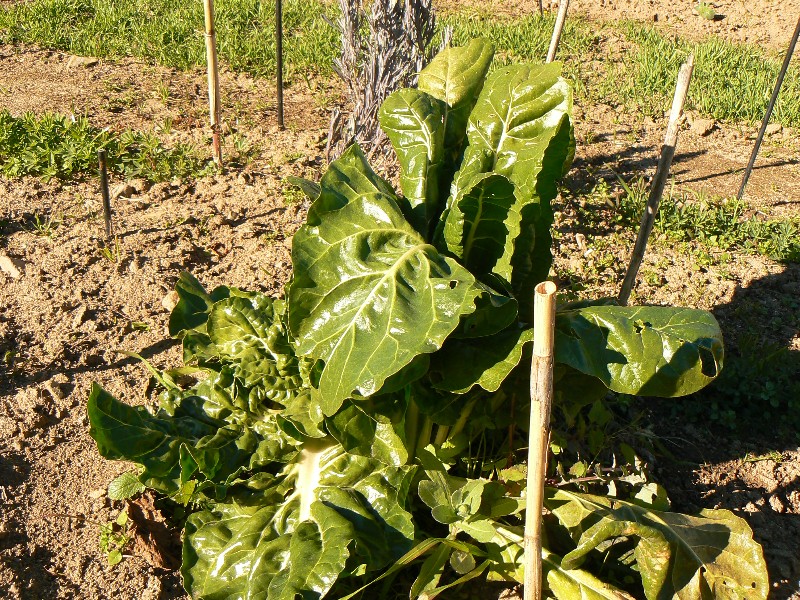
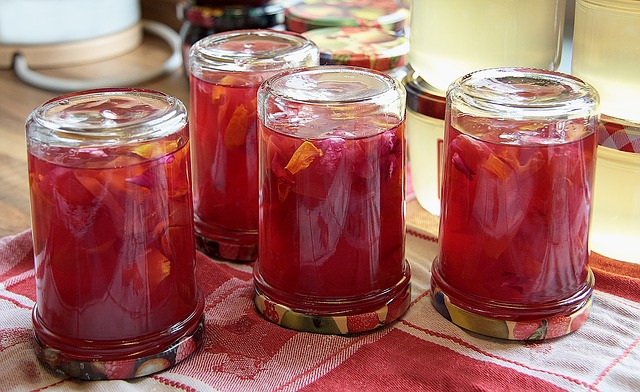
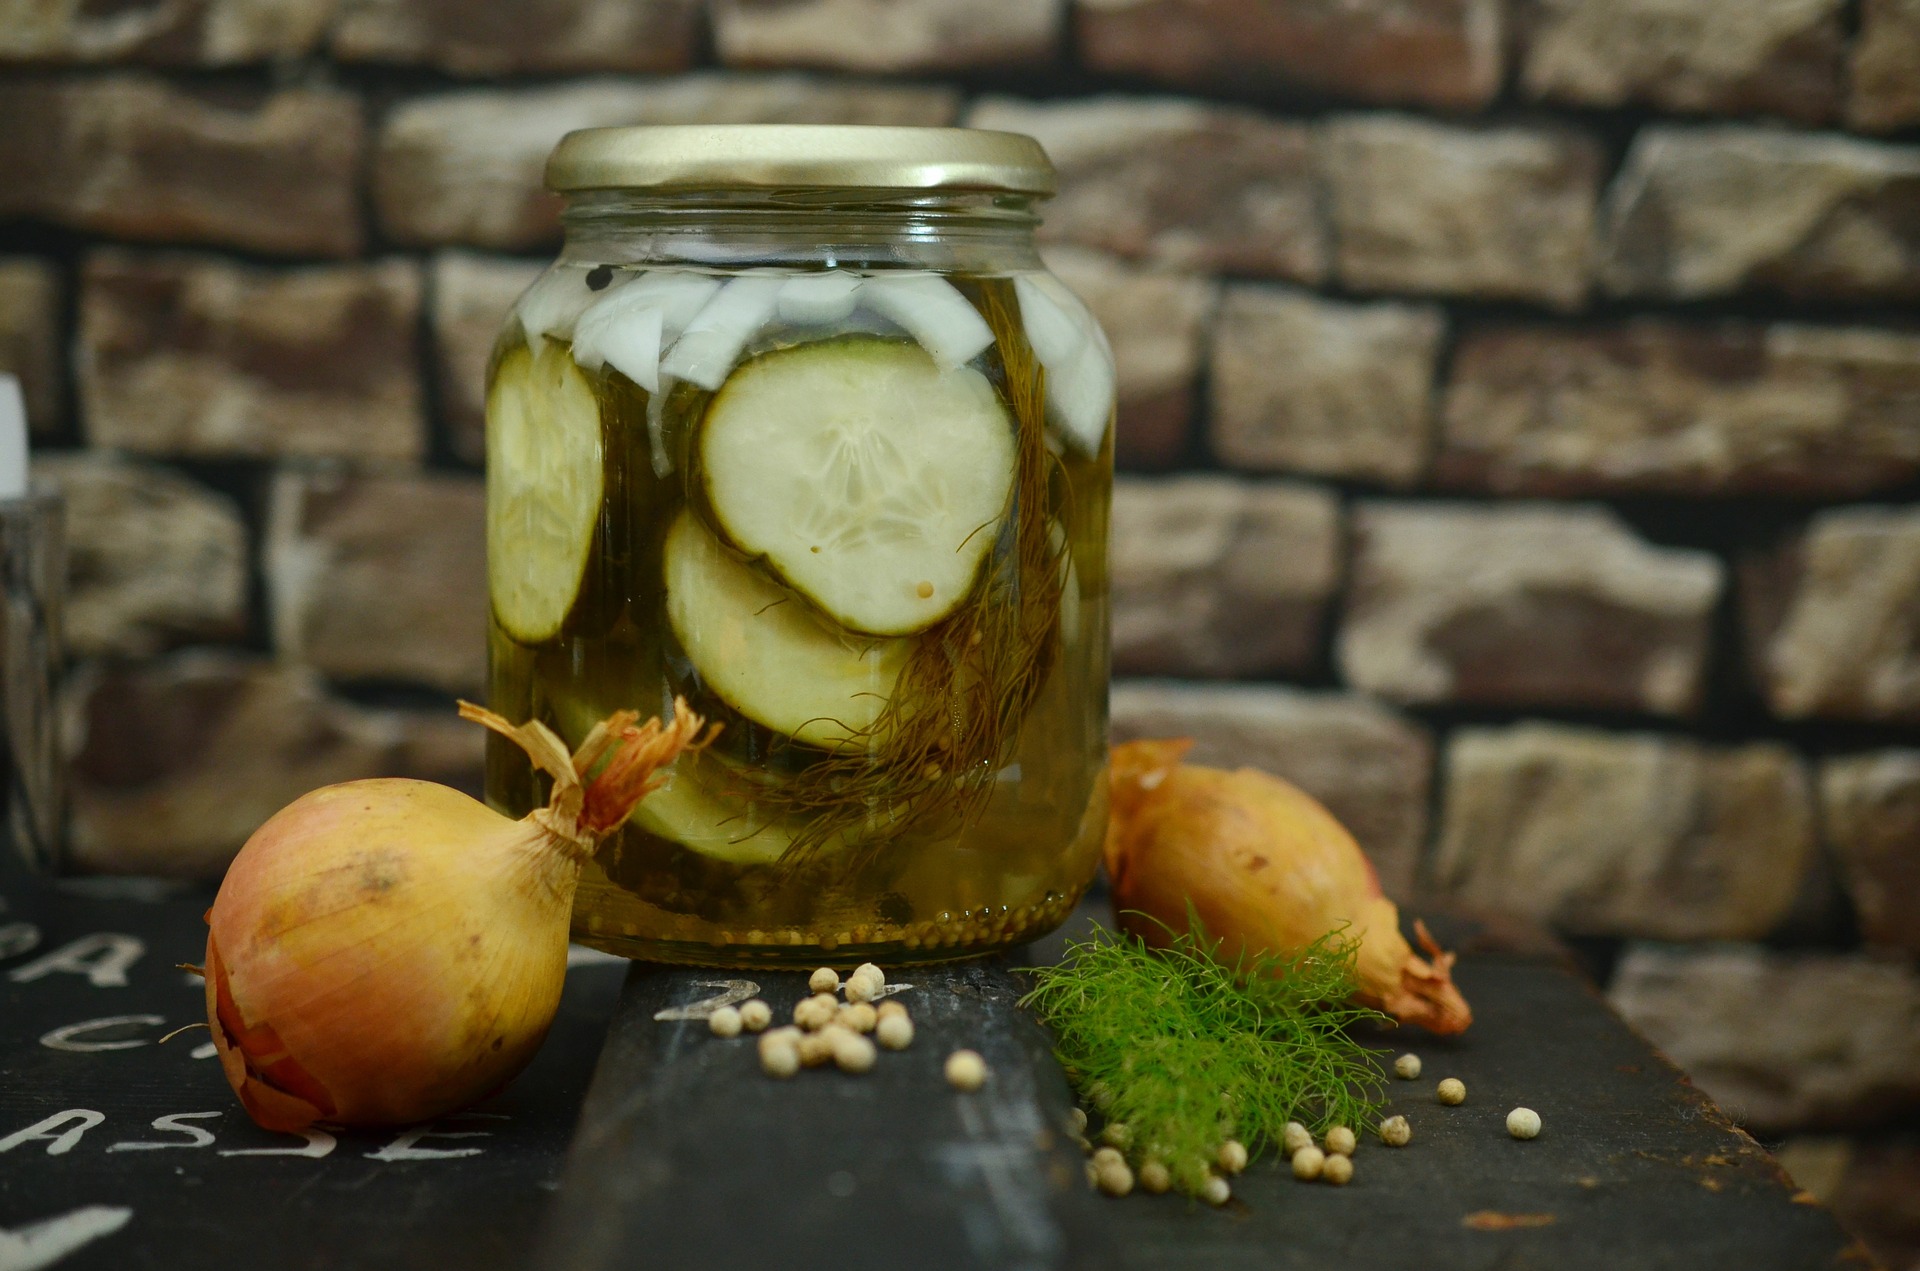
Like what I do with red beets, I love them pickled. Usually we do not have so many in the garden at a time. We grow them well spread year round. Sometimes I manage to harvest some when nobody bothers about them and I make a few jars of pickled red beets. It does not take much space in the kitchen and it is done in no time.
So that is how you could start. Buy a kilo of some vegetables, like carrots or red beets and can them. Really it does not need to be a big deal. And if it goes wrong, no problem, you only lost a kilo of carrots and some time.
Canning is a very controllable process. With the right hygiene and some things to stick to you can can. When done right the losses are minimal.
A short overview of the most common ways of canning.
When you look around on the internet you will find several ways of canning. I would say there are three main types:
Canning in jars with a metal screw on lid.
Water Bath canning.
Pressure cooker canning.
The types will overlap each other a little.
A simple way of canning for starters.
My experience is that canning in jars with a metal screw on lid is the simplest way of canning. You do not need any special stuff for doing it, except maybe a funnel for filling the jars. And even that one is optional, however very practical.
Watch the short video in which I show you what jars I mean and what is special about them and what you need to know about the lids.
What can you can in jars with a metal screw on lid?
Can you can anything with this canning method? Pretty much. The only thing I never managed is to can green beans or cabbage, somehow that is more complicated. The other thing you can not do is add milk or dairy products to the things you want to can.
What do you need for canning? And how to spend next to no money on it.
Jars with a metal screw on lid is probably the jar you have seen most in your lifetime. You can find it in any grocery shop. These jars you can reuse for canning.
It is very likely that you buy some product in such a jar, so the only thing you need to do is: do not throw them away. You have to keep the jar and the lid.
When you are on your own it might take awhile before you have enough jars to can something. If you want to hurry up: ask a friend if he or she wants to save some jars for you.
What else do you need? Normal kitchen stuff: a pot to cook vegetables in, a pot for sterilising the lids, a spoon, a special funnel, towels, heat grips, an oven.
Heat grips are save to use. It is a special grip that you can use to take the jars out of the hot water. Click here for the grip.
The filling of the jars needs to be done without staining the rims of the jars. The special funnel is a great help to keep your jars clean.
How to make your canning into a success and do it save.
Essential for canning is that you work super clean.
A clean working surface.
The surface that you are going to use needs to be wiped with a clean wet, soapy cloth. After that it needs to be dried with a clean dry cloth. Make sure there are no bread crumbs left behind on the surface. Bread crumbs contain yeast and yeast will spoil your canning.
Clean hands and nails.
When you start the process make sure you have washed your hands. Do not forget to clean your fingernails as well.
It seems to be a bit overdone, but it is not. Working super clean just means you will not lose your precious canning work. A small breadcrumb or a little dirt can spoil your product.
Clean and sterilised tools, lids and jars.
Jars, lids, special funnel, spoons and other tools need to be well washed either with hot water and soda or in a dishwasher. Rinse everything well with hot water since you do not want to taste soda in your canned vegetables. Then dry it with a clean cloth.
After that the jars and tools have to be sterilised. For the jars I use the oven, the rest, including the lids I put in boiling water. Do not sterilise the lids in the oven, because they will not work any more after that. The oven is set on 100°C for 10 minutes.
How to preserve food by canning: the basic principles.
To preserve food vinegar, salt or sugar is added. The reason is that an acidic, salty or sweet environment oppresses the growth of bacteria.
The whole principle of canning is that you start clean, with sterilised material. Then you fill your clean jars either with hot dish and seal it. Or you fill it with a warm dish and heat it in a water bath. The temperature needs to be 100°C to sterilise your dish in the jar, or it needs 73°C for pasteurising the dish in your jar.
I will not go into the details of the differences here, but you will find out that most recipes are based on either of the two. There is a difference in approach between U.S. Recipes and European recipes. I believe both works. There are more save guards then you think in the whole canning process.
One of the most important save guard in caning in jars with a screw on top is that the lid clicks into vacuum. When the lid comes out of the vacuum before you have opened the jar, it means the content of the jar is off. See the video above where I explain this.
After the heat vinegar, salt and sugar help to preserve the canned food
The heat is necessary to kill yeast, fungi and bacteria at the start after that the vinegar, salt or sugar will safeguards your dish from going off. Bacteria that for some reason survived the heat have no chance to grow.
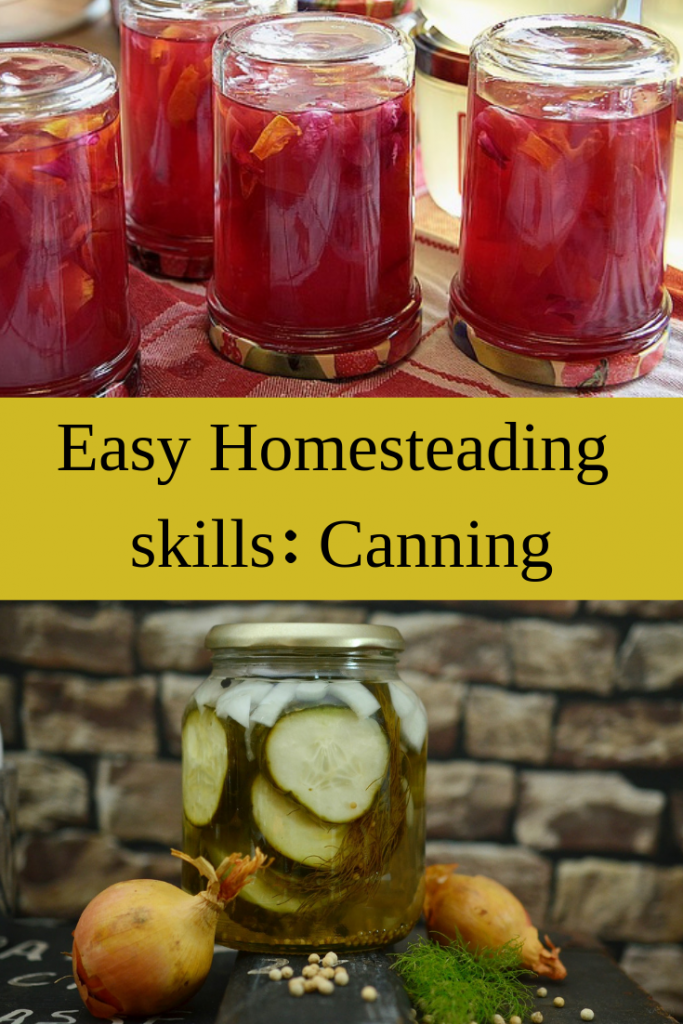
Pin it for later
How to use vinegar, salt and sugar.
Vinegar.
If you would use pure vinegar for canning, your canned vegetable would get very sharp. To get a balanced taste in your canned produce it is recommended to delude the vinegar with water.
To get a balanced taste for every 1 liter of vinegar you would use 400 ml water and 40 grams of salt. You could say this will result into a very basic pickle.
To give your produce more taste you could add herbs and spices like garlic, black pepper seeds, mustard seeds or chilly. This will depend on your taste and on the recipe you are using. You can experiment with different things.
An example of using vinegar, water and salt.
Using vinegar, water and salt works like this:
Fill some jars with well washed vegetables, leave about 2 – 3 cm of space at the top.
Poor the vinegar, water and salt in a pot (if you want add some herbs and spices). Heat it until it is boiling.
Poor the hot liquid into the jars with vegetable. Leave a head of liquid above the vegetables.
Close the jars.
Turn the jars upside down for 10 minutes.
Label the jars with date and content.
Keep the jars for at least 3 weeks before you use them, this will add to the taste. Store in a cool place.
Sweet – sour.
What is often done to make your canned product even more tasty is to add some sugar to the vinegar water and salt. This will result in a sweet sour pickle.
Herbs and spices that are often added to this combination are coriander seeds, anis, ginger, black pepper seeds or dill.
Using vinegar, sugar, water and salt works the same as just using vinegar, water and salt. The only difference is that in no 2. in the example you add the sugar. How much sugar you want to add is a matter of taste. I usually add 4 or 5 table spoons on every liter of water. But je can go up to 300 gr of sugar.
Sugar
Another way, that is mainly used for fruit is using sugar to can. You can either make a sugary liquid to preserve whole fruits in or make jams and jellies.
Fruit in sugary liquid
To can fruit, like apples, small pears or any other firm fruit you can make a heavy or light syrup.
A heavy syrup recipe is based on 1 kg of fruit, 1 liter of water with 1 kg of sugar. Add a bit of lemon juice. You can make it even more tasty by adding ½ l of port wine.
For a lighter syrup you can use 1 kg of fruit, 1 liter of water and 500 grams of sugar. Also add some lemon juice.
It works like this:
Divide some pieces of fruit or small fruits in jars. Like 4 small jars.
Boil 250 ml of water and add 250 gr of sugar for a heavy syrup. Or 250 ml water with 125 gr of sugar for a light syrup.
Leave the syrup to cool down a bit so it is manageable.
Poor the hot syrup into the jars over the fruit. Leave a head of liquid above the fruit.
Close the jars
Put the jars in a pot and fill the pot with water so the lids of the jars are still just above the water level. Place a cloth under the jars to prevent them from breaking.
Bring the pot to near boil, at 75-80°C and keep it at this temperature for 20-30 minutes. You can mesure the temperature with a thermometer that is used for cooking.
Turn off the heat and leave the whole thing until it cools down (lukewarm to cold).
Take the jars out and dry them well. Leave them a bit to become really dry. The lids of the jars should have popped vacuum. If not the process did not work.
Label the jars with date and content.
Keep the jars for at least 3 weeks before you use them, this will add to the taste.
Jams & Jellies
For making jam you can use almost any fruit. You will have to take the stones out of the fruit. Some fruit might make a better jam without the peel.
Since jams & jelly making is a whole story on it’s own, I will not proceed here.
Jam making, you could say, is also a way of preserving food using a lot of sugar. That is why I mention it here.
Nothing at all added.
It is possible to can fruit and vegetables with no additional at all. Except some lemon juice. To keep canning save, some additional acid is necessary.
The other thing is that you have to work with boiling hot produce.
One of the things you can make without using additional things is apple sauce.
This is how this works:
You will have to make an apple sauce from a mixture of sweet apples.
Make it boiling hot.
Fill the sterilised jars with apple sause and close the lids while the apple sause is still hot. Close the lids firm.
Turn the jars upside down and leave it for 10 minutes. This way the air in the jar above the apple sause gets sterilised. This stops the sause from going off.
Turn them back up.
When the jars are cold label them with a date.
Let’s go for it.
Now you know the principle of canning like using heat, vinegar, salt and sugar. With the instructions in the blog you should be able to do your first canning.
So what can you do?
Collect some jars. Something like 15 jars would be a good start.
Go to the supermarket around the corner and buy some cheap vegetables, like carrots and onions.
Follow the instructions of the sweet sour pickles. For the amount of liquid that you need you have to make an estimate. I usually use a third of the volume of the jars for the amount of liquid. So say you need 1/2 liter to top up the vegetables in the jars, you will need: 300 ml vinegar, 125 ml of water, 15 gr of salt and a tabel spoon of sugar. I do not make an exact calculation. It’s just more or less.
Enjoy eating it.
Do the same again with other vegetables. Try an apple sause with or without sugar. Make some fruit on light syrup (like strawberries, yummy). Try some nice recipes and adjust the recipes to your taste or to the ingredients that you can get for cheap. Be free and try.
Get the hang of it.
More Ways of Preserving Food.
Apart from canning there are more ways I use for preserving food. Click on the links to find out more ways:
Do you want to start your own Homestead one day? Is that day still some years ahead?
Here is something you can start doing right now.
Why it is Important to Start Learning Homesteading Skills now?
When you finally start your Homestead there are many things you will have to do. Some things you might never have done before.
It will take a significant amount of time to learn everything you want to do. Time you might not have ones you are running your Homestead.
For us it proved to be very useful that we already knew how to cook seasonal before we started our Homestead.
In this blog I will tell you something about season cooking, something that you can easily do before you start your Homestead.
It will cover the following topics about seasonal cooking:
Why would you cook seasonal?
How do you know which vegetables are seasonal?
How to cook seasonal?
Where to find the right recipes to cook seasonal
Buying bulk to preserve seasonal vegetables.
What is Seasonal cooking?
What is seasonal cooking? It means you cook with seasonal ingredients, ingredients that grow in the season that is on. Like in spring you would cook with vegetables that grow in spring, like broad beans. Or in summer you would cook with vegetables that grow in summer. Like Tomatoes or lettuce or both.
Why would you cook seasonal?
The main reason is: when you will have your Homestead, that is what you are going to do when you have your vegetable garden.
Seasonal cooking is different from cooking with non-seasonal ingredients. For example: it is end of summer and there is an abundance of tomatoes, bell peppers and zucchinis. You need to find or design recipes that use exactly these ingredients.
Other times of the year like in spring there are only broad beans and peas to cook with. In that case you will need a variety of recipes with broad beans or peas that taste very different from each other.
As you practice you will get better at it without boring your family members with broad beans or peas.
As you go, you can start making your own database with recipes that use broad beans, peas, tomatoes, bell peppers and/or zucchinis.
A bonus is that seasonal cooking is much cheaper then non-seasonal cooking. You will be able to save more money for your future Homestead.
Because seasonal vegetables are cheaper then off season vegetables you can buy bulk and start preserving food. Something that you will also do on your Homestead ones your vegetable garden is a success.
How do You Know Which Vegetables are Seasonal?
Try to find local growers that sell on the market and ask them which vegetables are seasonal.
Check for the cheap vegetables in the supermarket. Do a second check whether the vegetables are produced in your region. Those vegetables will most likely be fresh and from the season.
https://www.youtube.com/watch?v=IDmWdQk95rk
How to Cook Seasonal?
At the beginning you might have the feeling that seasonal cooking narrows down the possibilities of making different dishes. But as you practice you will hopefully find out that there are much more things you can do with just one vegetable then you think. At least that is what happened when I started cooking seasonal.
It is all a matter of finding the right recipes.
Where to Find the Right Recipes to Cook Seasonal?
Well try google: google seasonal recipes and you will find some for sure. I found that the bbc has very doable recipes, but there might be a lot more out there.
Experiment with one ingredient recipes like onion bhaji or onion soup. This way you can broaden your horizon in what you can do with one ingredient.
Grandmother’s recipes are also great to try. Especially when you can find grandmother’s recipes from the area that you are living in. These recipes will not only tell you to cook with seasonal ingredients, but also with local ingredients.
https://www.youtube.com/watch?v=qdz0KeAsMOk
Buying Bulk to Preserve Seasonal Vegetables.
Another way to avoid eating only a view vegetables in a season is to preserve food.
Here is an example: In some climate zones, in late summer there will be an abundance of bell peppers. They will be cheap to buy. Bell peppers can be preserved very well. Filling some jars with nicely preserved bell-peppers when they are cheap and keeping the filled jars in your pantry will provide you with bell-peppers when they do not grow.
You could do this with any vegetable that grows in abundance at a certain time of the year. Just can or dry a view kilograms of vegetables you can buy for cheap and fill your pantry. Eat the canned or dried vegetables when they are expensive, at another time of the year.
By the time you will start your own Homestead you will be a good food preserver and know exactly how to do it. Above that you will also know how much you will have to preserve year round to fill the bellies of the family members.
These are just few things that you can do to start Homesteading right now.
Now you know why seasonal cooking can be useful, how to do it and what you need.
Next blog we will tell you more things you can do right now when you want to start your own Homestead.
Don’t want to miss our next blog, subscribe to the blog. If you do a free gift is waiting for you: a starters guide to get started with your Homestead.
This is a guest blog written by Emma. Emma is a part-time property developer, part-time home improvements and gardening blogger at Fixtures and Flowers, and full time Mum.
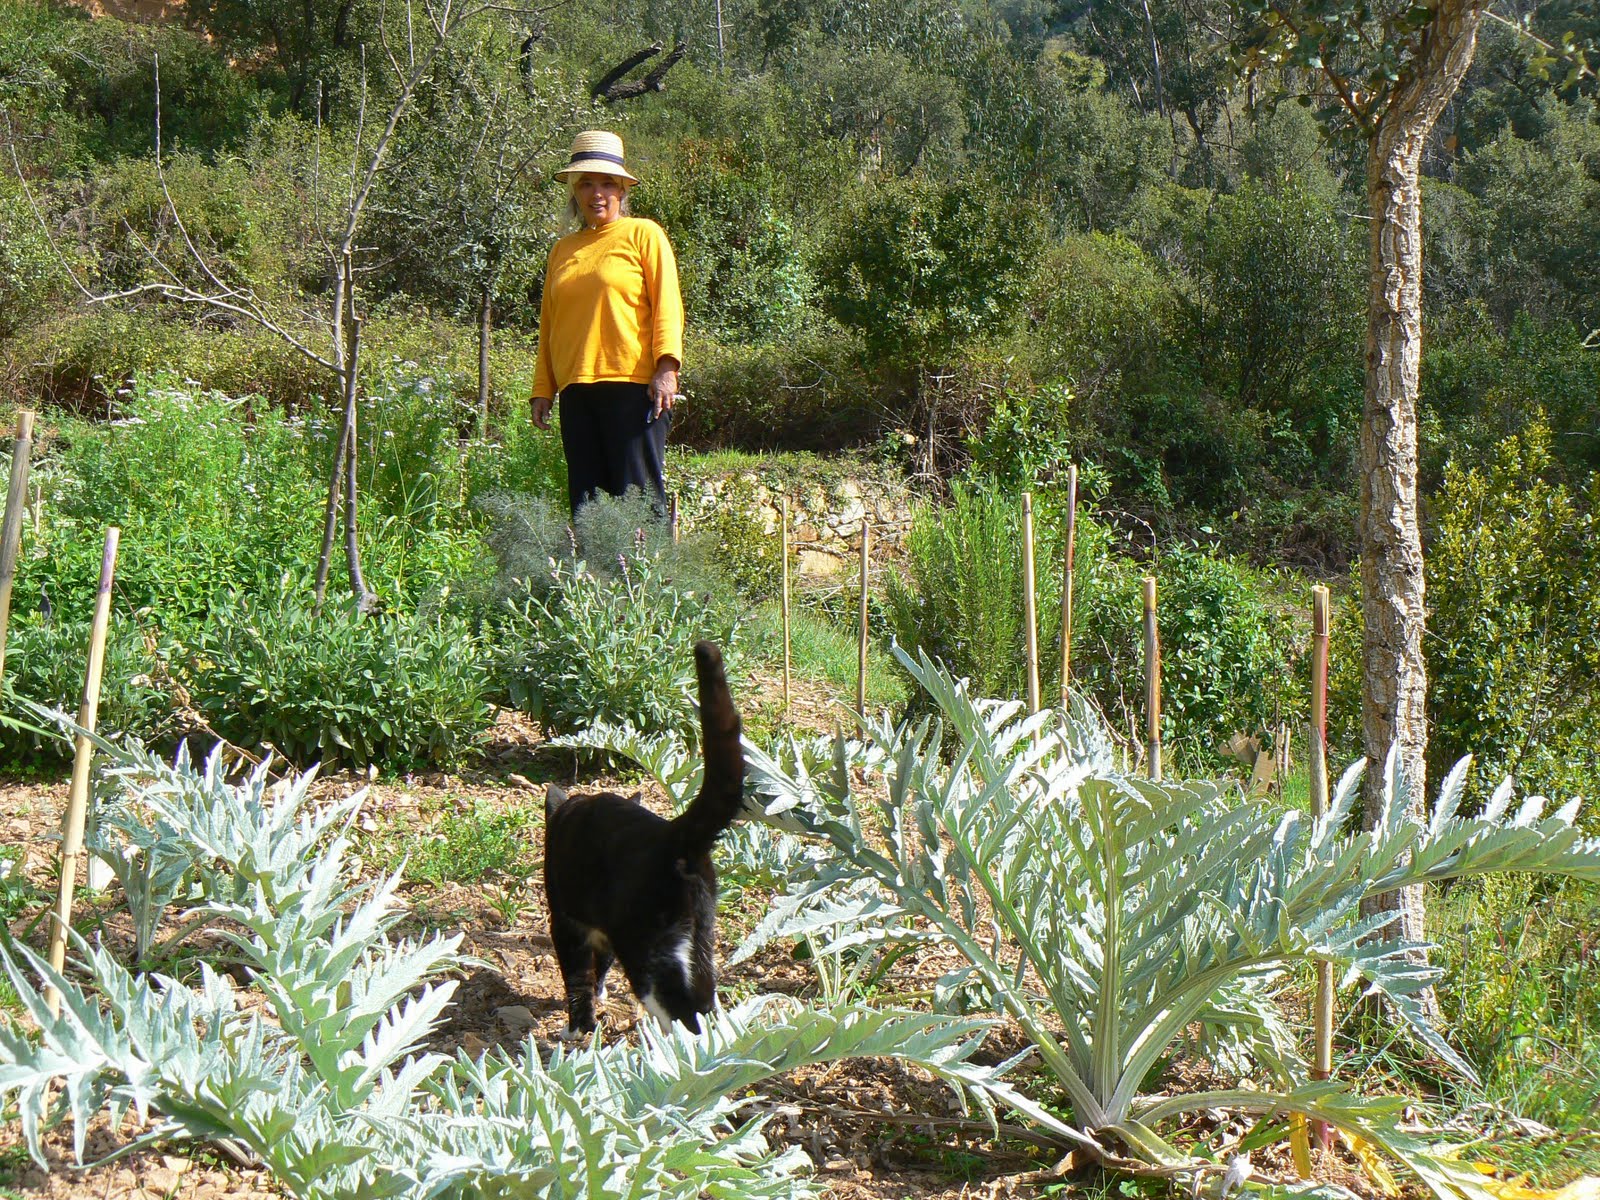
Gardening is for everyone.
Regardless of who you are, or the space you have; there’s a form of gardening that will suit you. Over the years, it has evolved significantly that even those who have insufficient space can take pride in their tiny gardens.
Any garden, big or small, can make any property more beautiful and bring tranquillity into your life. It also provides the perfect outlet for you to expend your energy and creativity. And if you’re into growing your food, it provides you with fresh and chemical-free produce whenever you need it.
However, gardening is not as straightforward as most people think. It takes a lot more than just planting and waiting for the best results. There’s a lot of things that you need to know about it which should come from studying and learning. What are these things, you ask?
Read on to find out.
How do you choose which plants to grow?
What you want to grow in your garden depends entirely on you and a few factors. As mentioned earlier, your garden soil will play a significant role if your plants will thrive or not. Ideally, you need to know first what soil type you have before making a decision.
Once you have this information, you can either do some research online or ask experts about which plants are suitable for your garden space. In case you already have something in mind that is not compatible with your soil type, don’t worry.
There are many things that you can do to make your soil the right mix for your plant. Adding compost to your soil, for instance, is an excellent way to supply it with the nutrients needed by plants. As much as possible, stay away from using chemicals as they will only do more harm than good.
If you’re new to gardening, it’s recommended that you go with plants that don’t require as much attention as other varieties. Caring for succulents, for example, is so easy that even an inexperienced gardener will do just fine.
How to take care of trees
Lucky you if you were blessed with an ample garden space since you get to plant trees as well. These beautiful works of nature will significantly enhance your garden. Additionally, trees will keep you fresh during summer and warm during winter.
Trees, especially when they’re mature, may look as if they’re so tough and don’t need to be maintained. But the truth is quite the opposite. In fact, you should avoid the most common mistakes people make when taking care of their trees.
Make sure that you water them more compared to your smaller plants since they have bigger roots that grow deeper in the ground. Trees also need to be pruned regularly to keep them healthy and active. When you prune your trees, however, see to it that you do it correctly and at the right time.
As hard and as tall as they may be, trees are also prone to diseases just the same as any other plant. Never ignore signs such as dead branches, scabs on fruits (if you have a fruit-bearing tree), early loss of leaves, etc. If you suspect that your tree is sick, it’s advisable that you contact an expert immediately.
Is artificial grass bad for your garden?
Having a clean and ‘perfect’ lawn is only possible if you dedicate a lot of time and effort in maintaining it. At least, that’s how it used to be before artificial grass found its way into residential areas.
The debate as to whether or not synthetic turf is good or bad for your garden is still ongoing. However, more and more people see that its benefits far outweigh the cons. After all, not everyone has the privilege of being hands-on in keeping their lawns in tip-top shape.
Artificial grass can be used not just in your garden — you can use it pretty much anywhere in the house. What’s great about it is that you can leave it be after installation. Your lawn – or wherever you decide to put it – will look as green and clean as you want it to be from day one, and for many years to come.
Gone will be the days of exhausting activities such as mowing, aerating, or raking your lawn. More importantly, you help yourself and the environment by reducing your carbon footprint. That said, the answer to the question at hand is a resounding yes!
If you want to be a successful gardener, it’s critical that you get to know the type of soil you have in your garden. Keep in mind that neither all garden soil nor plants are created equal. You cannot just grow whatever you want without knowing if your plants and soil are a perfect match or not.
In most cases, however, your garden soil will be a mix of the different types. You should consider having your soil tested especially if you plan on taking gardening seriously. Doing so will provide you valuable information such as pH level, nutrient content, chemistry, etc.
Container gardening is perfect for you if you live in an apartment with insufficient space to work on. If this is the case, you don’t need to worry too much about the soil type. You can just purchase potting mixes that are appropriate to the plants you want to grow.
Should you use chemicals in your garden?
As much as possible, avoid using chemicals in your garden. If you have to, try to keep it to a minimum. Besides, there shouldn’t be a need for you to use chemicals as long as you take care of your garden well.
Chemical pest control products can be useful in dealing with threats to your precious garden. However, these things also come with significant risks of their own. Once pesticides find their way into the water that you drink, you’re putting not only you but your family’s health at risk. These chemicals can also kill beneficial insects such as honeybees which are essential for plants to survive.
Synthetic fertilisers are also not suitable for your garden as they can even kill beneficial microorganisms that help make it rich in nutrients needed by plants. Edible plants grown on soil with chemical fertilisers are not suitable for the health either when eaten.
Instead, practice non-chemical gardening at all times. Feed your soil and your plants only with organic munchies and homemade plant food. Doing so will also help your plants develop resistance to diseases. You can also introduce natural predators in your garden to help you eliminate problems with pests.
In the know
Pretty much, the things mentioned here are just the basics. There’s a lot of other things that you and any gardener need and want to know. Do yourself a favour and start gardening if you haven’t already. Don’t be afraid to fail because it’s normal. As with everything else in life, knowledge comes with experience and practice makes perfect.
About the author: Emma is a part-time property developer, part-time home improvements and gardening blogger at Fixtures and Flowers, and full time Mum. Her background in property development means Emma has a lot of advice to share on all things home, and she loves to explore gardens and gardening in her spare time.
Do you want to know what it was like to run a Homestead in the late 19th century? Do you like to read a reality novel to learn something from the past?
I love to learn things about the past. Because we run a modern Homestead I am really curious to find out how people used to Homestead in the past.
I also love to read novels I can learn something from. I find it very relaxing to read novels. At the same time I have the feeling I am not wasting my time reading a novel like “Trails of The Earth” because I can learn something as well.
[pmc_box border_color=”#e6ac00″ text_color=”#000″ background_color=”#e6ac00″ ]This blog contains affiliate links. By using these links you will support our farm. To buy an item will cost you nothing extra, but we will get a small commission.[/pmc_box]
What is “Trails of the Earth” about?
“Trails of the Earth” is a true lived story. Mary Mann Hamilton tells us her live story almost without taking a breath.
Her style of writing is very open and readable. It is as if you hear your grandma telling you stories about the past. She describes events picturesquely so you almost have the feeling the events are part of your own memory.
Mary tells you about the hardships and the good things she went through in her life. There are breathtaking scenes, like about her surviving a big flood on a tree trunk; sad moments where she loses a child and a happy Christmas story on their own piece of land.
At a young age she marries Frank Hamilton. A handsome somewhat older man, who works for a railroad company and for a sawmill. Frank is an English immigrant who does not want to talk about his background, although we get to know that he is an offspring from an old, wealthy English family.
Frank appears to be a heavy drinker, but despite this he does try to care for his family. At the beginning of their marriage the mysterious background of Frank and his drinking habits are not easy to handle for Mary.
Together with Frank and their children, Mary moves to the Mississippi delta where Frank works for a loggers company. Mary runs a boarding house for the loggers. They have to move several times.
Finally after some years Mary manages to save some money to buy their own Homestead at the Sunflower River. The community manages to run a small school and to attract a doctor. Something that was not so common in those days.
The need to educate ourselves as homesteaders.
For me reading Mary Manns book is a way to educate myself about running a Homestead. In her book I read that this is nothing new. Mary and Frank were not farmers. Mary was running a boarding house and Frank was mostly doing administrative jobs.
When they got their Homestead they had to learn how to farm. Frank had no idea how to plough a field and grow cotton and corn. He had to learn it by himself, with some kind help from a neighbour.
Frank and Mary did not know about farming, just like many of us did not know everything about Homesteading. We had to train ourselves.
I think the way Frank and Mary made things happen is very recognisable for us Homesteaders.
Poor health care.
Although some of us might live a bit remote, most of us will make it to a doctor in time.
And making it to a doctor did not mean that you would survive an illness. One of Mary and Franks children dies because of a medical fault, and so does Frank at the end of the book.
Living in remote places was quite a different type of adventure back in the days, as I learned from Mary’s book. It was not only exciting but also a risky thing to do.
What is the benefit of reading this book?
I liked reading this book because it is easy. The story is straightforward without any complicated interwoven story lines. There is just one story line, her life as it happens.
It might sound a bit boring, but it is actually very relaxing after a hard days work on the Homestead. Mary’s vivid way of telling her story makes you want to continue reading.
The way Mary tells us about her life also made me except some backsides of Homesteading. Like the never ending workload. This is not only the case for our Homestead, but is very much connected to Homesteading. Her story made me except this fact and deal differently with it.
I also liked the many details about the life back then. This way I got a very good picture of what was going on.
A pleasant book for you to read.
For Homesteaders who are always busy and who would like to read a book from which you can learn something, “Trails of the Earth” is an interesting book to read.
Also for people who are starting a Homestead and want to know what it is like “Trails of the Earth” is an interesting book. It shows you what Homesteading is about. Sure the times have changed and facilities like a doctor and a school are much better now. However some things have not changed at all. Like the amount of work a homestead is and the fact that you will have to teach yourself how to run a Homestead.
Don’t you enjoy working on your Homestead anymore, because it is so overwhelming? Does it make you wonder whether other homesteaders have the same trouble and why on earth somebody would start a homestead?
In this blog I want to tell you something about a book I read and how exactly it changed my view on the work we have on our small farm. And how it made me enjoy our place and our work much more.
This blog contains affiliate links. By using these links to buy something you will support our farm.
The amount of work it just is, to run a Homestead
Somehow I did not get that it was not just us having so much work on our 9 acre farm. I know my neighbours complain a lot about the amount of work as well. But I kind of, did not generalise the fact that we have so much to do.
We are so used that thing can be fixed quickly. We see buildings rising in the towns with such an ease. Streets made in some weeks time.
We do not know any more what hard work it was to build up homesteads in a wild environment in the old days. With only just the human labour available, no Tarmac roads, no Walmart nearby, no hardware store within a km, no connection to the town’s drinking water pipe, no central heating.
Mary Mann was always working, together with her children, with her worker William, with some help from the neighbours. She was running a household and when her husband was out working somewhere else, she ran the farm. It was just the way it was. No choice.
For me reading Mary Mann’s life story was a reminder of what effort it took to make your own farm. And that is what I was doing. Not a quick fix. I am building up a farm in a wild environment, just like she did. And that needs time. Something that I had to learn to accept.
Once accepted that it takes time, I am going to take the time. No hurries no worries.
Unlike Mary Mann Hamilton, we go to the grocery store if we do not manage to put in our cabbages and broad beans. Lucky us. Does it matter? No. Do we want it different? Yes. But we do not need to do it now, right away to survive. We can take our time. Making it better all the time, in small steps.
Reading the book made me realise that my life is so much easier than hers, it made me so much more relaxed about this huge workload I thought I had.
The Homesteads of the past where not 100% self-sufficient
I learned from my Grandmother who used to have a Homestead in the tea plantations in Indonesia that there would be a delivery of some sort ones a week. A lorry would come driving up the winding roads in the mountains to deliver some ordered goods to my Grandmothers home. The same happens in Mary Mann’s story.
Flower, soap and many other household products were bought outside, in the closest town. A lorry would be organised to bring the goods home. Home would be a remote place like the loggers camp, a homestead or a tea planters compound (in my grandma’s case).
Being 100% self sufficient on just one homestead has never been the case. It never happened that way. There was always a human community around. No matter how far indigenous people live in the would they always traded goods. Things that they have for things that they do not have.
When your homestead concentrates on dairy, you might as well trade cheese for vegetables. That does not make you a bad homesteader. You can still grow some lettuce because you prefer to eat your lettuce freshly picked, but you do not need to grow everything.
In our individualistic society we are so used to doing everything ourselves. In the past things were different. People were very much depending on each other. Living like they did in our homestead needs a different approach.
People were not working on their own
Back in the past families were much bigger and neighbours were closer. Every family member had to contribute to the work in the household or on the land. Neighbours would help out in times of crisis. Together the family ran the farm.
Mary Mann’s children would all work on the land. Every child had it’s tasks adjusted to their age. The smaller ones doing lighter and simpler work, the older ones whatever they could handle at their age. They were tough to use tools and guns as they grew up and they handled the things well.
How are we supposed to run our 9 acre Homestead just with the two of us. No way! We need to bring down our expectations. Either we do not do all the work we want to do, or we will have to hire in somebody to do the work for us. That became very clear to me after reading “Trails of The Earth”.
Change of Motivation
Did you start your Homestead with a different motivation from the motivation you have right now to keep on going?
You do not need to stick to the impossible. You can make a change without losing the essential things you want with your life.
First her motivation was to work hard to make some savings for their families own Homestead. When they finally manage to buy a piece of land to run their Homestead, the family lose it again. That was a big shock at first, but after that having her own Homestead as not what motivated her. The well being of the children was much more important to her then the ownership of a piece of land.
After this change in motivation the family rented a good piece of land. They then had their Homestead anyway. Since you only need good land, it does not always matter whether you own it or not.
Things can change. Life makes you take different priorities. After having owned a Homestead it might not be as ideal as you have thought. It is just a matter of allowing yourself a change to make a change.
First of all, a Homestead is just a lot of work. In the past days people would share the work amongst the family members and they would not try to be entirely self-sufficient.
As you have your Homestead and you know better what it is to run one, the way you see Homesteading might change.
These I think are lessons I learned from Mary Mann’s book, looking into the history of Homesteading. It made my view on our own situation much more realistic. And that changed our approach to the work that needs to be done.
When you are where we were, It is definitely worth reading the book.
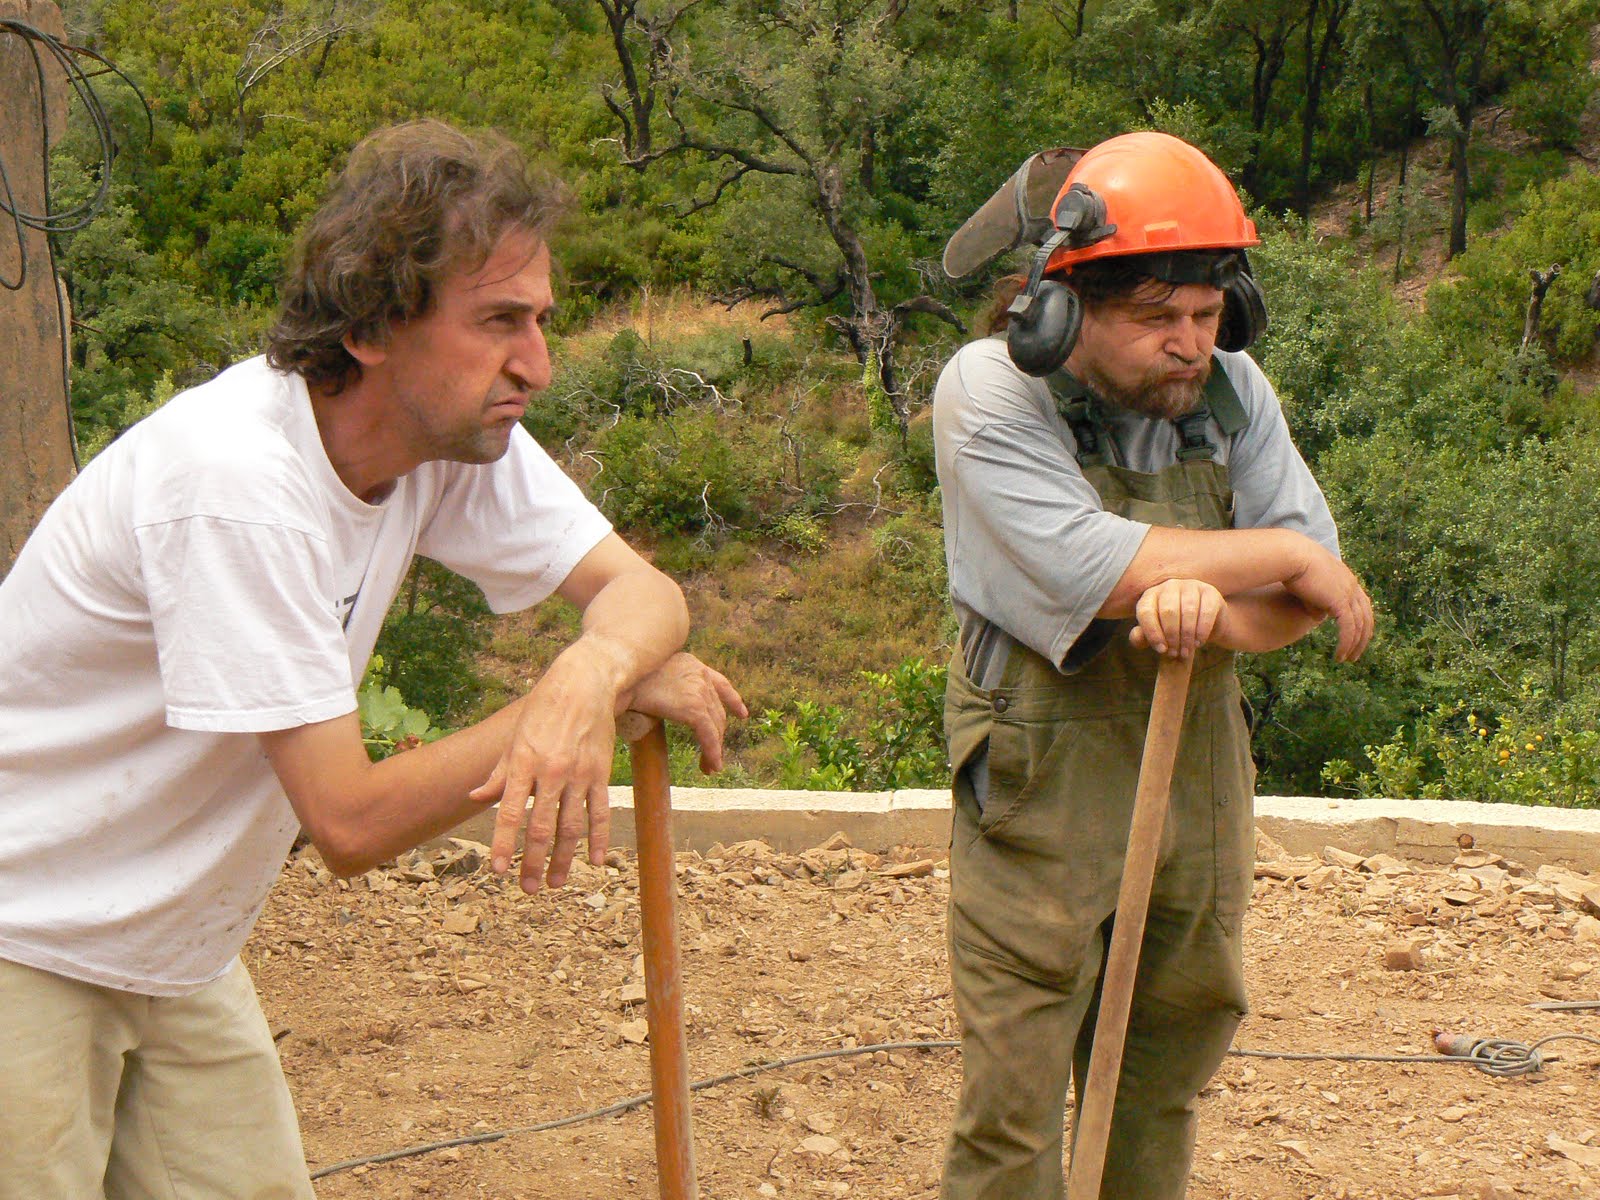
For four weeks on a row we were working our heads off. Trying to harvest all our fruit, make cheese, getting the fruit processed, cleaning the house, laundry, dishes it needs to be finished. There was too much work on our homestead. The work goes on and on, endless. I never imagined that running a homestead would be so exhausting.
Is this what is happening at your homestead? Or is this the biggest fear you have not to start your own homestead?
In this blog I am going to let you know how we learned to deal with an overwhelming workload on our Terra do milho homestead.
This blogpost contains affiliate links. By using them you support our homestead.
After 8 years of hard work our workload was still overwhelming
At the beginning we thought we would be able to finish our homestead in two years and then have it up and running. Making money with renting out a holiday tent and selling fruit and giving meditation lessons.
What we didn’t expect is the amount of time it takes to do everything yourself. Apart from building our homestead we wanted to be as self-sustainable as possible.
We do have electricity from the grid, but that is it. We had to provide our own drinking water and we use our own wood from the land for heating the house. We grow our own fruit and veggies, we have chickens for eggs and goats for milk, yoghurt and cheese. To keep the basics going is already a lot of work.
Working very hard we managed to get the basics going. However, after 8 years there are still a lot of unfinished projects.
When, in 2018 a violent wild fire destroyed half of our fruit trees we were almost ready to quit. We had to start planting all over again. It was so frustrating because we couldn’t handle the overwhelming amount of work no more.
Something needed to change. But how and what?
Over the years we tried a lot to handle our workload. Time management, dividing the work, schedules, working plans and much more. Some things helped, but the feeling that it was all too much remained.
One morning when I woke up I was thinking about my grandmother. She used to have a homestead in the mountains in Indonesia, on Java. My grandmother lived in the mountains with her family, my grandfather was a specialist in treating tea plants. They lived in the middle of nowhere, more or less like we do. How did she manage? And how did all those pioneers who lived like my grandmother managed homesteading?
I started looking for answers on the internet and came across a very special book, which changed my way of looking at the problem.
How reading a book changed my view on our overwhelming workload.
In her book she describes her life in way that made me realise that there is no reason to be frustrated about the amount of work we have. She is not frustrated about having an overwhelming workload all the time, she takes it as it is. Unlike we did.
I realised, since there is no way to change the never ending amount of work on a homestead, you might as well find a way to deal with it as it is. Mary Mann, my grandmother, they just lived with it.
What has changed on the farm since I read this book?
Since I have read the book our plans on the farm are much less ambitious. We stick to what we have and try to keep it as simple as possible. Enjoying what we have instead of missing what we do not have. This is a big switch of mindset.
Since it is just a fact of life that homesteading is hard work, it is not changeable. What is changeable is the way you experience it.
Working from the perspective that you like what you have means also that you lose less time by trying to gain what you don’t have. It is so much more relaxed.
It also means that there is no point in hurry up things. There is going to be an endless amount of jobs and projects. When you finish one, there will be another one. You might as well take a nice break between the jobs. Enjoy a lazy Sunday or go party at the neighbours.
Mary Mann Hamilton made us see homesteading in a different way, just by being herself and telling us her story.
Thanks to Mary’s book Trail of the Earth, I am far less frustrated by an overwhelming workload. We now do one thing at the time. Instead of trying to finish homesteading, we actually are learning how to enjoy it. And believe me there is so much joy in it.
Read the book and find out yourself how much it can do for you.